Use Liquibase with JPA/Hibernate entities in IntelliJ IDEA | JPA Buddy
Writing database migration scripts is a time-consuming and error-prone task. JPA Buddy can save you a lot of time thanks to advanced database analysis and Liquibase changelogs generation.
Estimated Reading Time: 10 mins
Introduction
As your application's JPA data model evolves, so does the database. To manage database versioning, tools like Liquibase come into play. They track database changes in specialized scripts: changelogs. While developers can either add changes to one main changelog or create individual scripts referenced in the main one, manual changelog creation can be tedious and error-prone. JPA Buddy simplifies Liquibase changelog generation, provides control over problematic changes, and manages Java-to-database type mappings.
In this guide, you will create a simple blog application, learn how to make JPA Data Model changes, and update your database accordingly using JPA Buddy and Liquibase.
Overview
You will learn how to:
- Set up a new project
- Set up a database connection
- Create entities
- Generate an init script
- Update the JPA data model
- Generate a diff changelog
- Add changeSets to existing changelogs
You can find the code of this application on github.
Setting up a New Project
First, you will go through a few steps to set up a new project. In this section, you will:
- Create a new project using Spring Initializr
- Load the project in IntelliJ IDEA
Start by creating a Spring Boot application using Spring Initializr.
- Visit Spring Initializr’s Website.
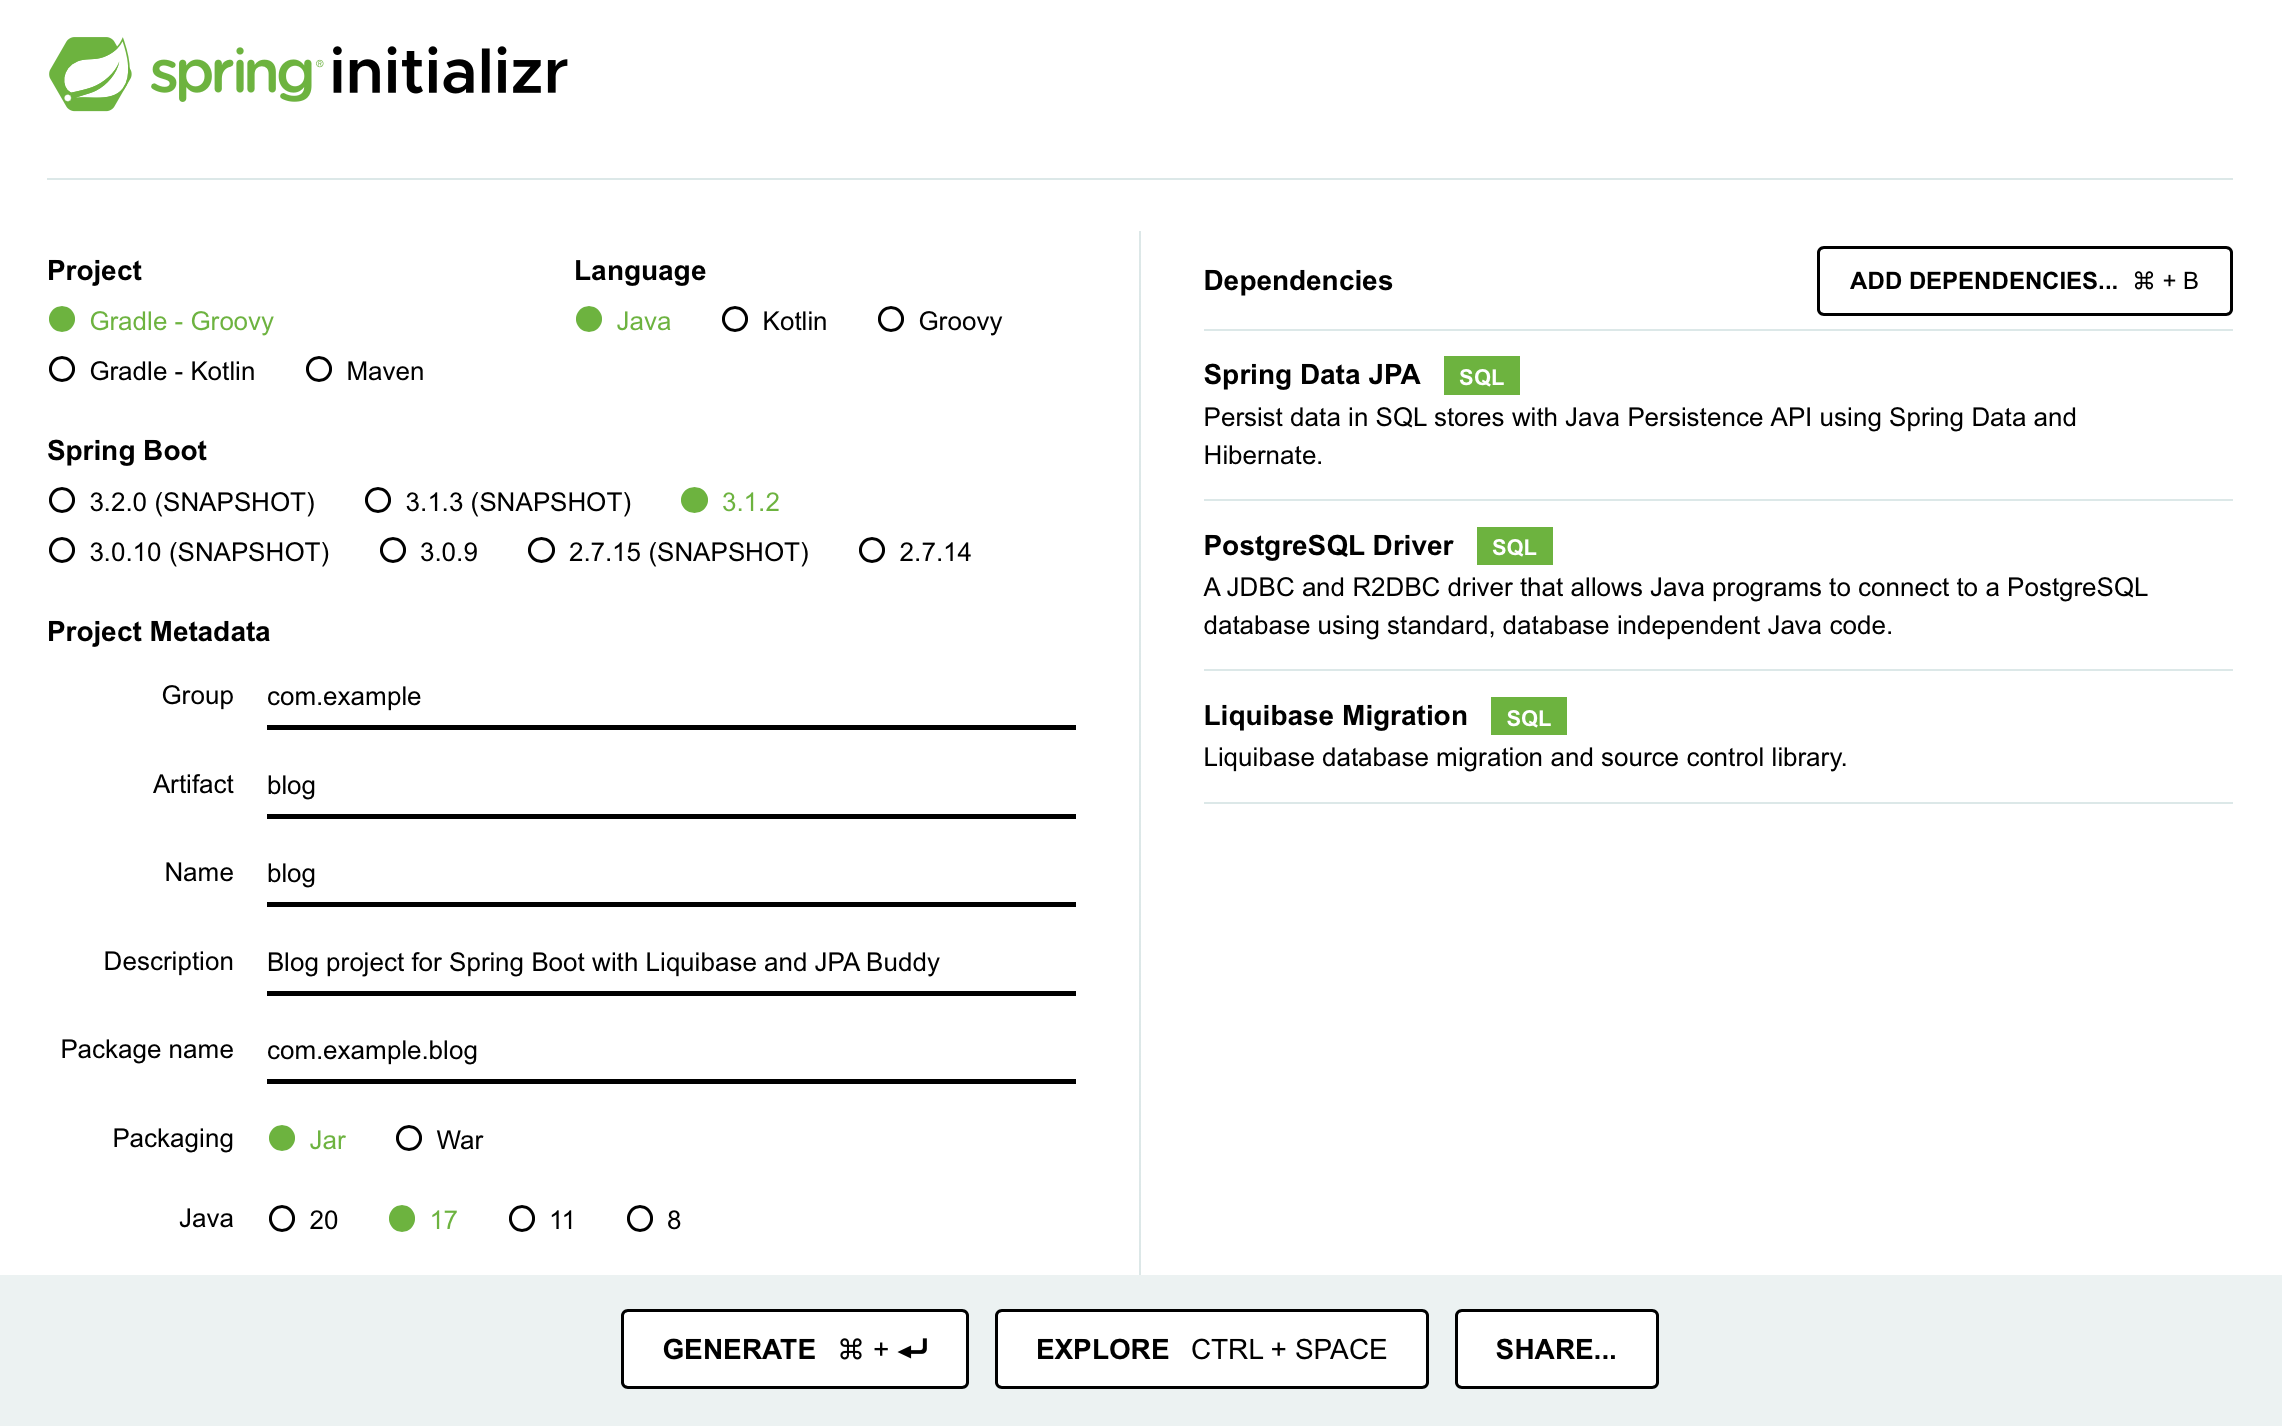
- Select the following settings:
- Java 17 as the programming language
- Gradle - Groovy as the build tool
- The latest stable version of Spring Boot
- The application will be packaged as a JAR file
- Add the following dependencies to your project:
- Spring Data JPA enables us to use JPA and Data Repositories
- PostgreSQL Driver provides database access
- Liquibase Migration manages database changes
These dependencies enable you to use JPA Buddy’s functionalities with Liquibase and access a PostgresSQL database.
Here are the selected settings in Spring Initializr:
Download the created project and open it in IntelliJ IDEA by clicking on File → Open.
Setting up a Database Connection
To connect your application to the database, you need to:
- Set up a new connection
- Link the application to the datasource using a properties file
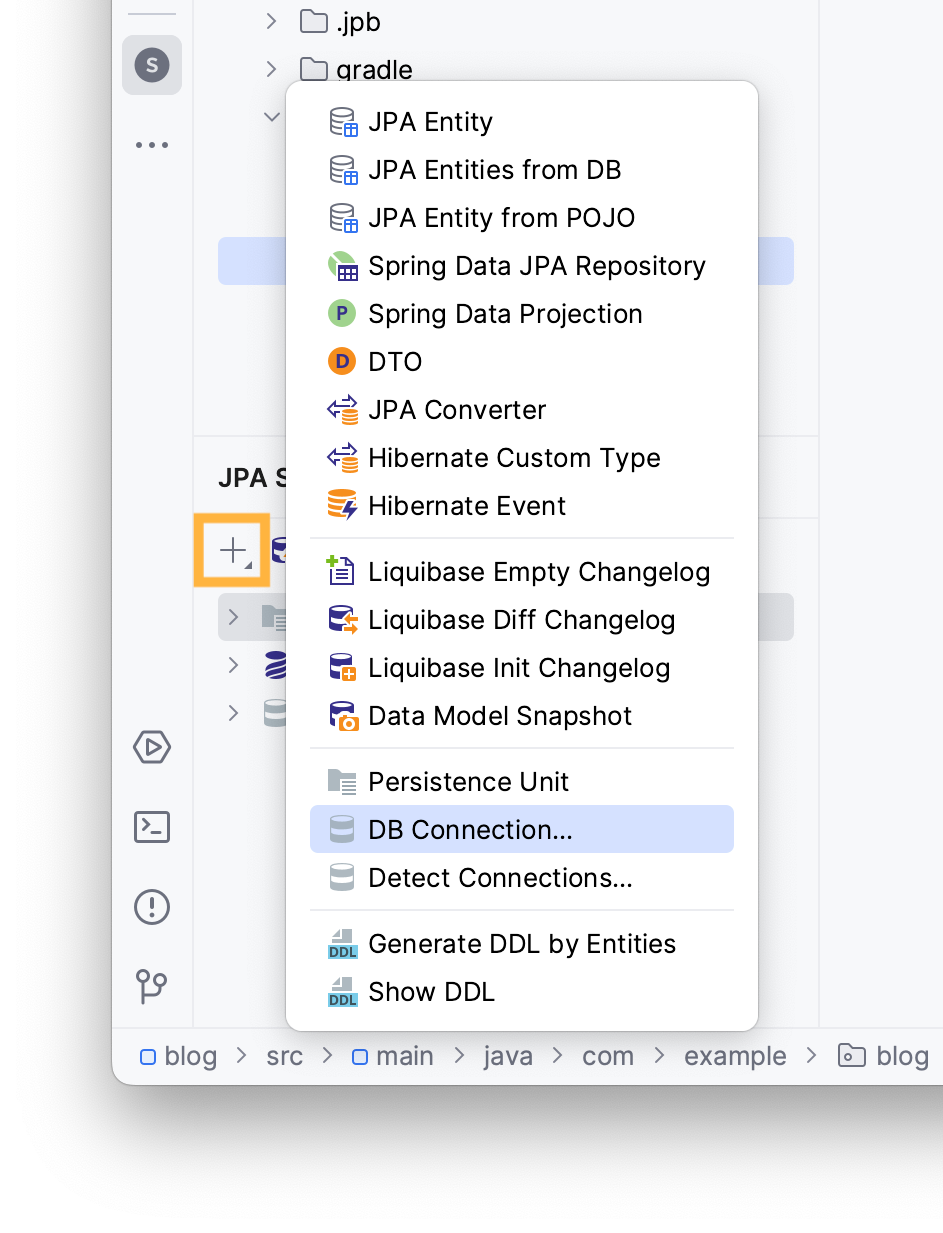
You can use JPA Buddy To set up a new connection through the JPA Structure tab:
- Navigate to the JPA Structure tab
- Click on the + button
- Click on DB Connection...
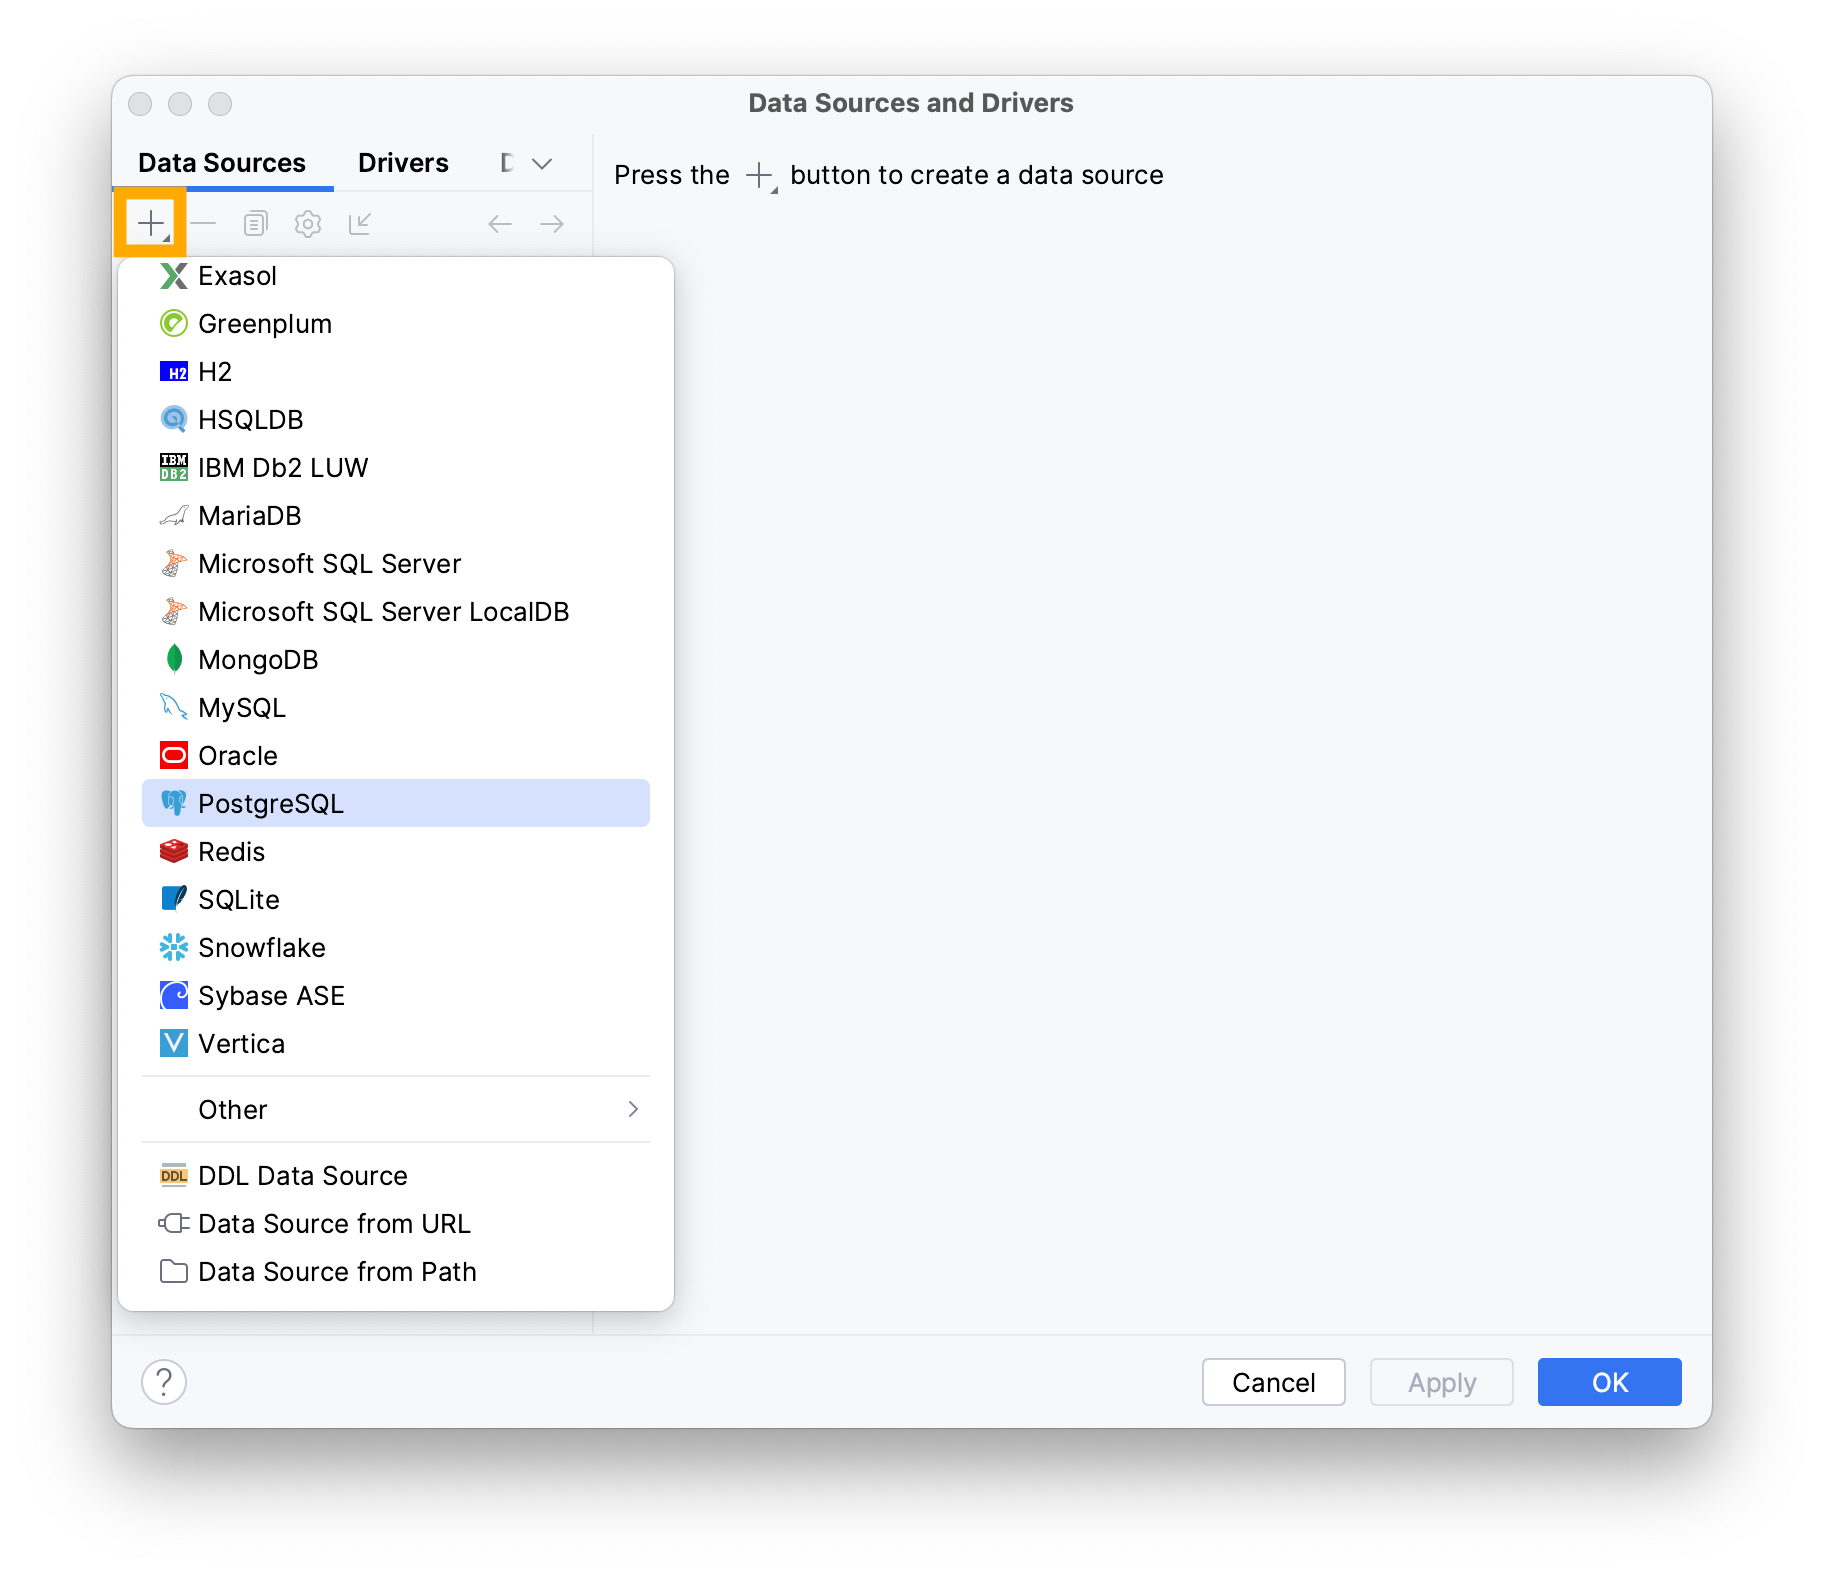
Add a new connection by clicking on the + button and choose PostgreSQL.
Type the following information in the invoked window:
- Username
- Password
- Name of the database
Note that your values may vary depending on your local environment.
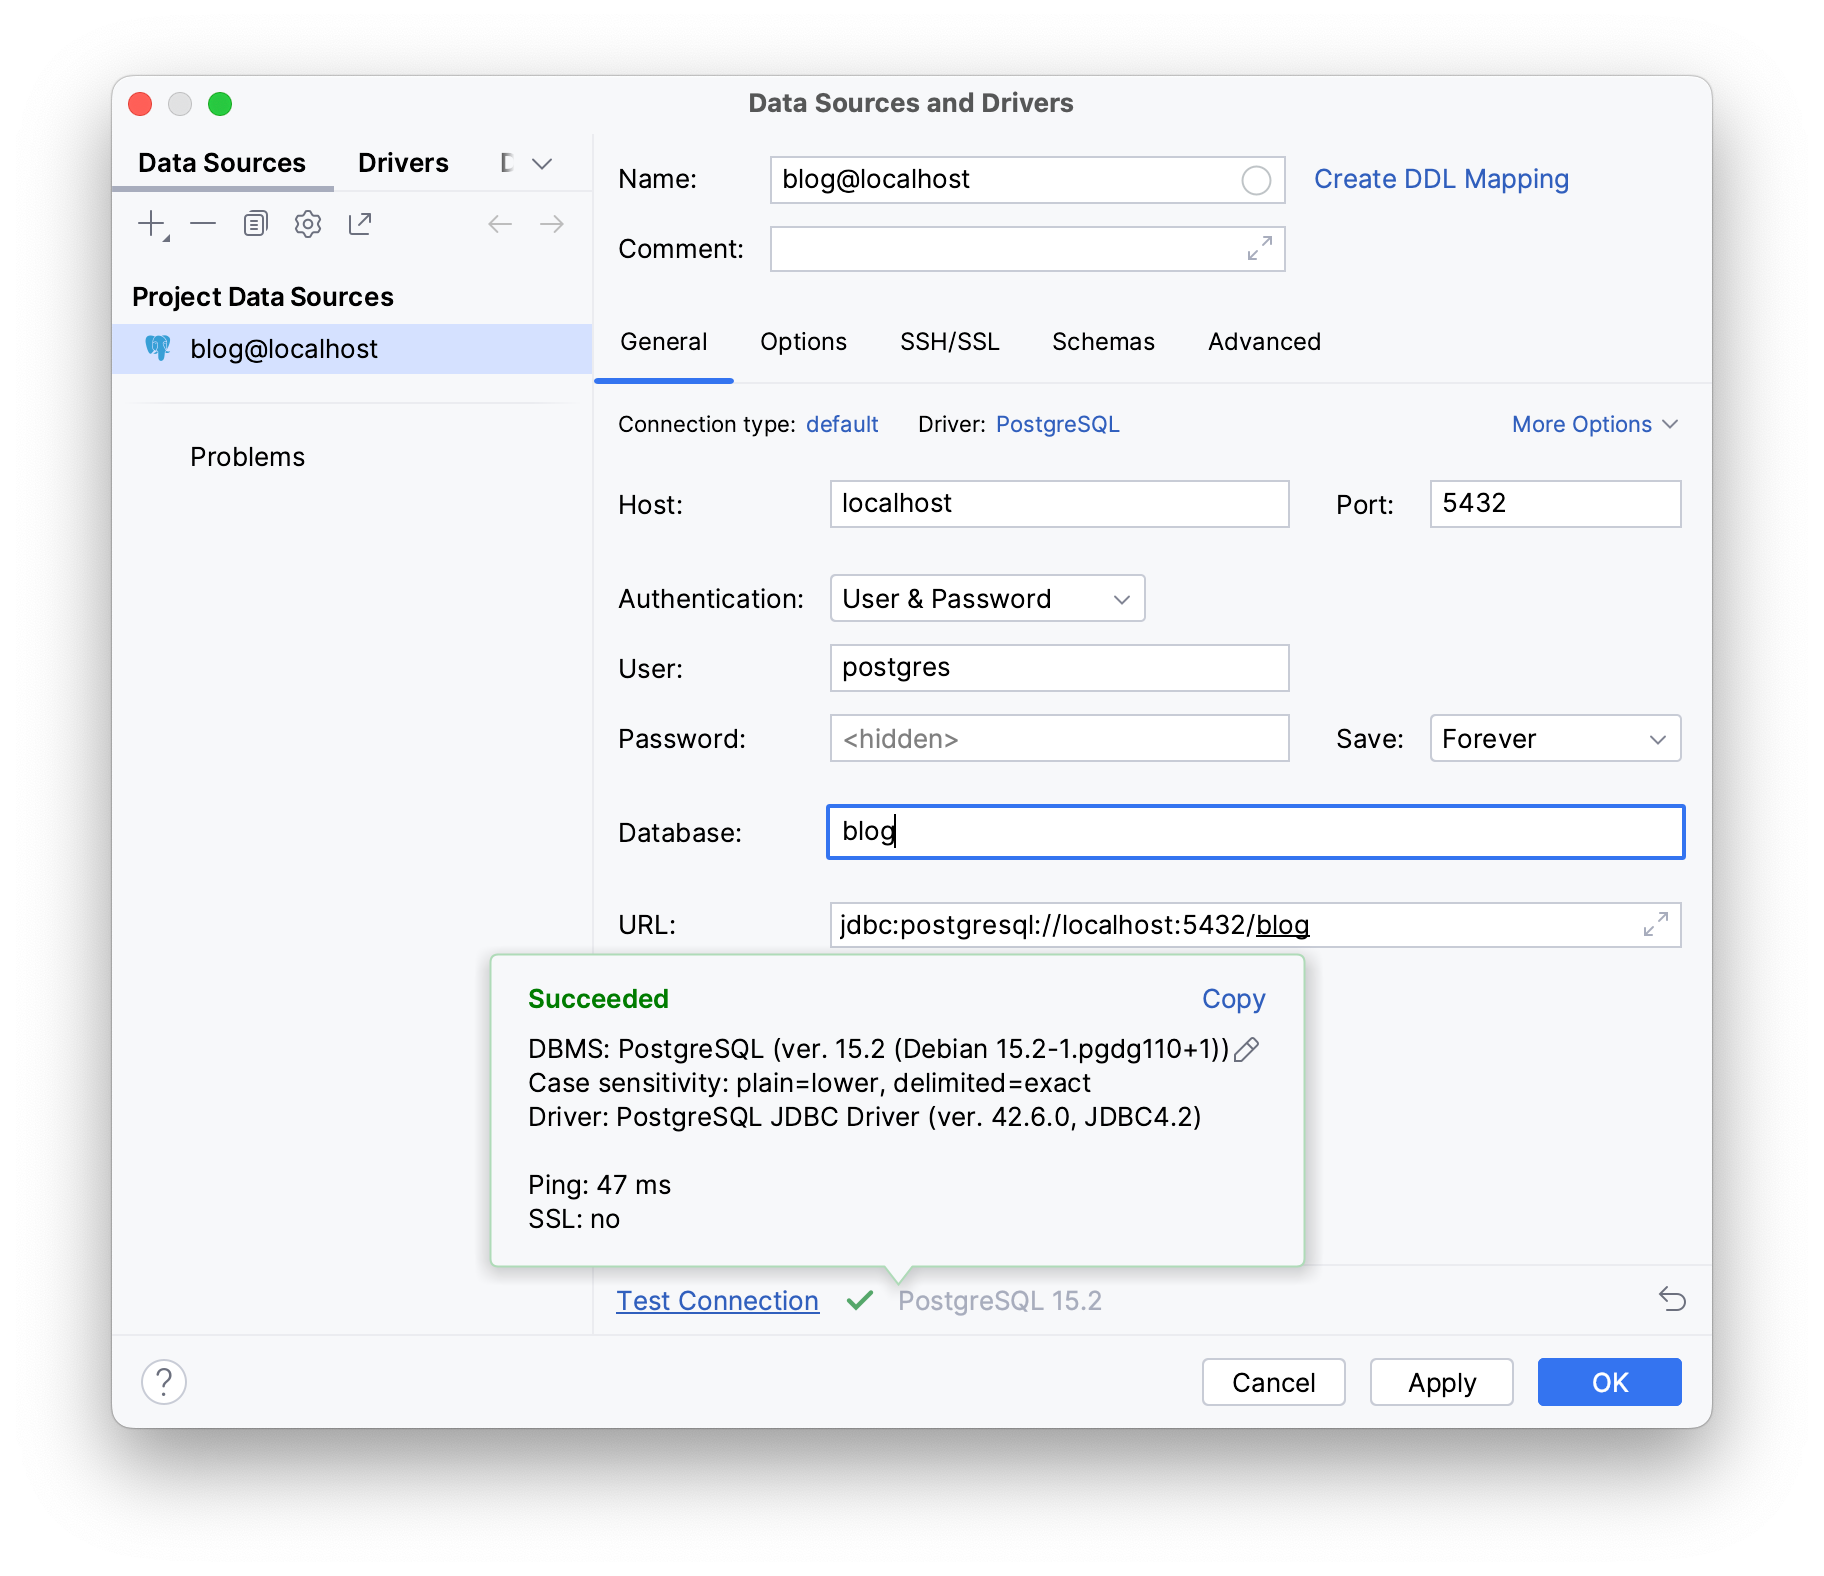
To check if your database works as intended click on Test Connection, it should display Succeeded if your database is properly configured and actively listening on its assigned port.
Click OK.
Next, provide the necessary datasource details to your application in the application.properties file under the resources folder:
- Open your
application.propertiesfile - Use IntelliJ IDEA’s Generate shortcut (command/ctrl + N)
- select the Data source option

JPA Buddy automatically detects the existing datasource.
Hibernate will validate your schema with your entity mappings during startup, if you set the Hibernate DDL-auto property to validate.
The Show/Format SQL options allow you to view formatted SQL logs on your terminal.
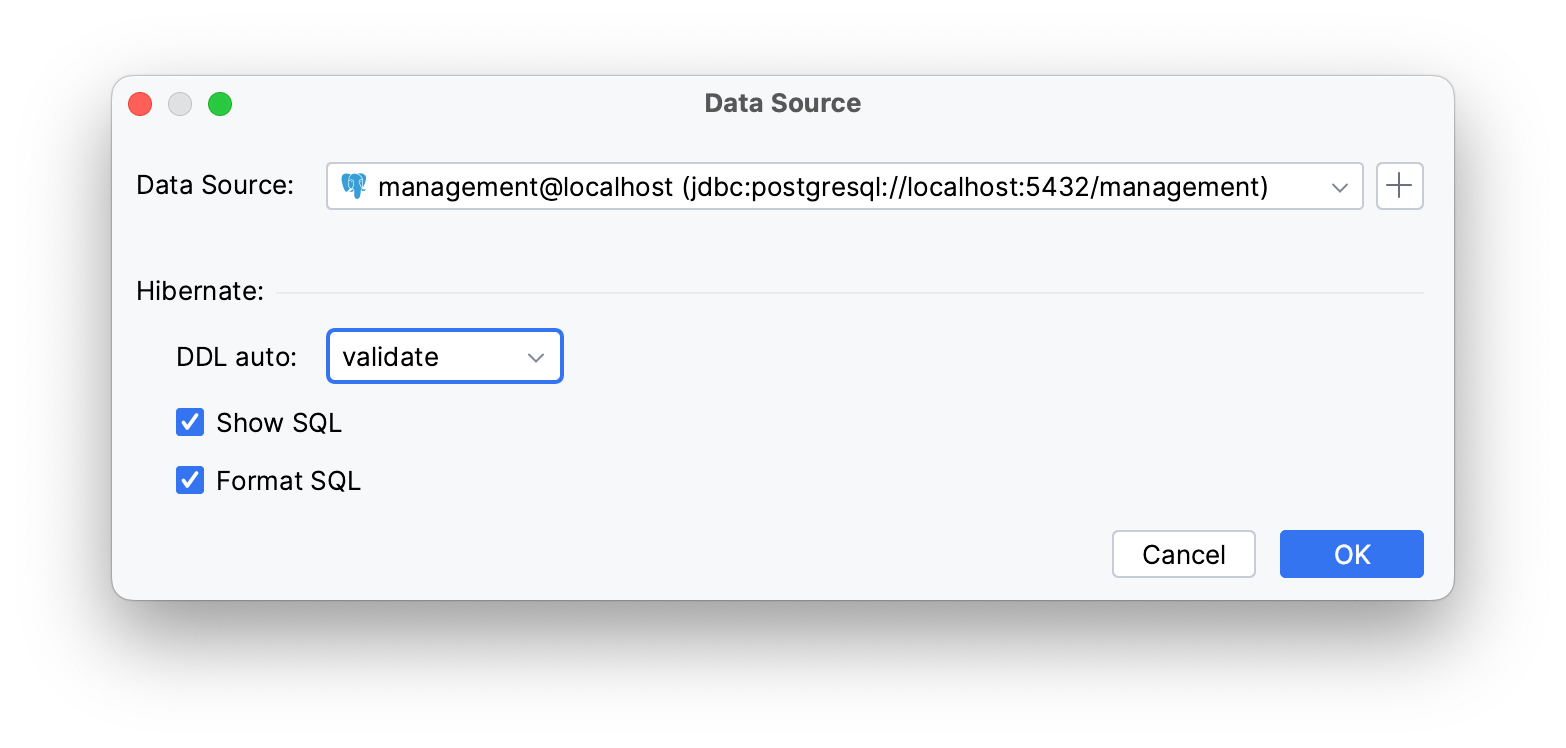
The mentioned settings generate the following properties:
spring.datasource.url=jdbc:postgresql://localhost:5432/blog
spring.datasource.username=postgres
spring.datasource.password=postgres
spring.datasource.driverClassName=org.postgresql.Driver
spring.jpa.hibernate.ddl-auto=validate
spring.jpa.show-sql=true
spring.jpa.properties.hibernate.format_sql=true
Creating Entites
The blog application you will build consists of two tables:
user: table for storing blog user informationpost: table for storing blog posts
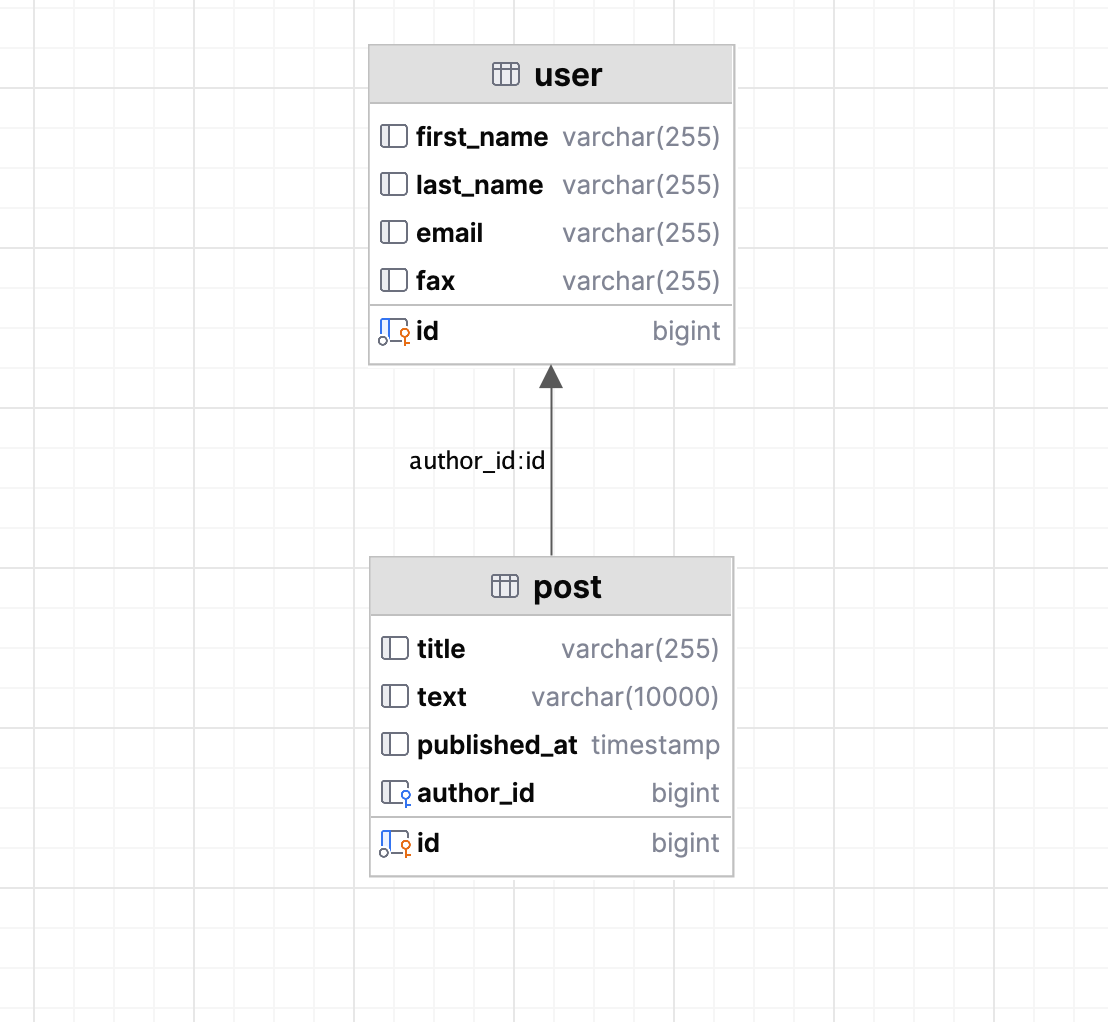
The relationship between post and user is OneToMany, meaning that multiple posts can be associated with a single user.
Let’s create the User entity using JPA Structure:
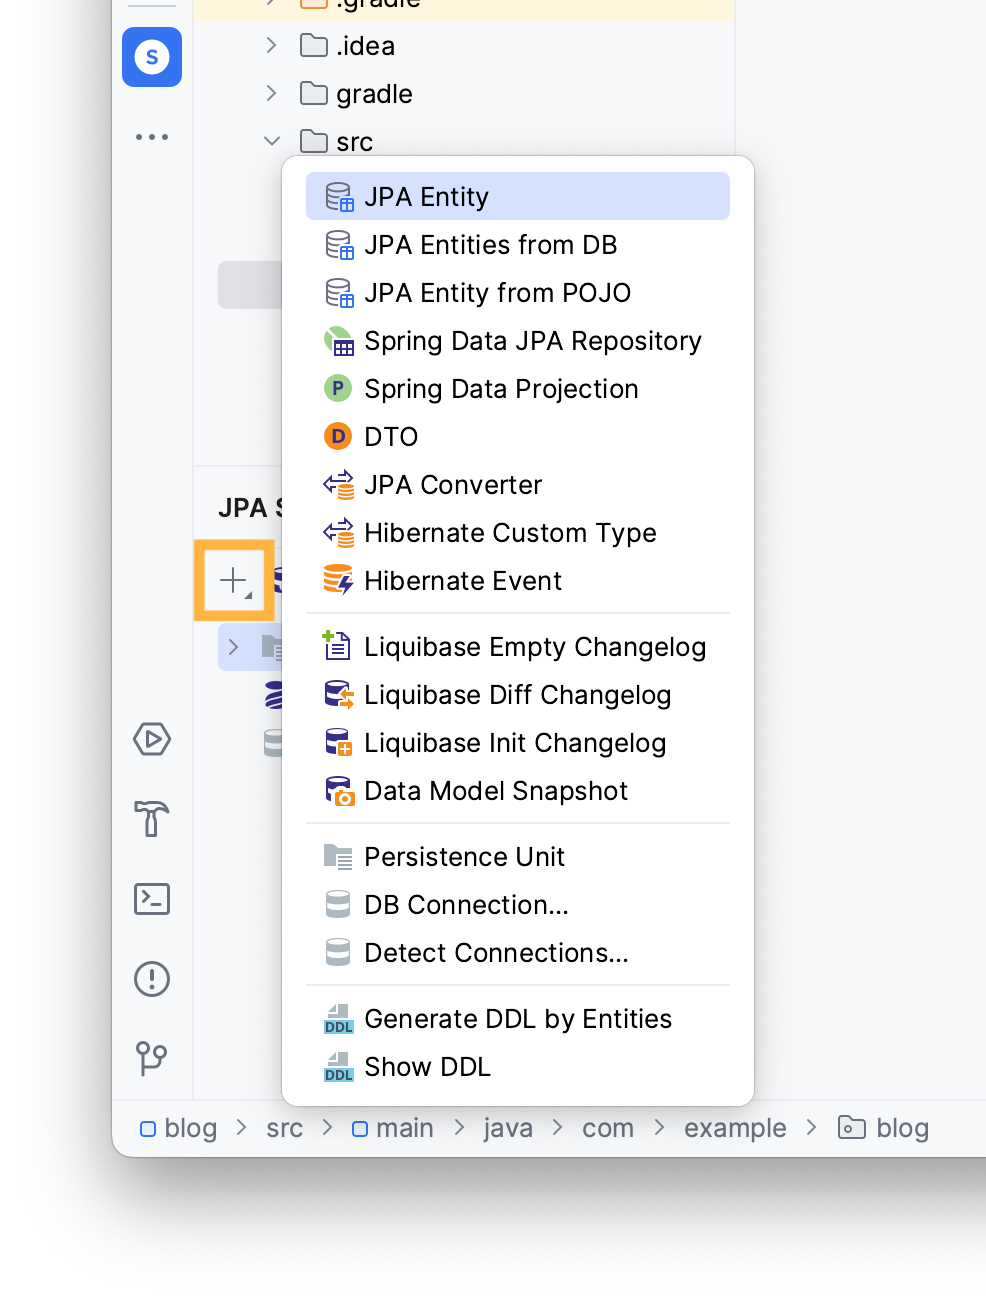
- Locate the JPA Structure tab
- Click on the + button
- Select the JPA Entity option
Type the name of your entity in the invoked window and add .entities to the package name, choose the Id type and the desired Id generation method.
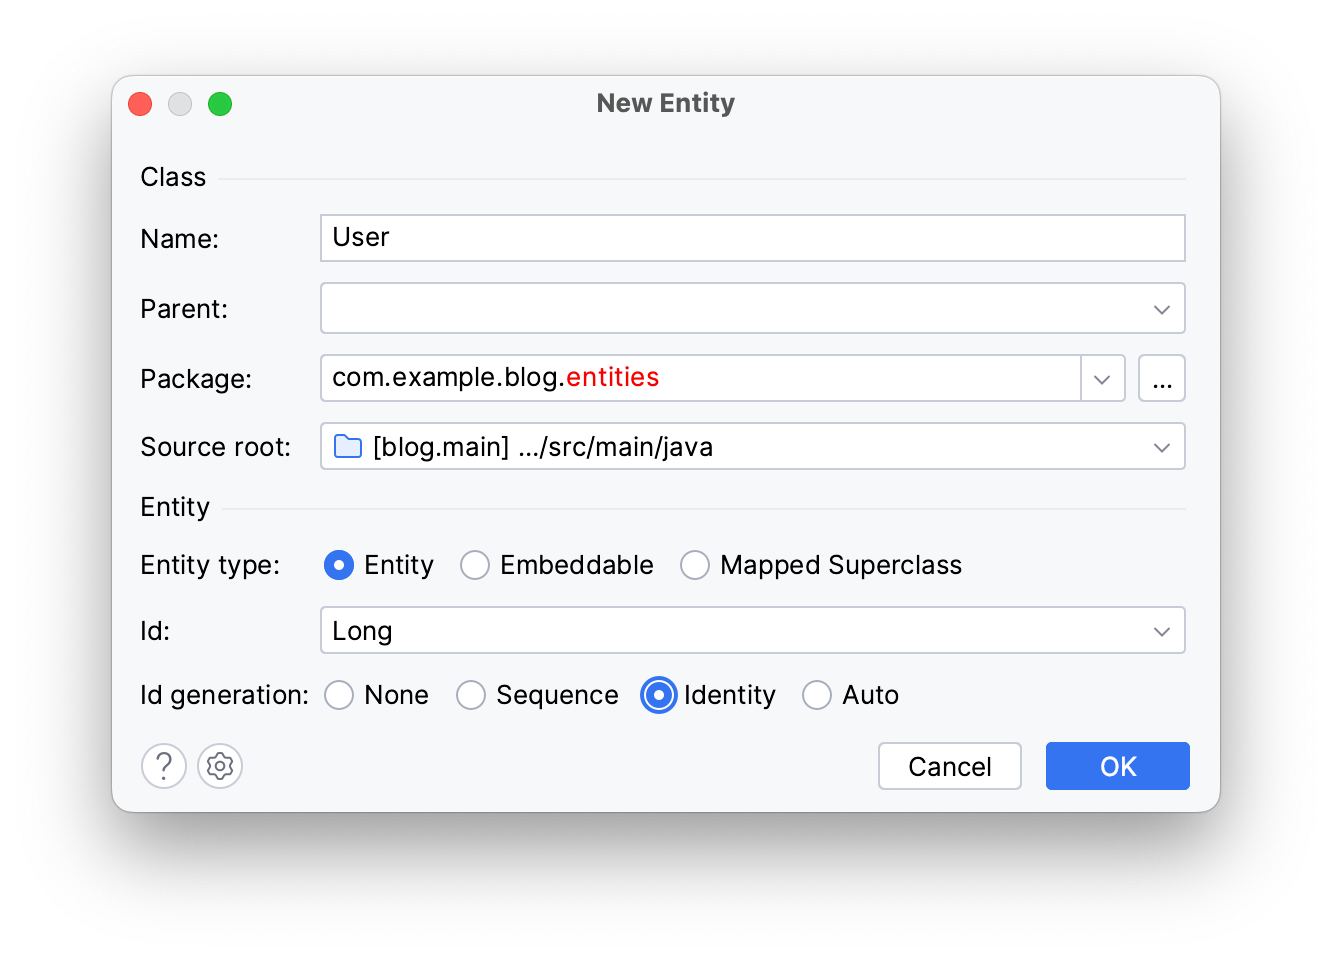
Click OK.
You can find your newly created entity in the entities package in your project panel.
You can use JPA Designer to create your entity’s attributes:
- Open
Usersource code from the project panel - Click on Basic Type in the JPA Designer tab
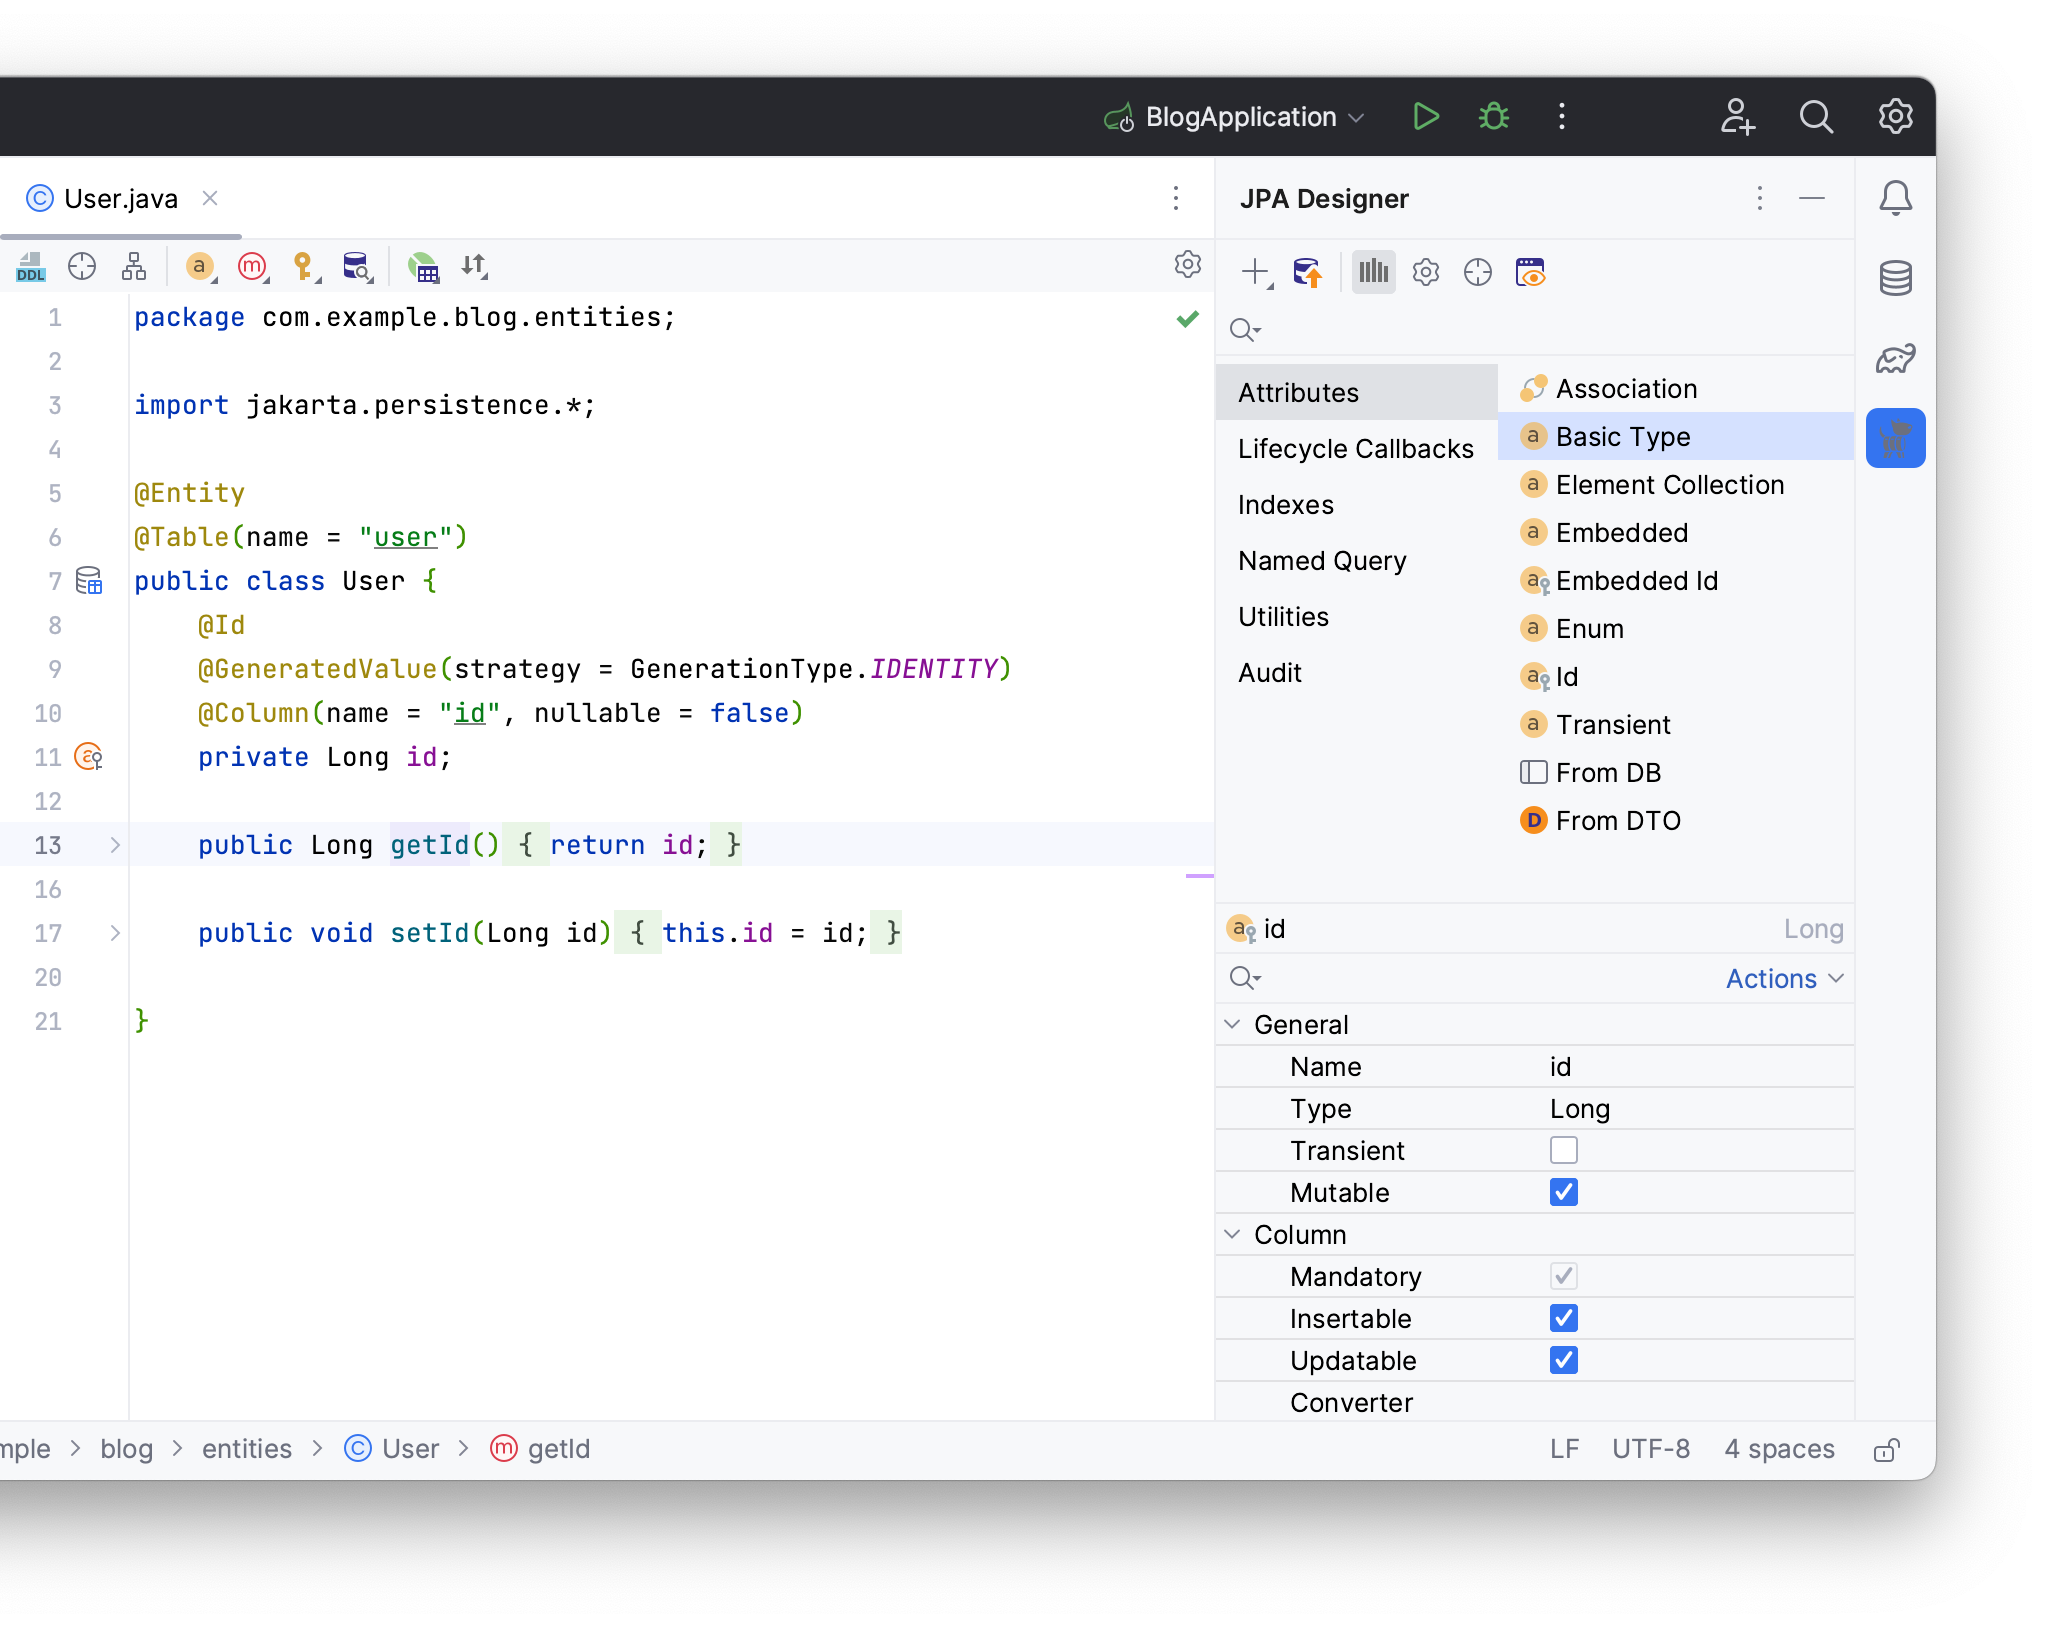
Pick your attributes type, write its name, and JPA Buddy will automatically name your table’s column according to naming conventions.
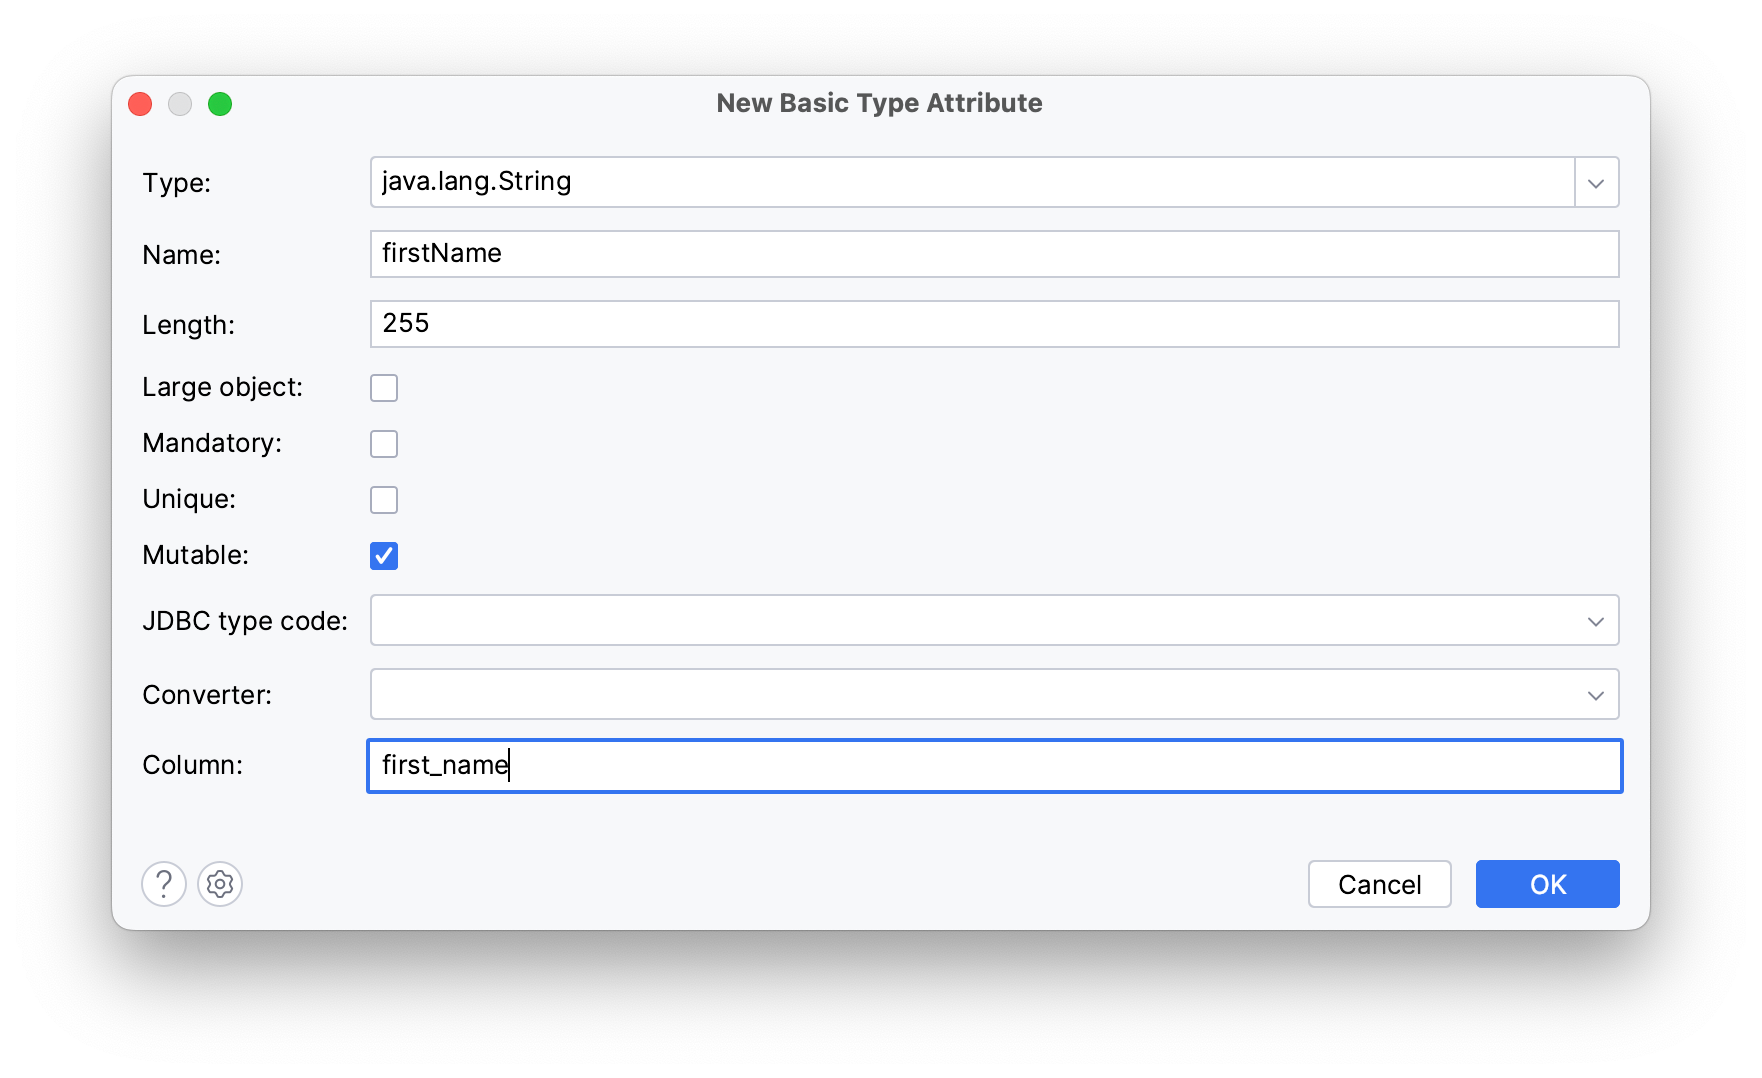
Click OK.
These instructions will create a firstName attribute with its getter and setter.
Using these tools, you can create the following entities.
User entity:
@Entity
@Table(name = "user")
public class User {
 @Id
 @GeneratedValue(strategy = GenerationType.IDENTITY)
 @Column(name = "id", nullable = false)
 private Long id;

 @Column(name = "first_name")
 private String firstName;

 @Column(name = "last_name")
 private String lastName;

 @Column(name = "email")
 private String email;

 @Column(name = "fax")
 private String fax;
Post entity:
@Entity
@Table(name = "post")
public class Post {
 @Id
 @GeneratedValue(strategy = GenerationType.IDENTITY)
 @Column(name = "id", nullable = false)
 private Long id;

 @Column(name = "title")
 private String title;

 @Column(name = "text", length = 10000)
 private String text;

 @Column(name = "published_at")
 private Instant publishedAt;

// getters and setters have been omitted for brevity

}
You will need an author attribute in your Post entity to reference the User entity:
- Open
Postentity's source code - Choose Association from the JPA Designer tab
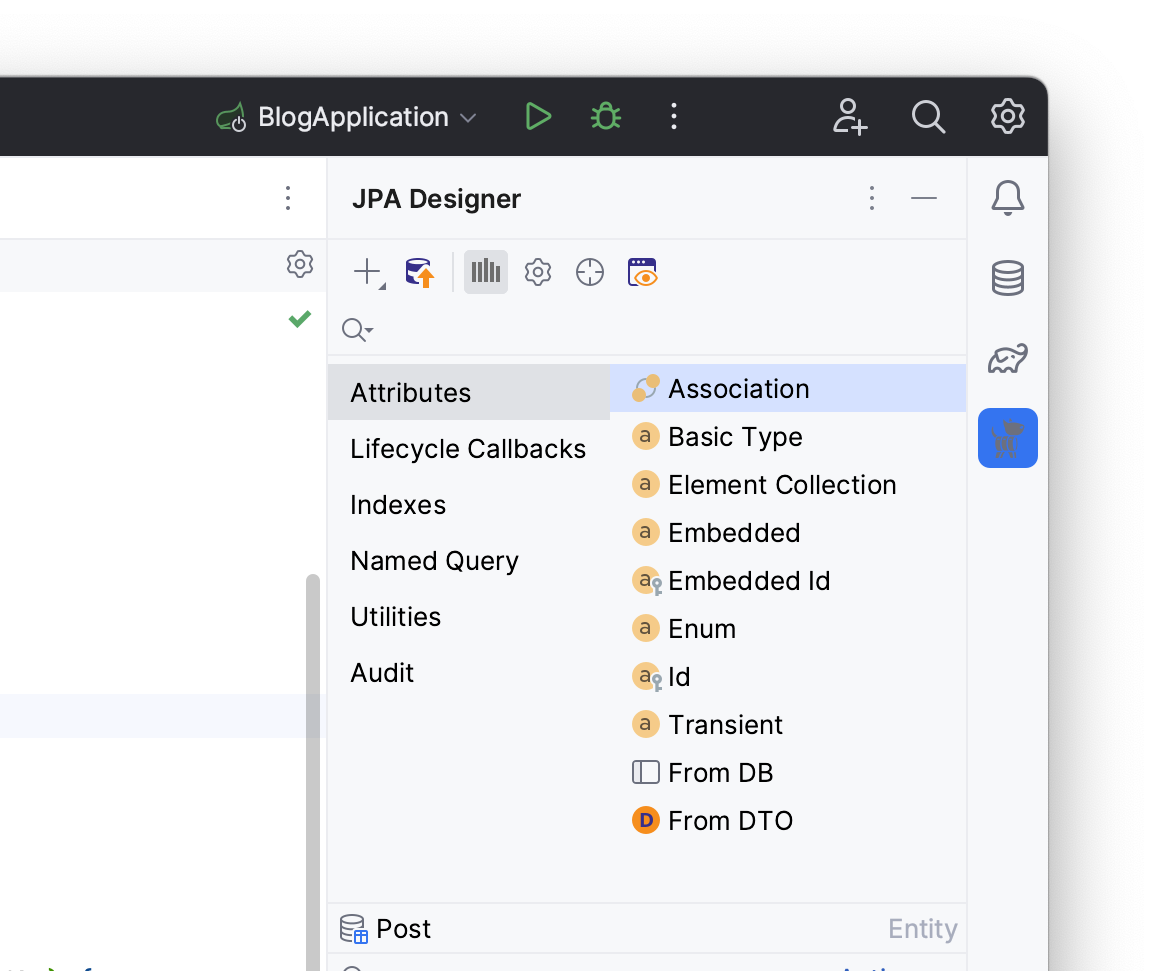
- Write
Useras the attribute’s type - Rename it to
author - Choose a
ManyToOnecardinality

Click OK.
The generated author attribute represents the linked User entity and should look as follows:
@ManyToOne
@JoinColumn(name = "author_id")
private User author;

public User getAuthor() {
 return author;
}

public void setAuthor(User author) {
 this.author = author;
}
The @JoinColumn annotation indicates that the author_id column in the database is used as a foreign key.
Generating an Init Script
To create tables within the connected database, you will need to generate an initial schema based on your entity model. In this section, you will:
- Create a master changelog
- Generate an initial changelog
- Create database tables
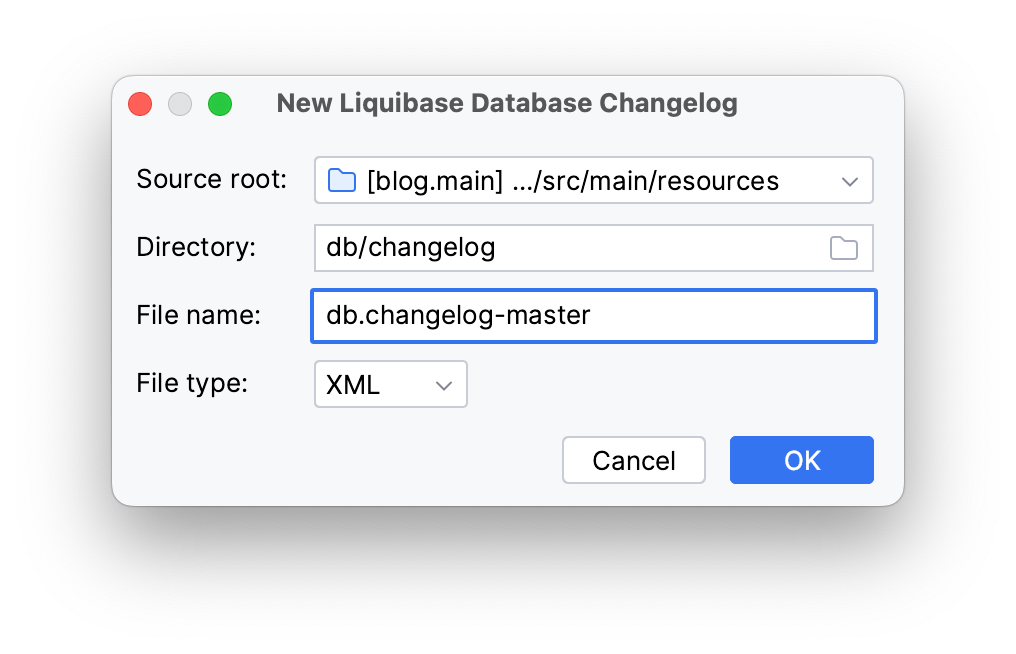
It’s considered good practice to include all your changelogs in a master changelog, let’s create one using JPA Structure:
- Click on the + button in JPA Structure
- Choose Liquibase Empty Changelog
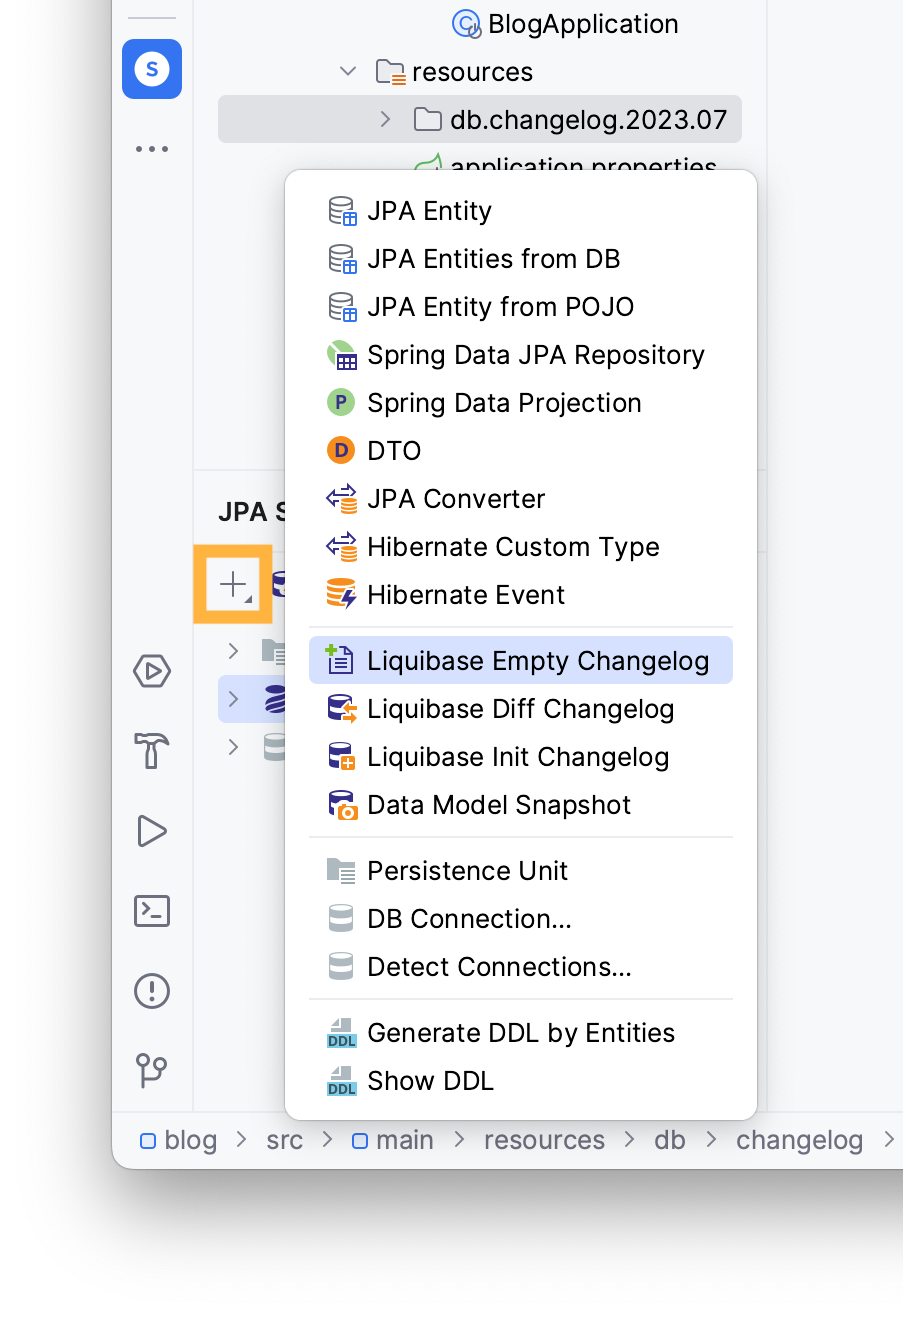
Next, choose the default db/changelog directory and rename your changelog to db.changelog-master. Click OK.
By default, Spring Boot automatically detects your master changelog in the db/changelog folder. However, if you place the changelog elsewhere, specify its location in your property file with the following property and change it accordingly:
spring.liquibase.change-log=classpath:db/changelog/db.changelog-master.xml
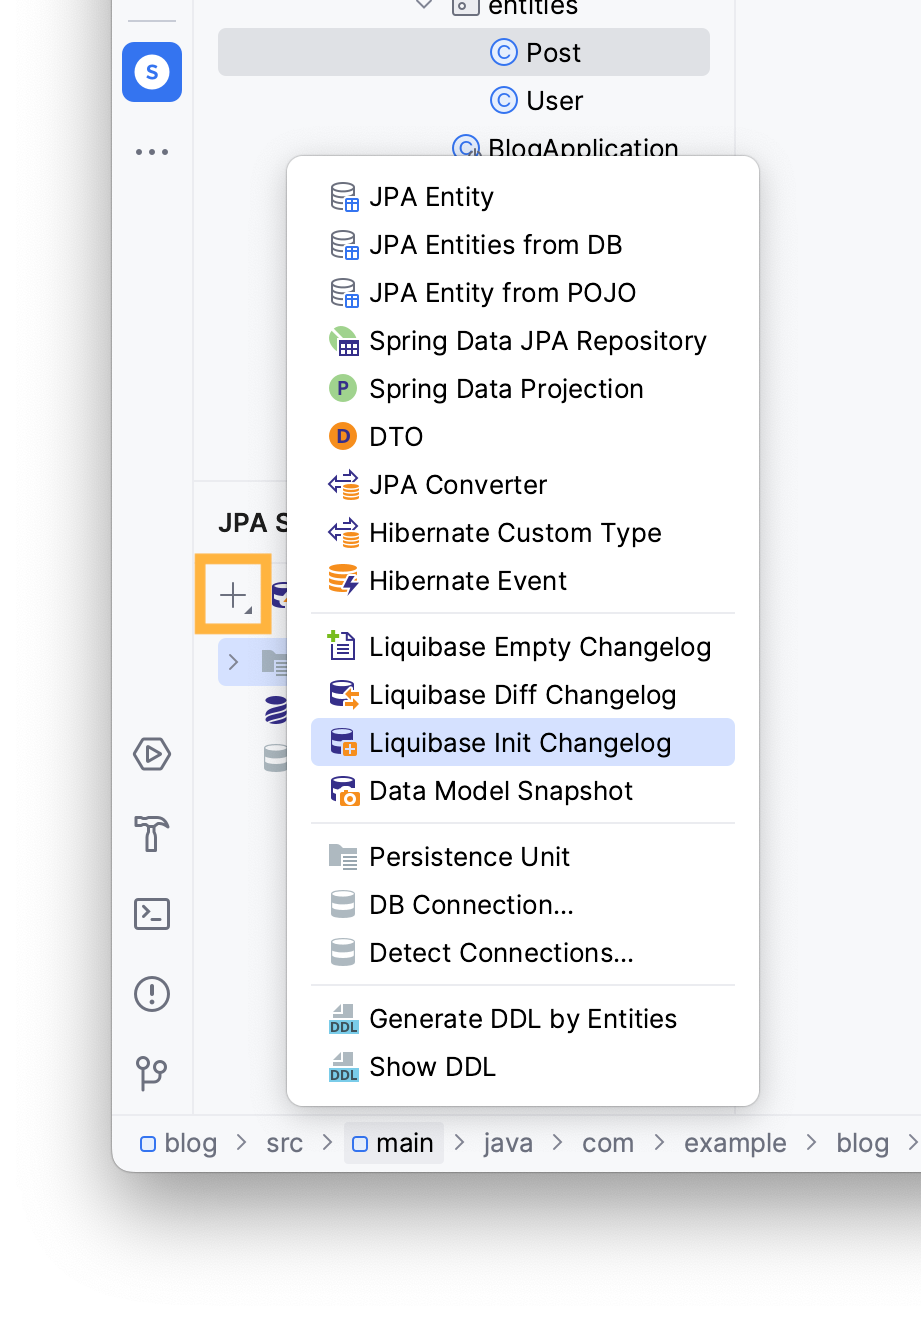
JPA Buddy can generate an initialization script to define your database schema, based on your current entity model:
- Navigate to the JPA Structure tab
- Click on the + button
- Choose Liquibase Init Changelog
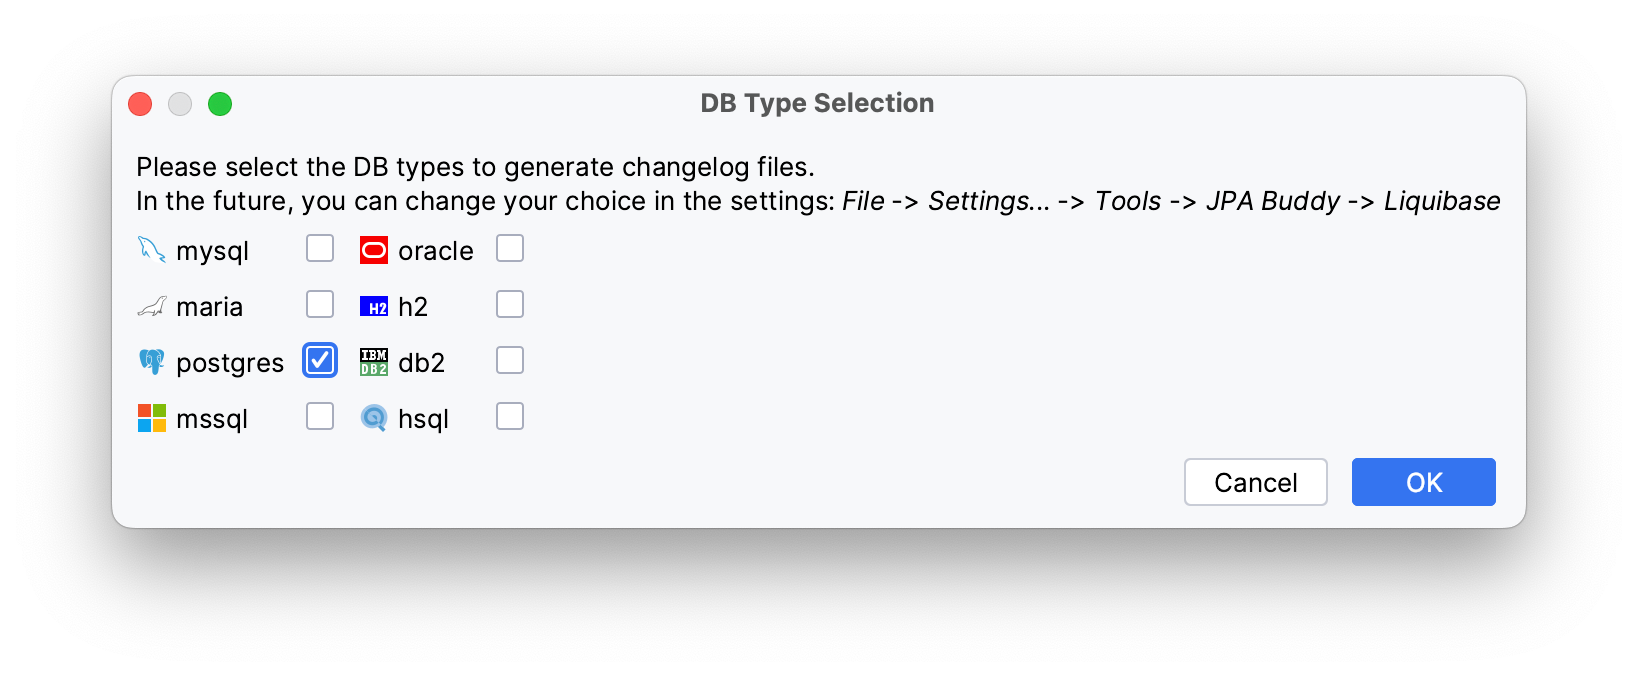
JPA Buddy will ask you to pick the SQL dialects you will be working with in the future. Choose postgres and click OK.
Check Model to generate a schema from your entity model, then select the corresponding SQL dialect. In this case, PostgreSQL.
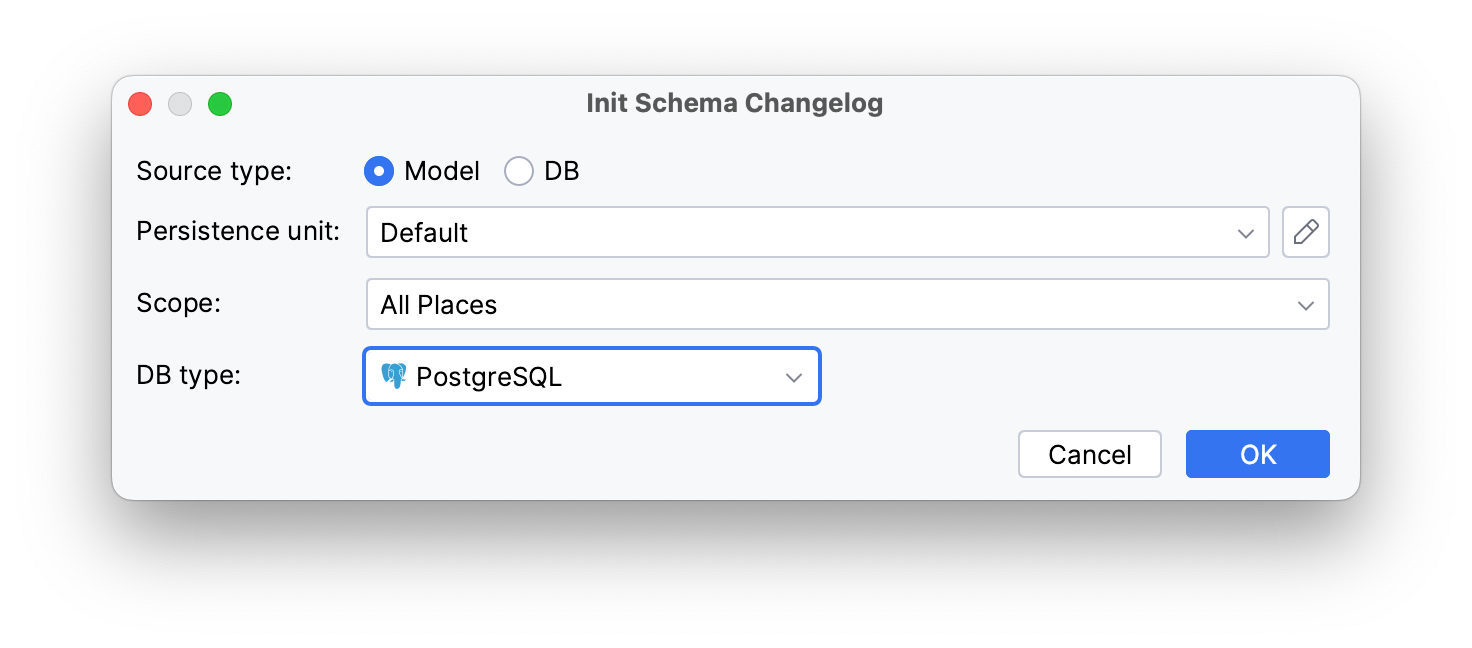
Click OK.
In the following window, you can review and adjust the auto-generated init script. Let’s assign the script a descriptive name, include baseline in the name, and select the db.changelog-master in the Include to field.
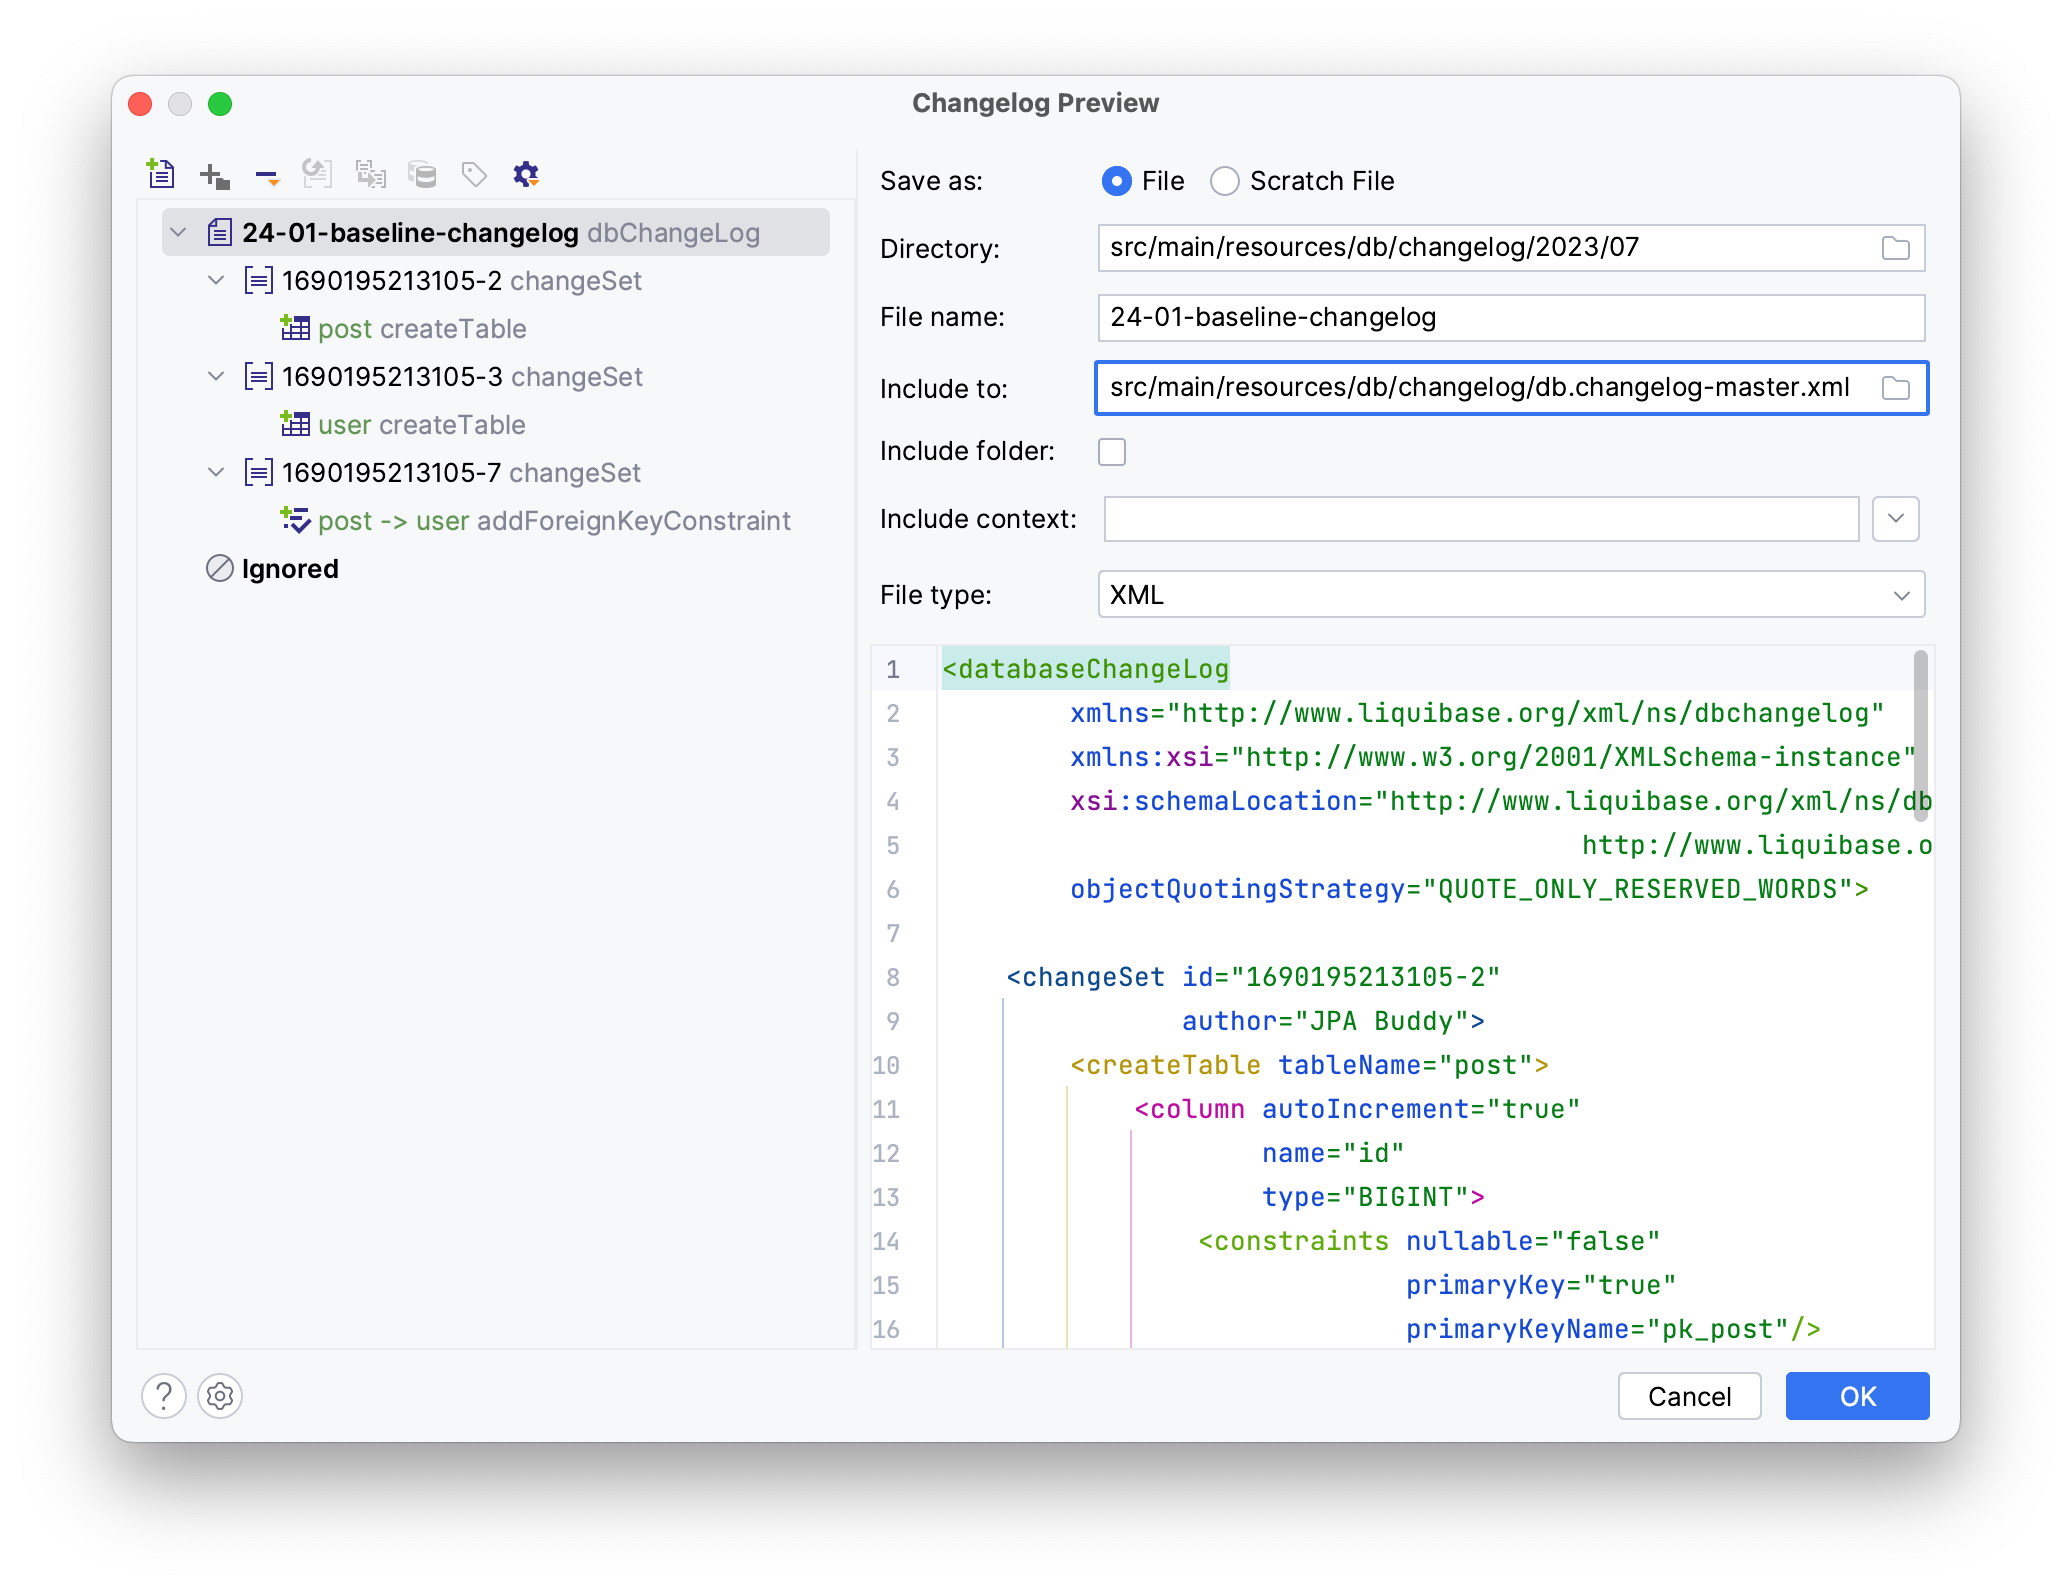
Click OK.
The created script will be displayed in the JPA Structure tab and stored in your resources folder.
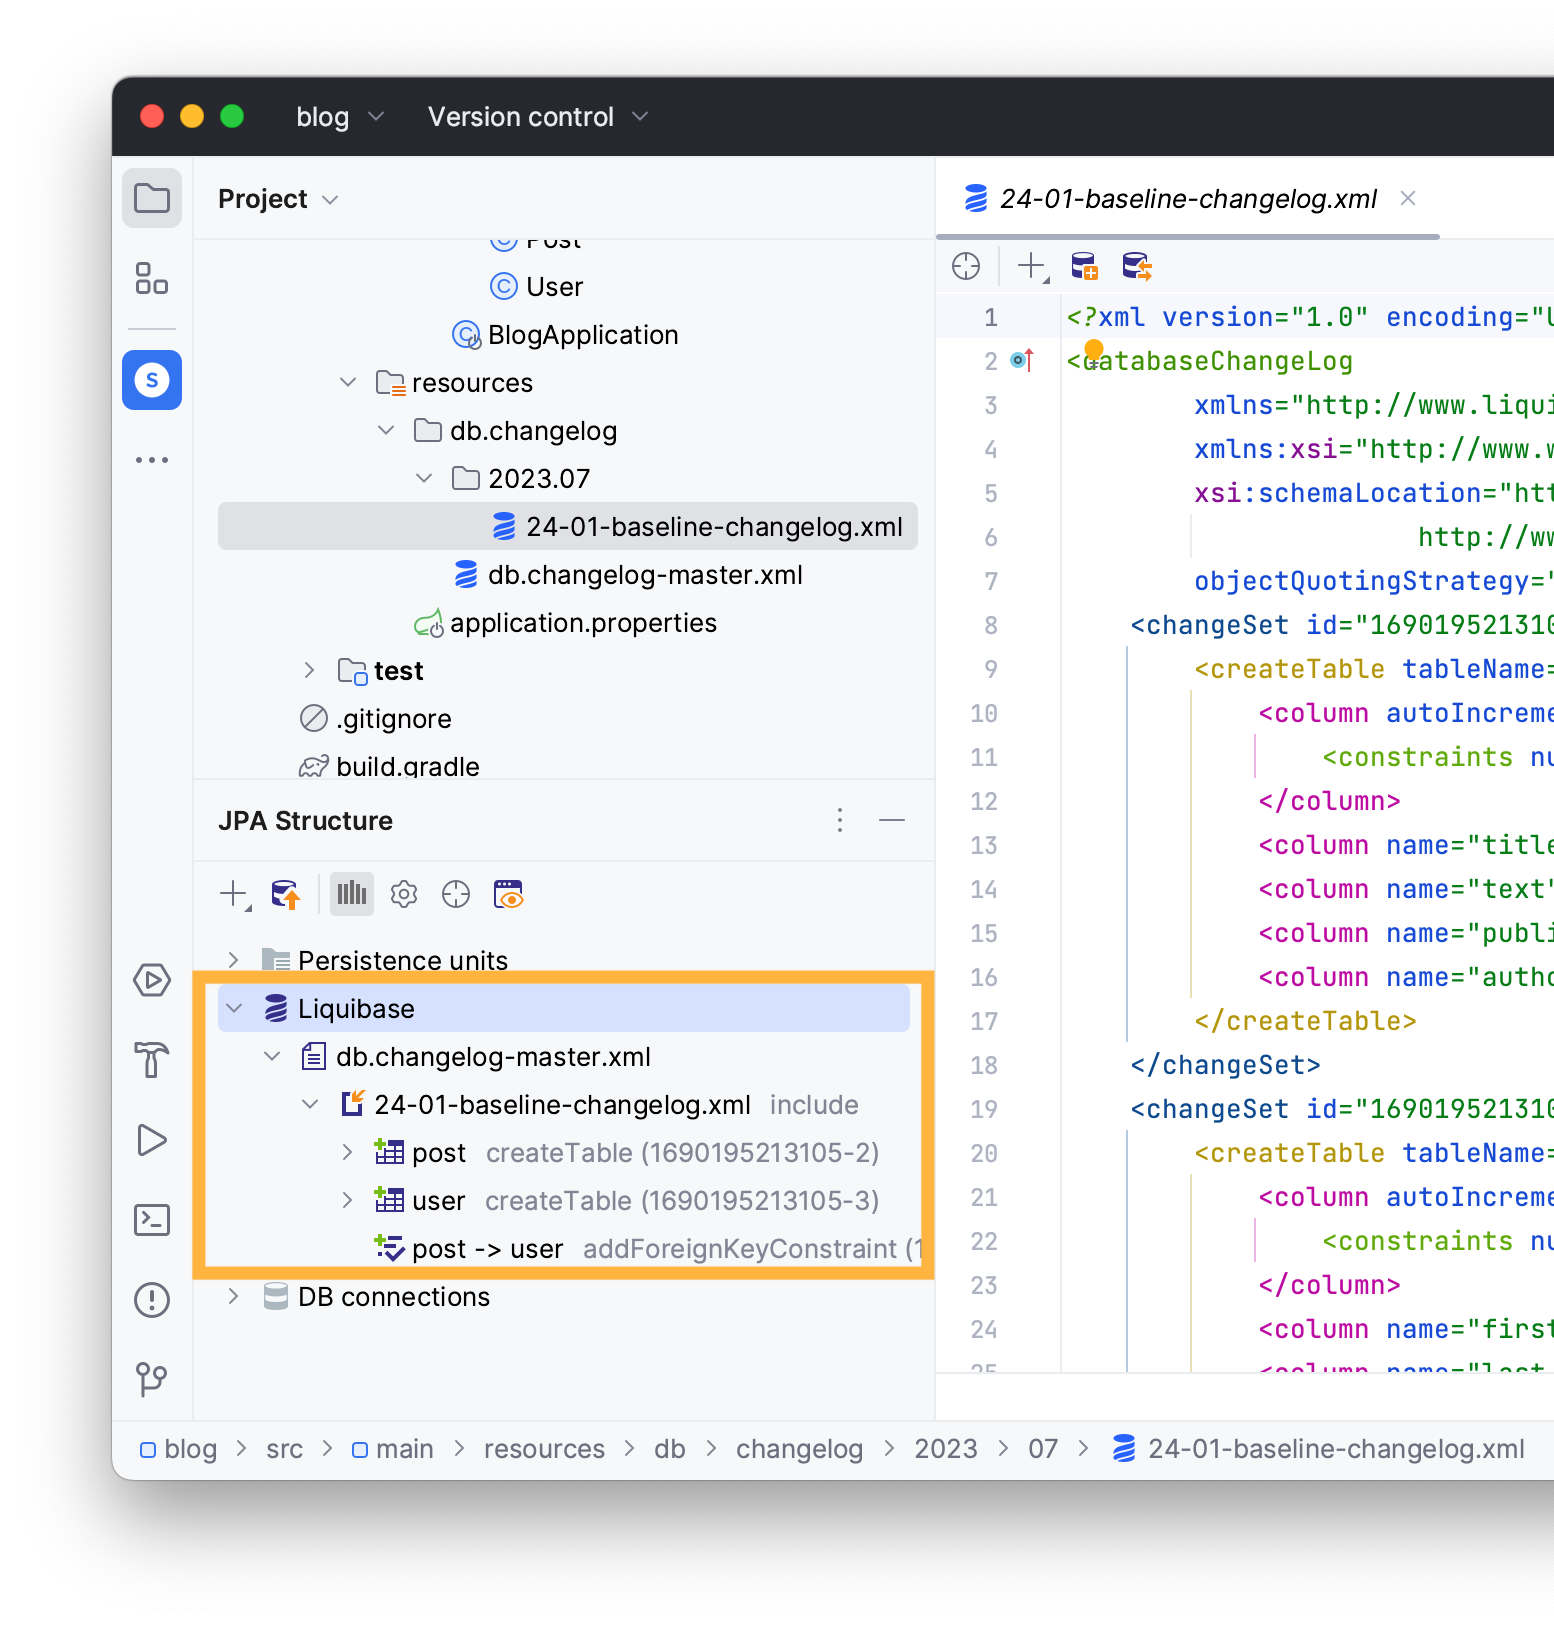
Now you need to run the script and implement the changes in the database. Select the Liquibase icon in JPA Structure to invoke the Liquibase Update wizard.

JPA Buddy automatically detects your active database connection.
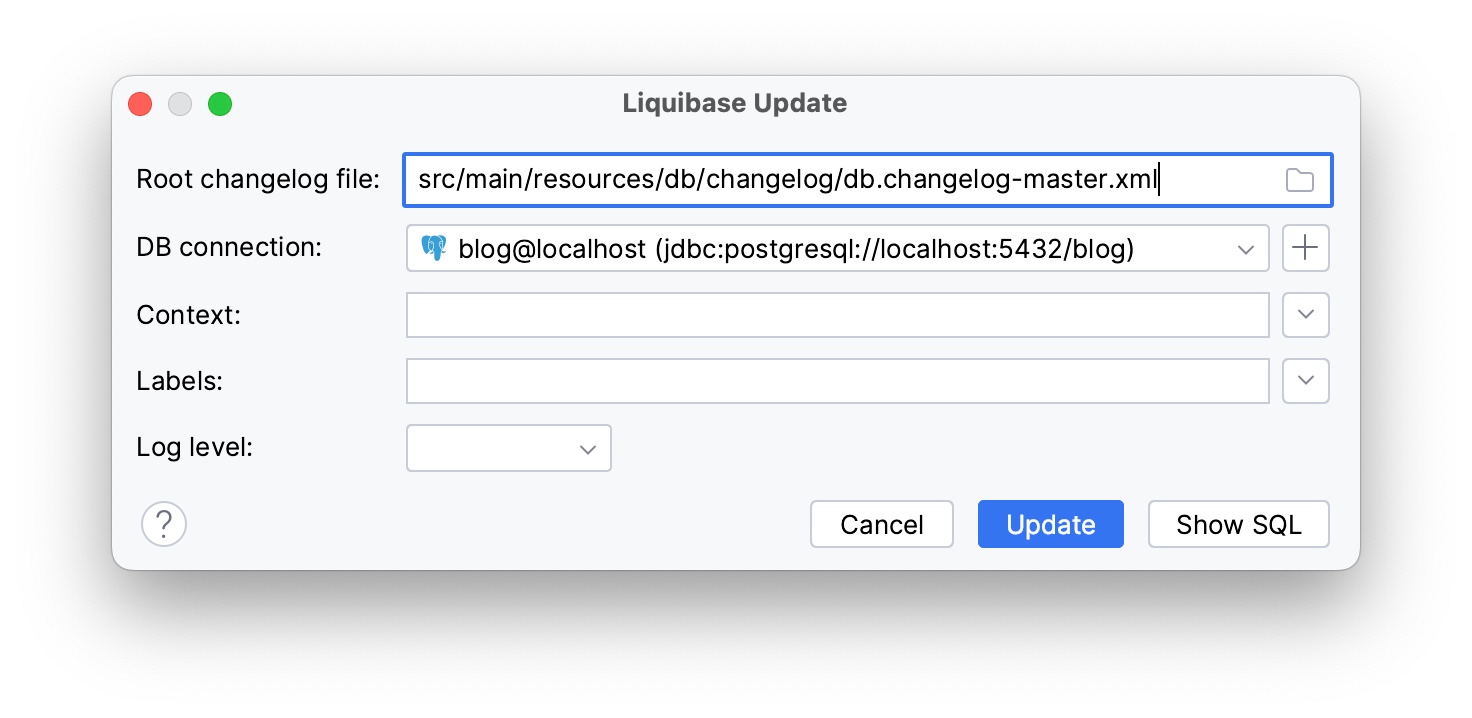
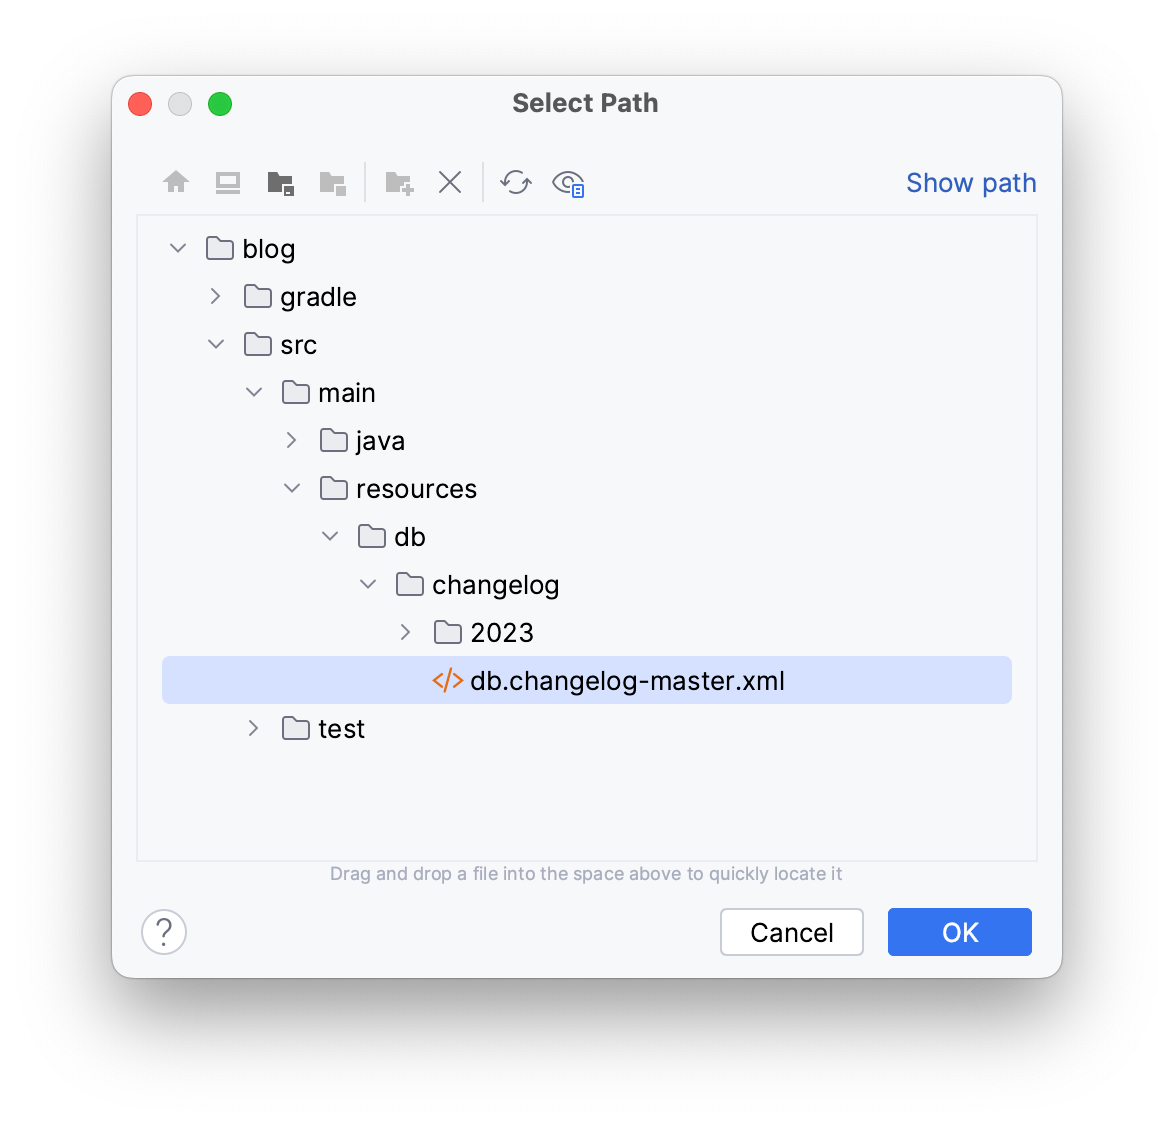
Select the created master changelog as your Root changing file, JPA Buddy will automatically select this changelog for subsequent executions.
Click OK.
Click Update to execute the script on the specified database. You can view the newly created tables in the Database tab.
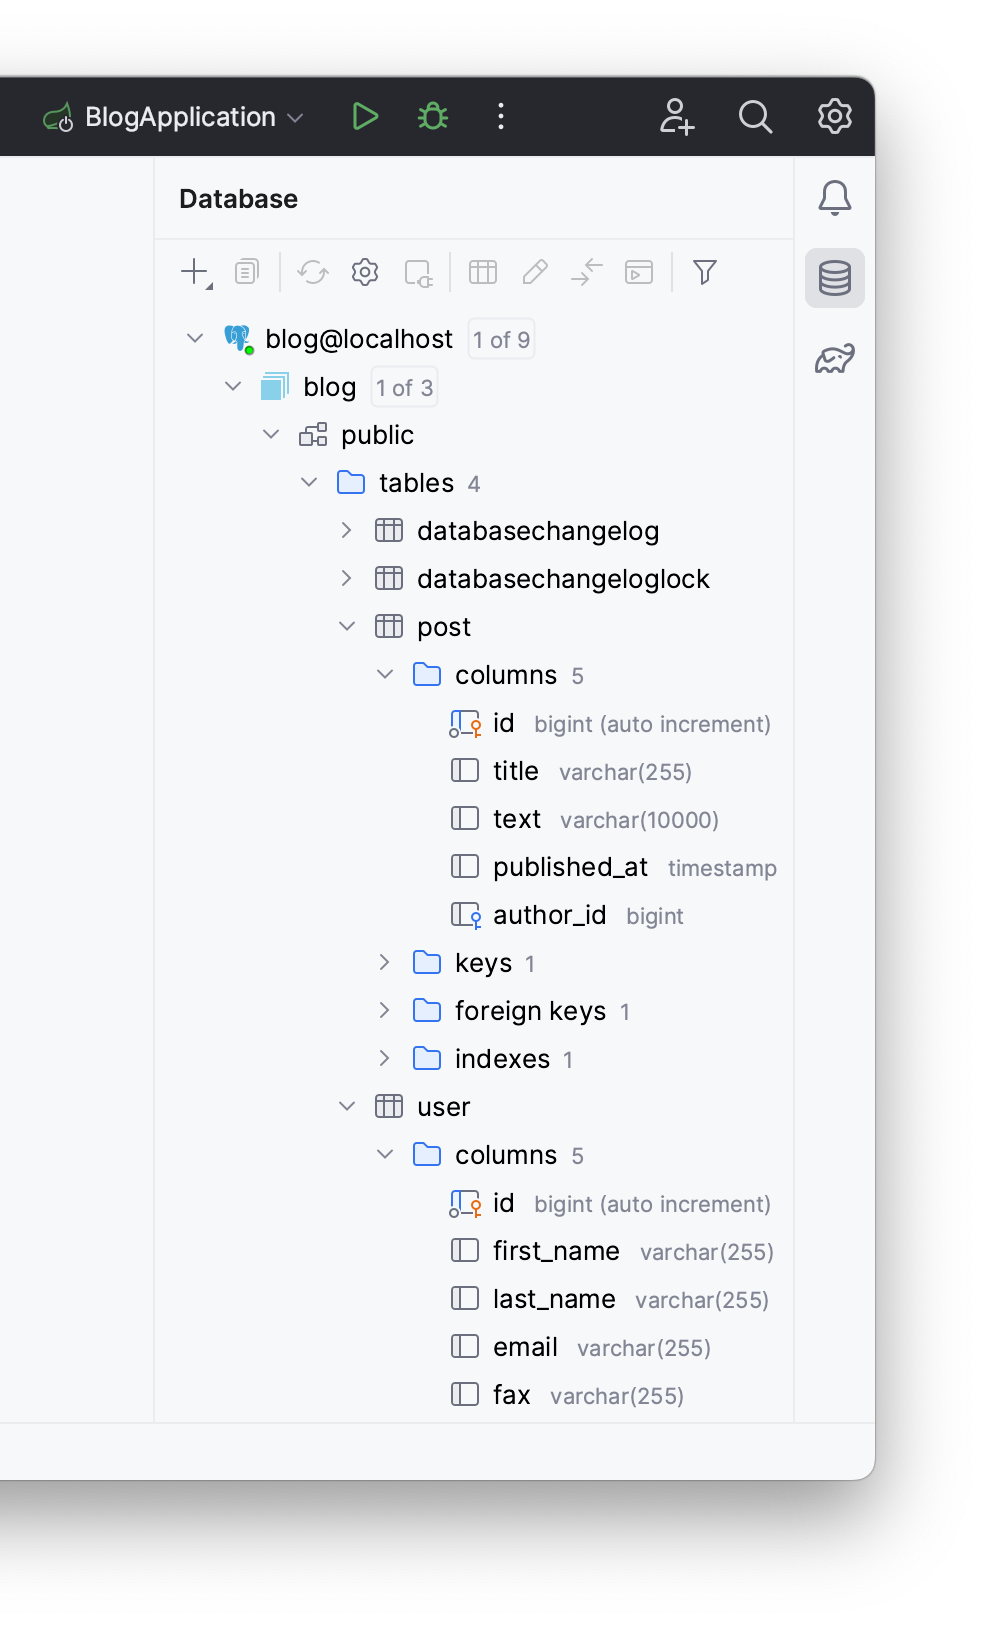
Updating the JPA Data Model
In this section, you will learn how to make the following changes to your existing JPA model:
- Modify existing attributes
- Create a reference
Commententity - Add a referenced attribute to the created table
Let’s start by modifying the email attribute. Use JPA Designer to make it a mandatory field:
- Open
Usersource code - Click on
emailin your code - Locate the JPA Designer tab
- Find and choose the Mandatory option
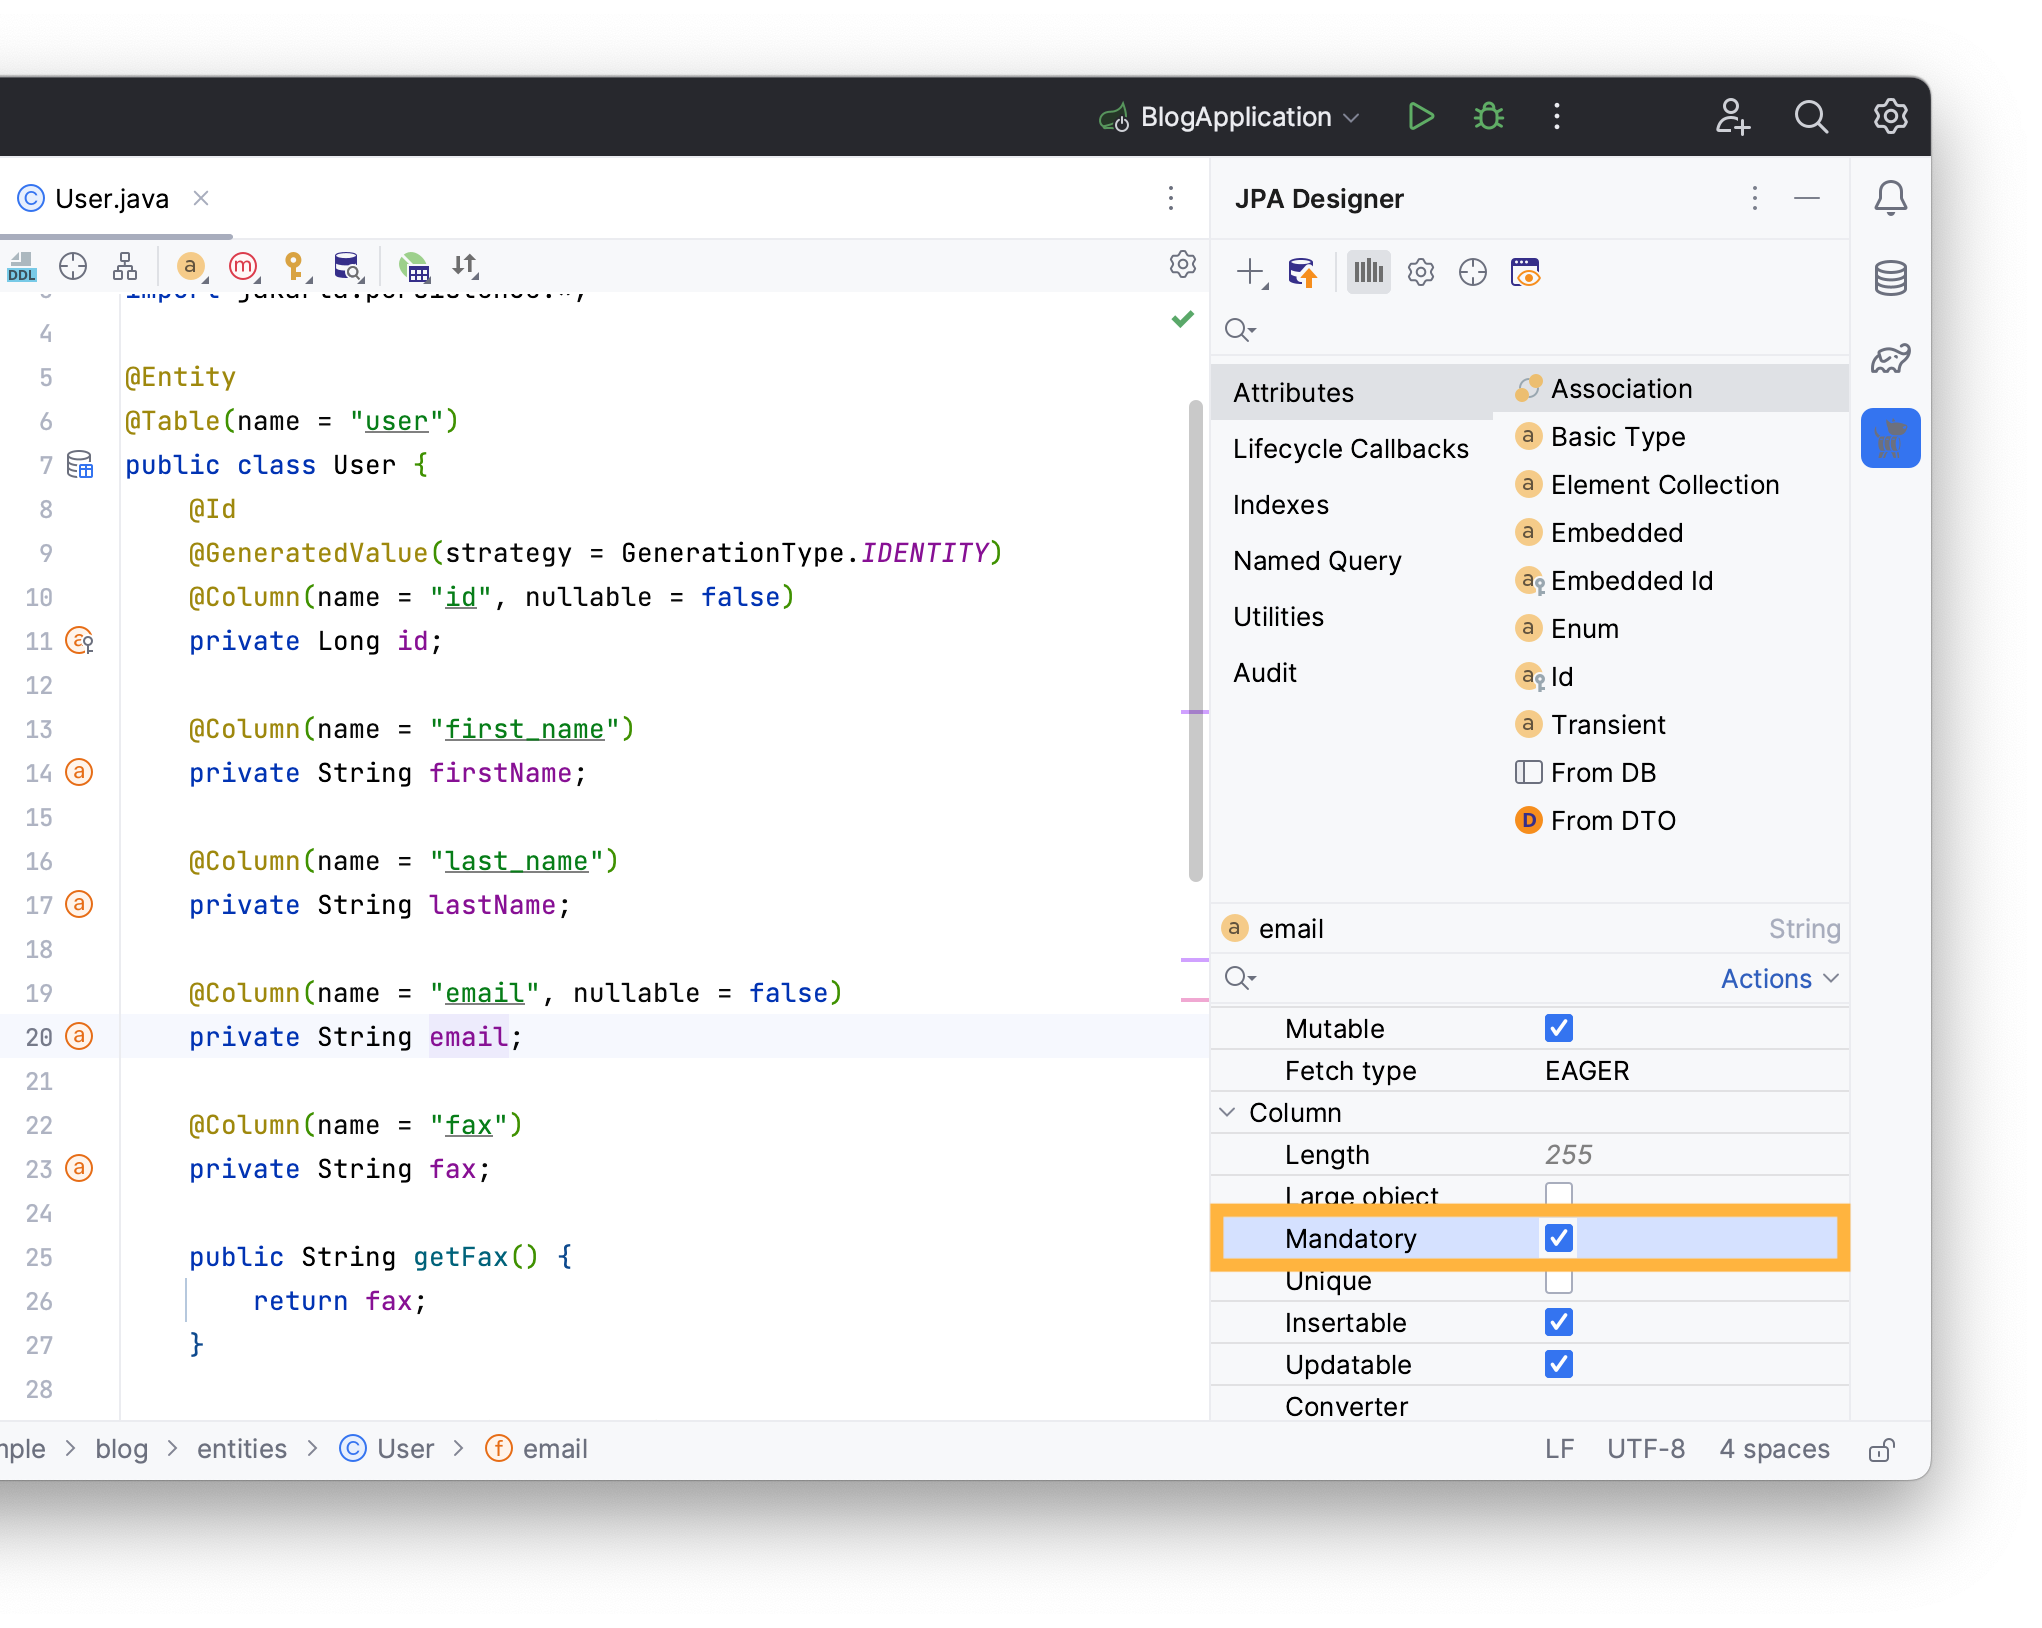
This will add a nullable = false to your @Column annotation.
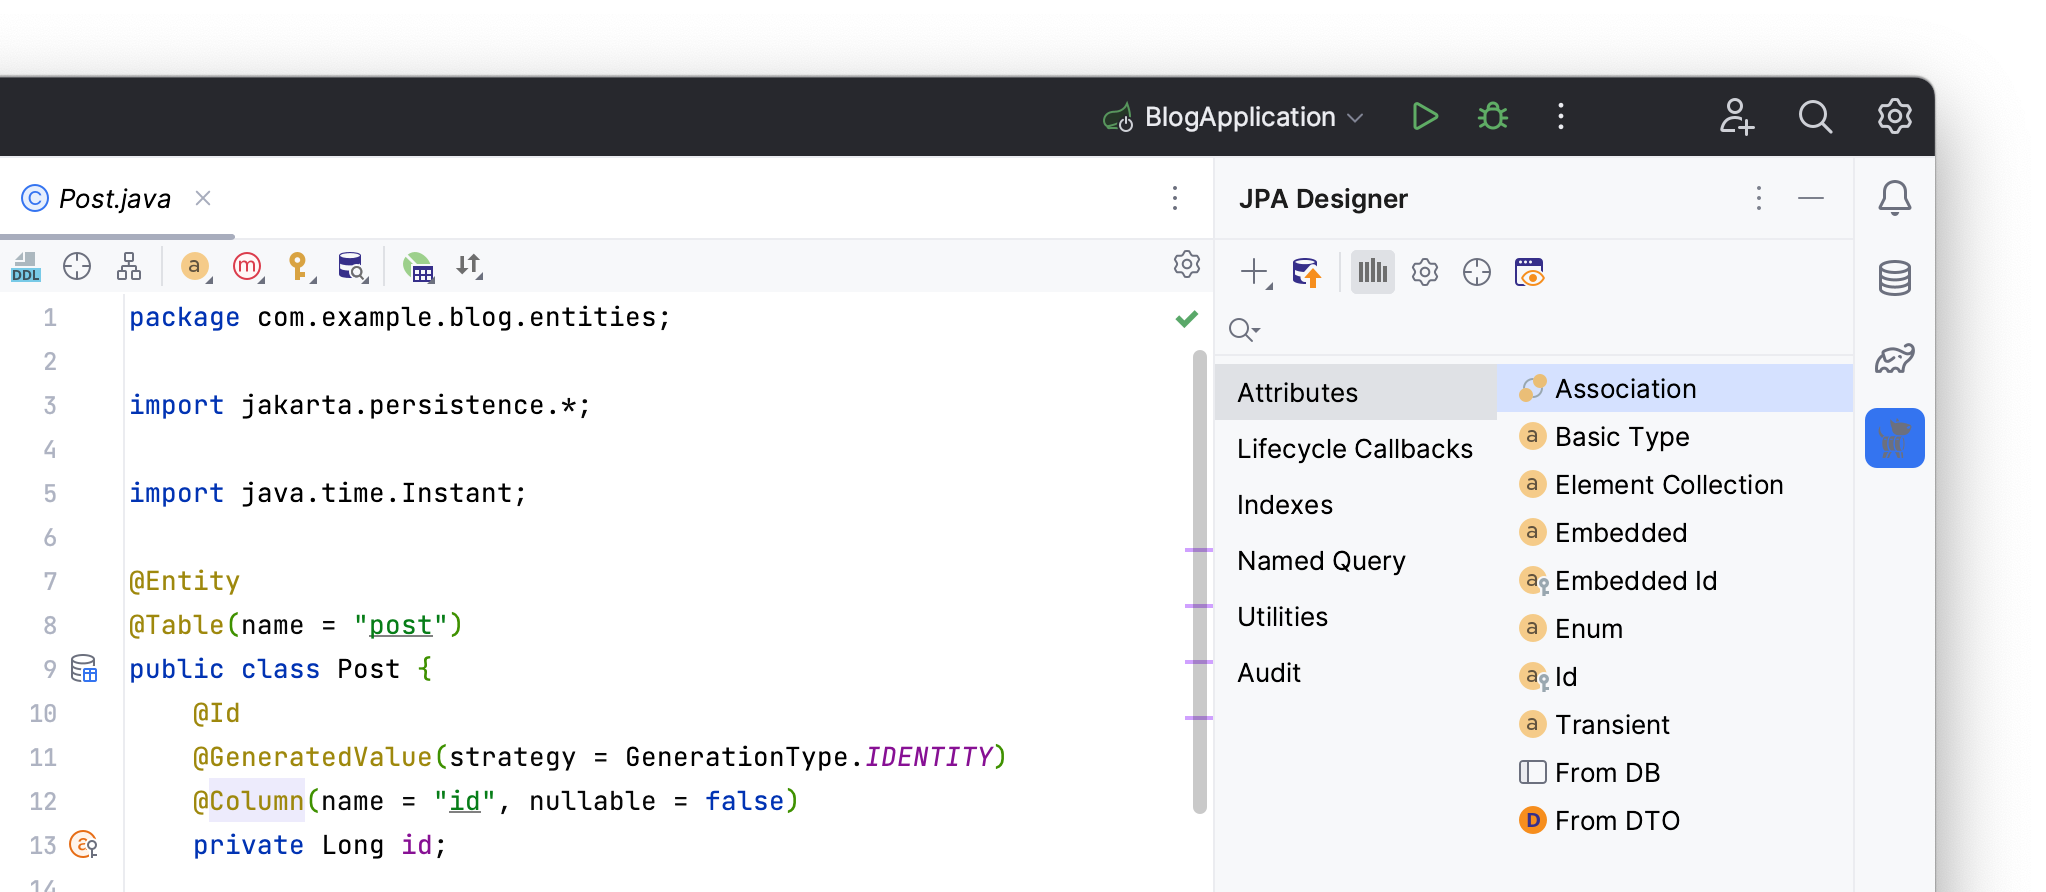
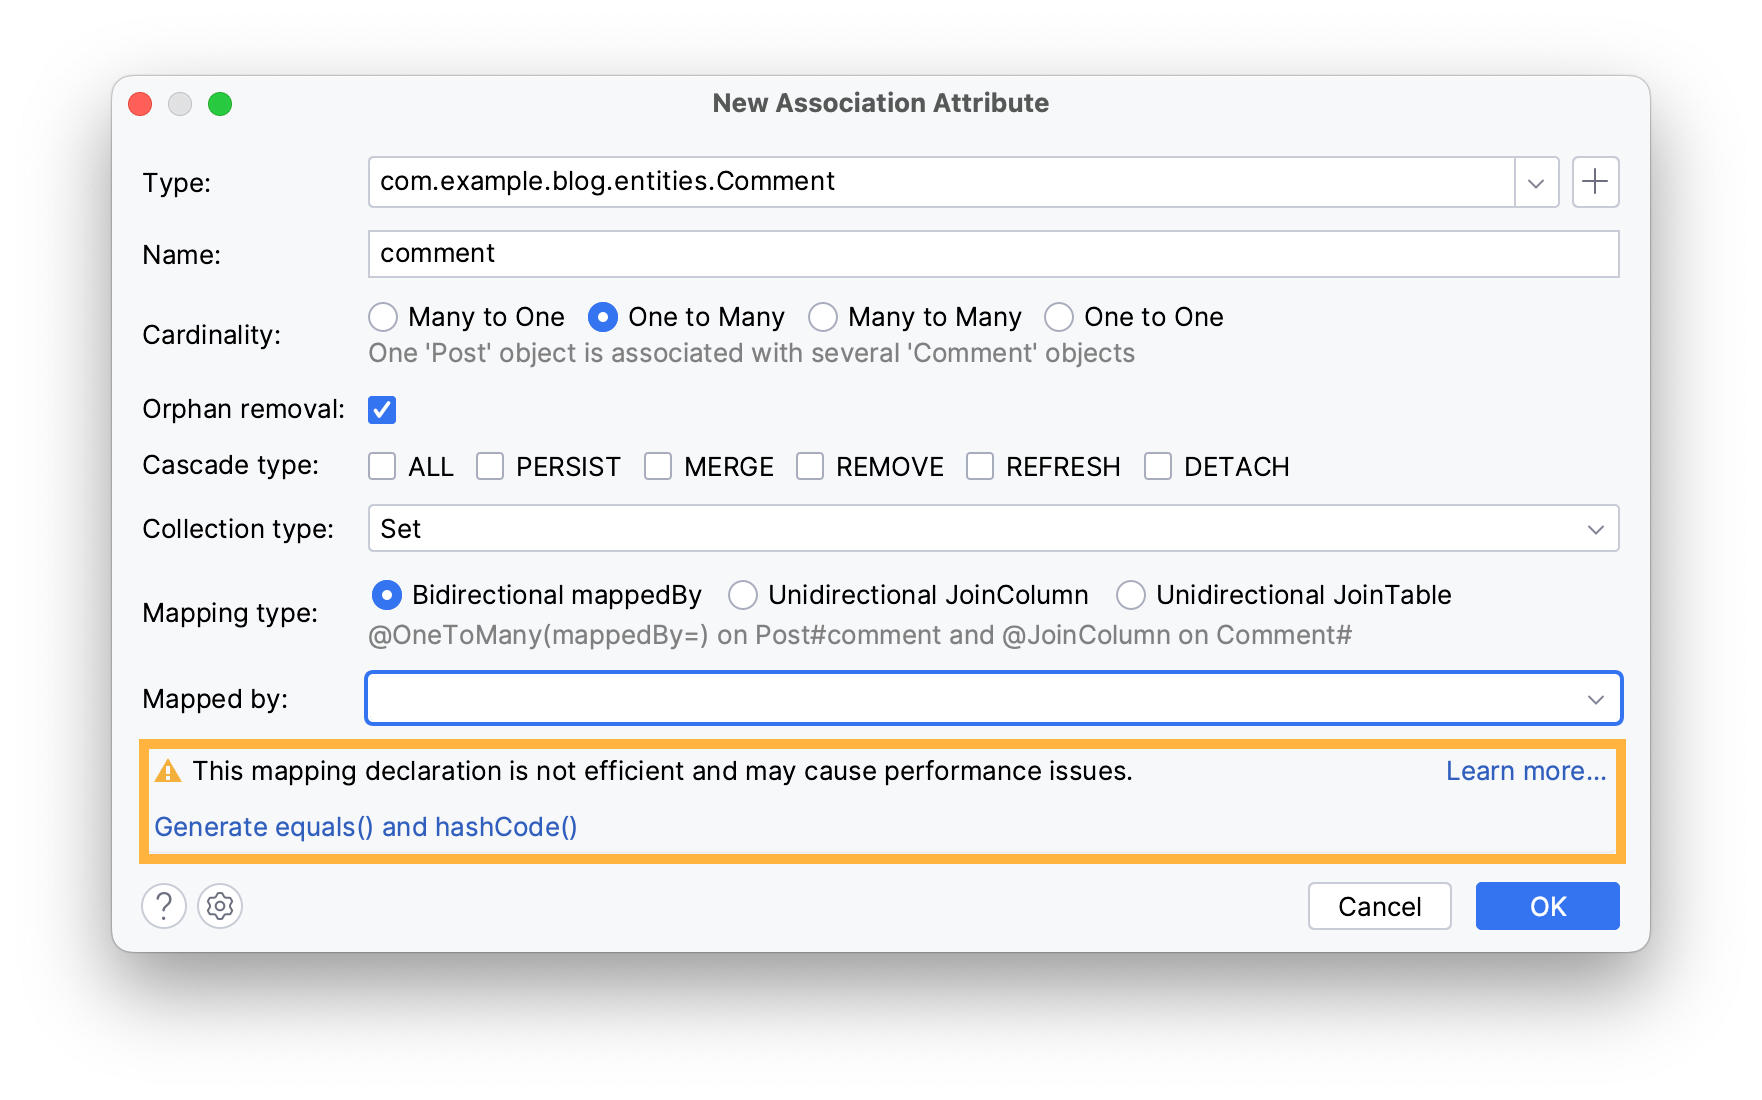
JPA Buddy allows you to add an associated attribute and create its type in the same wizard. Let's create a Comment entity and link it to the Post entity with a OneToMany relationship:
- Open
Postsource code - Click on Association in JPA Designer
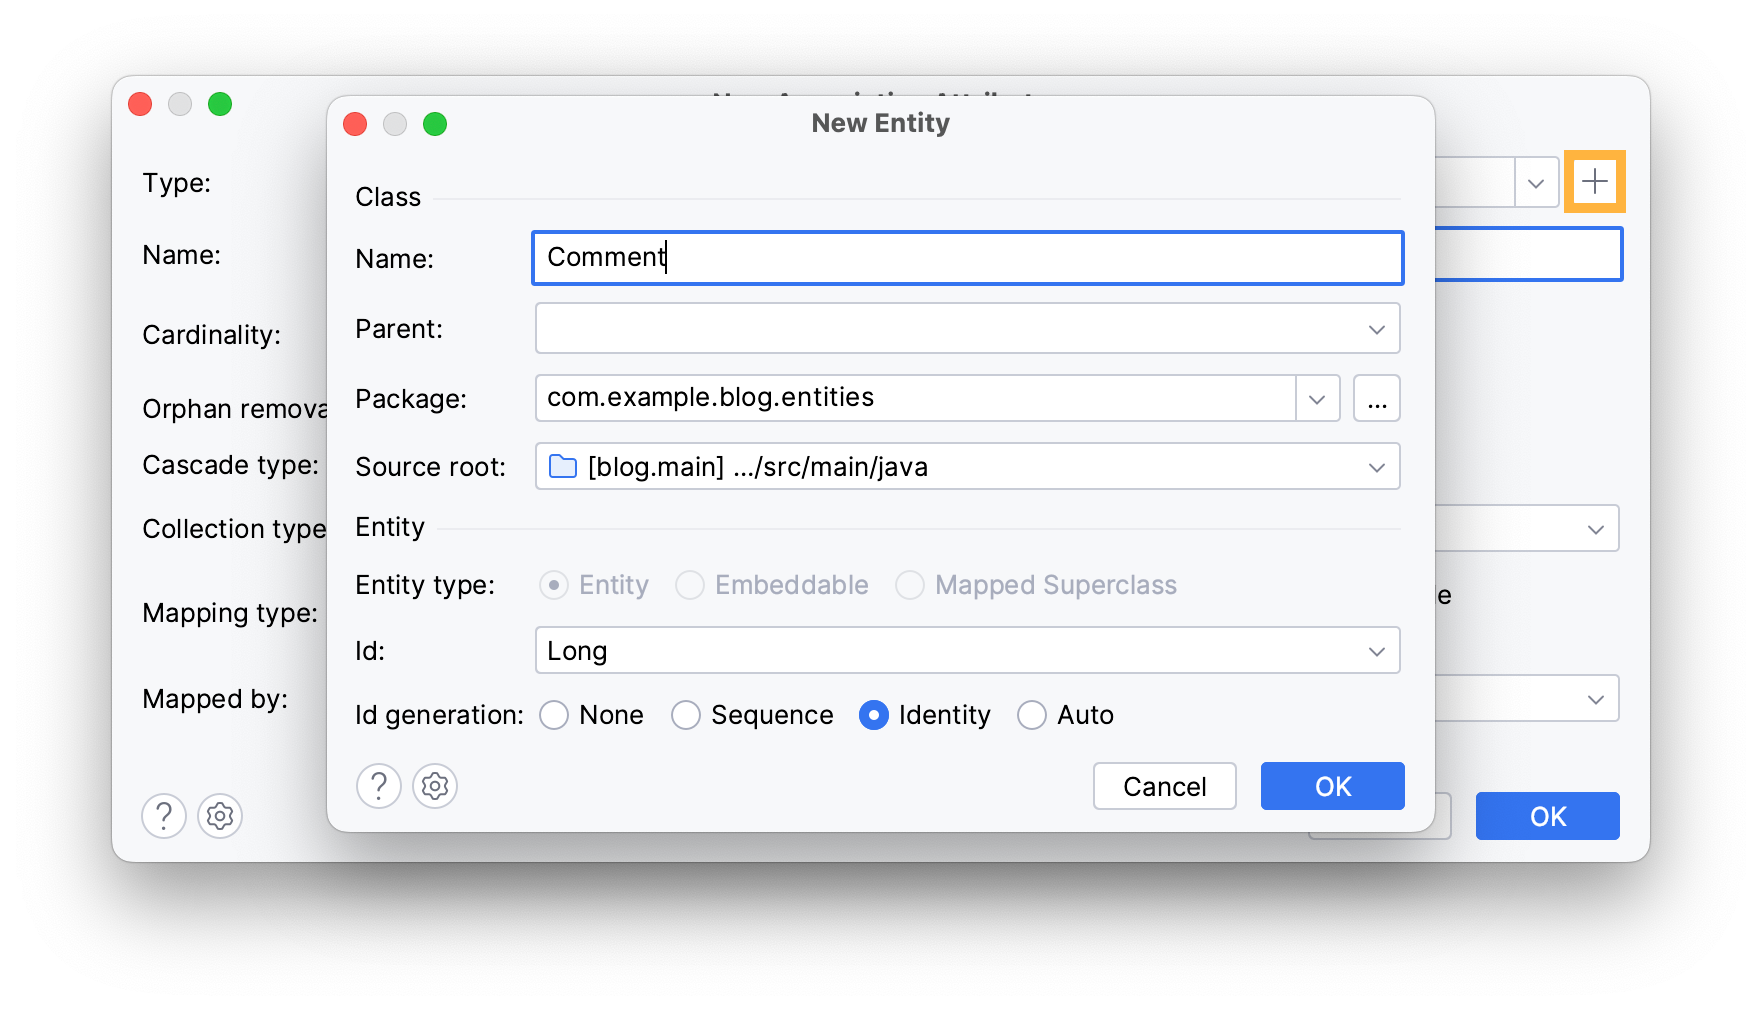
Create a Comment entity by clicking on the + button to invoke the New Entity wizard. Enter the entity’s name, and JPA Buddy will autofill the rest. Click OK to exit the wizard.
Set the attribute’s name and choose a OneToMany relationship. JPA Buddy will suggest generating equals and hashcode methods for the new entity for better performance. Click on Generate equals() and hashcode() then hit OK.
Finally, add an inverse attribute for bidirectional navigation. Click the Mapped By field → select create inverse attribute. JPA Buddy auto-generates its name and column based on the Post entity. Click OK to exit the Create Mapped Attribute window.
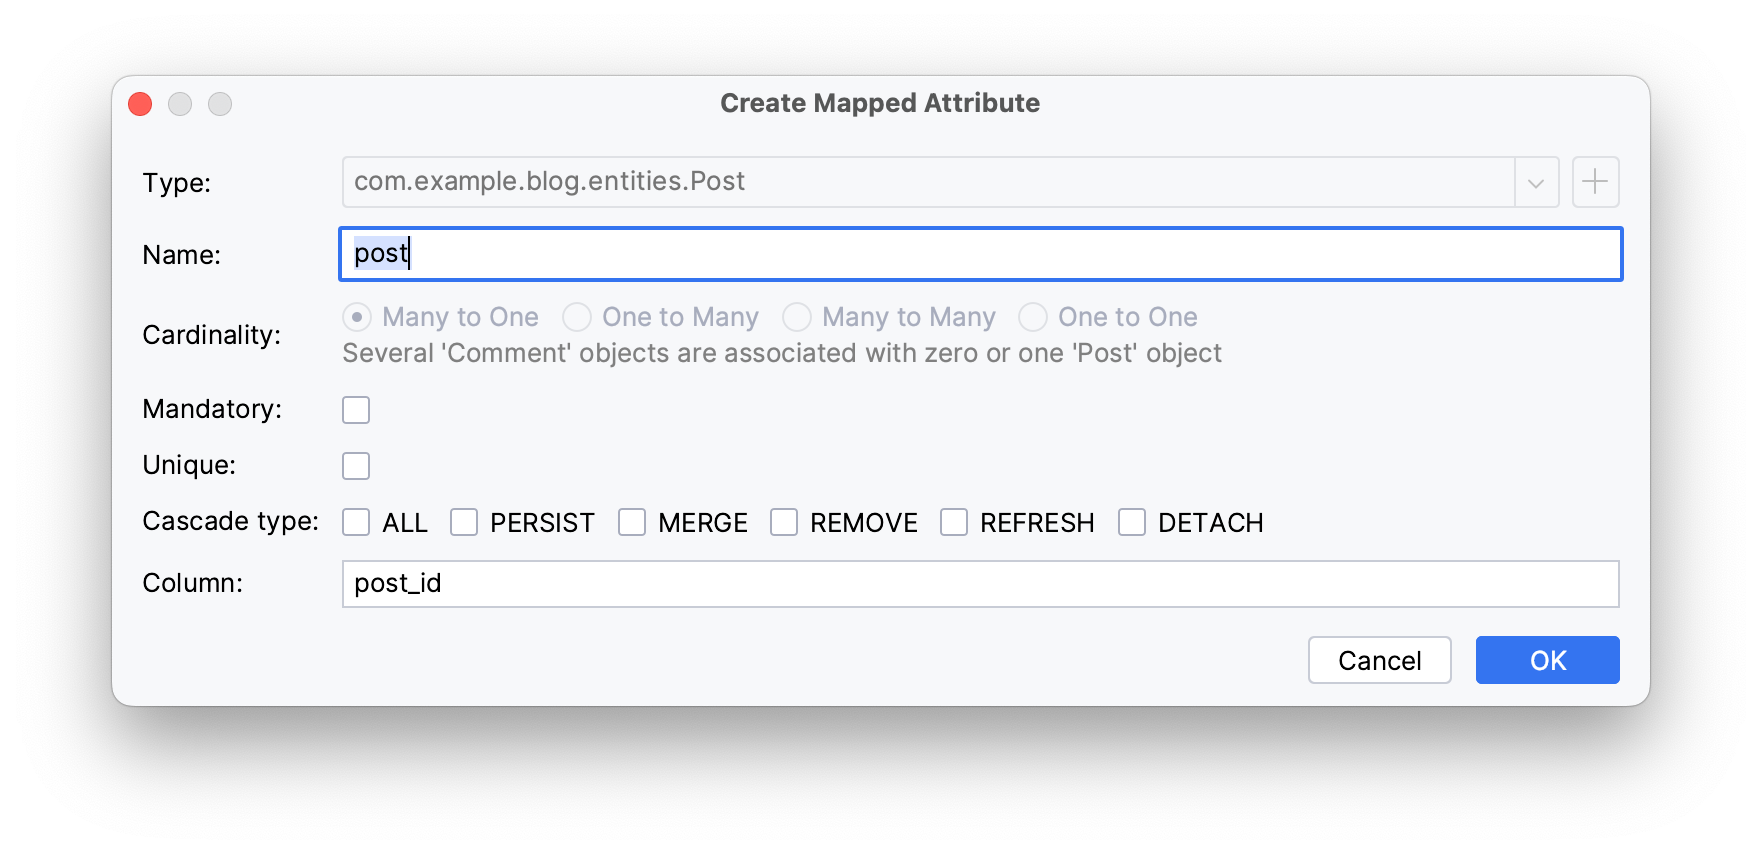
Once you've clicked OK again, these steps will create an attribute in your Post entity to define a OneToMany relationship with the Comment entity:
@OneToMany(mappedBy = "post", orphanRemoval = true)
private Set<Comment> comment = new LinkedHashSet<>();
And a Comment entity in the entities package:
@Entity
@Table(name = "comment")
public class Comment {
 @Id
 @GeneratedValue(strategy = GenerationType.IDENTITY)
 @Column(name = "id", nullable = false)
 private Long id;

 @ManyToOne
 @JoinColumn(name = "post_id")
 private Post post;

// getters and setters have been omitted for brevity

}
Your comments should include text content, a creation date, and the user who authored them. Let's generate these attributes following the same steps defined in the Creating Entities section.
@Column(name = "data")
private Instant data;

@Column(name = "text")
private String text;

@ManyToOne
@JoinColumn(name = "commentator_id")
private User commentator;
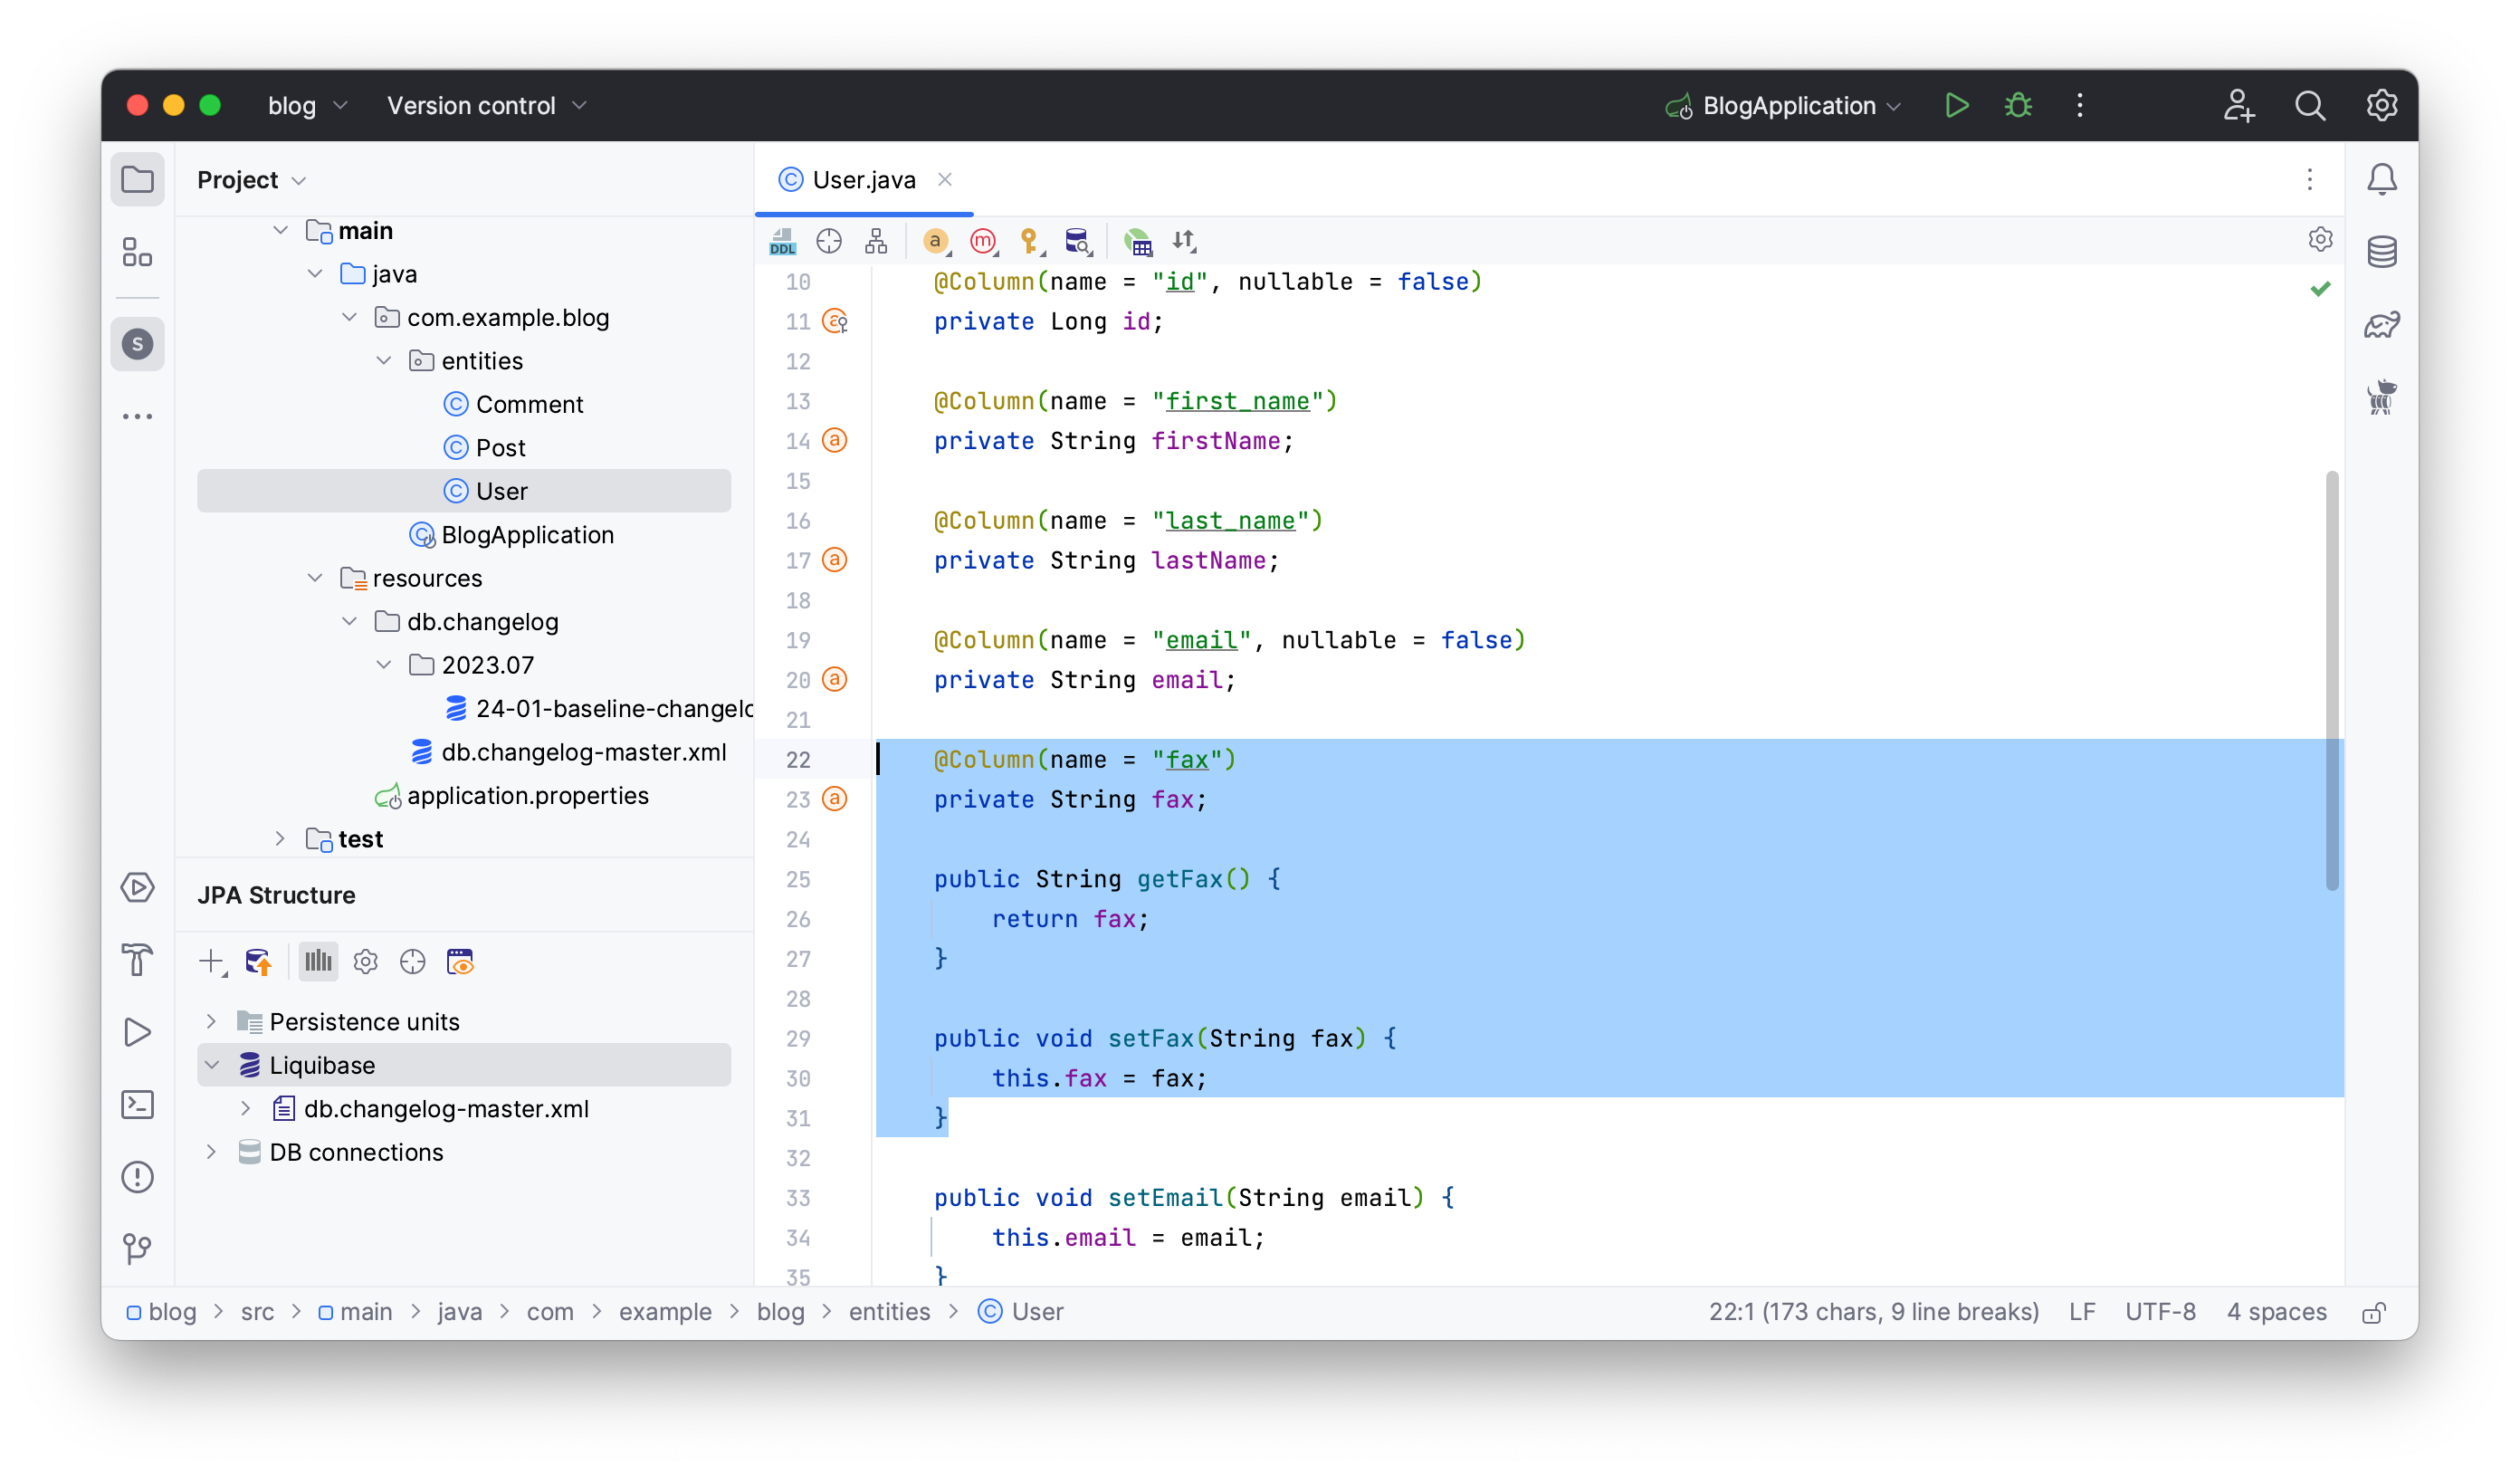
Delete the fax attribute in the User entity to reflect it in the changelog later.
Generating a Diff Changelog
You made some changes to your entities and need to implement those changes in your database. In this section, you will:
- Generate a diff changelog
- Ignore some changes in the changelog
- Add a changeSet to an existing changelog
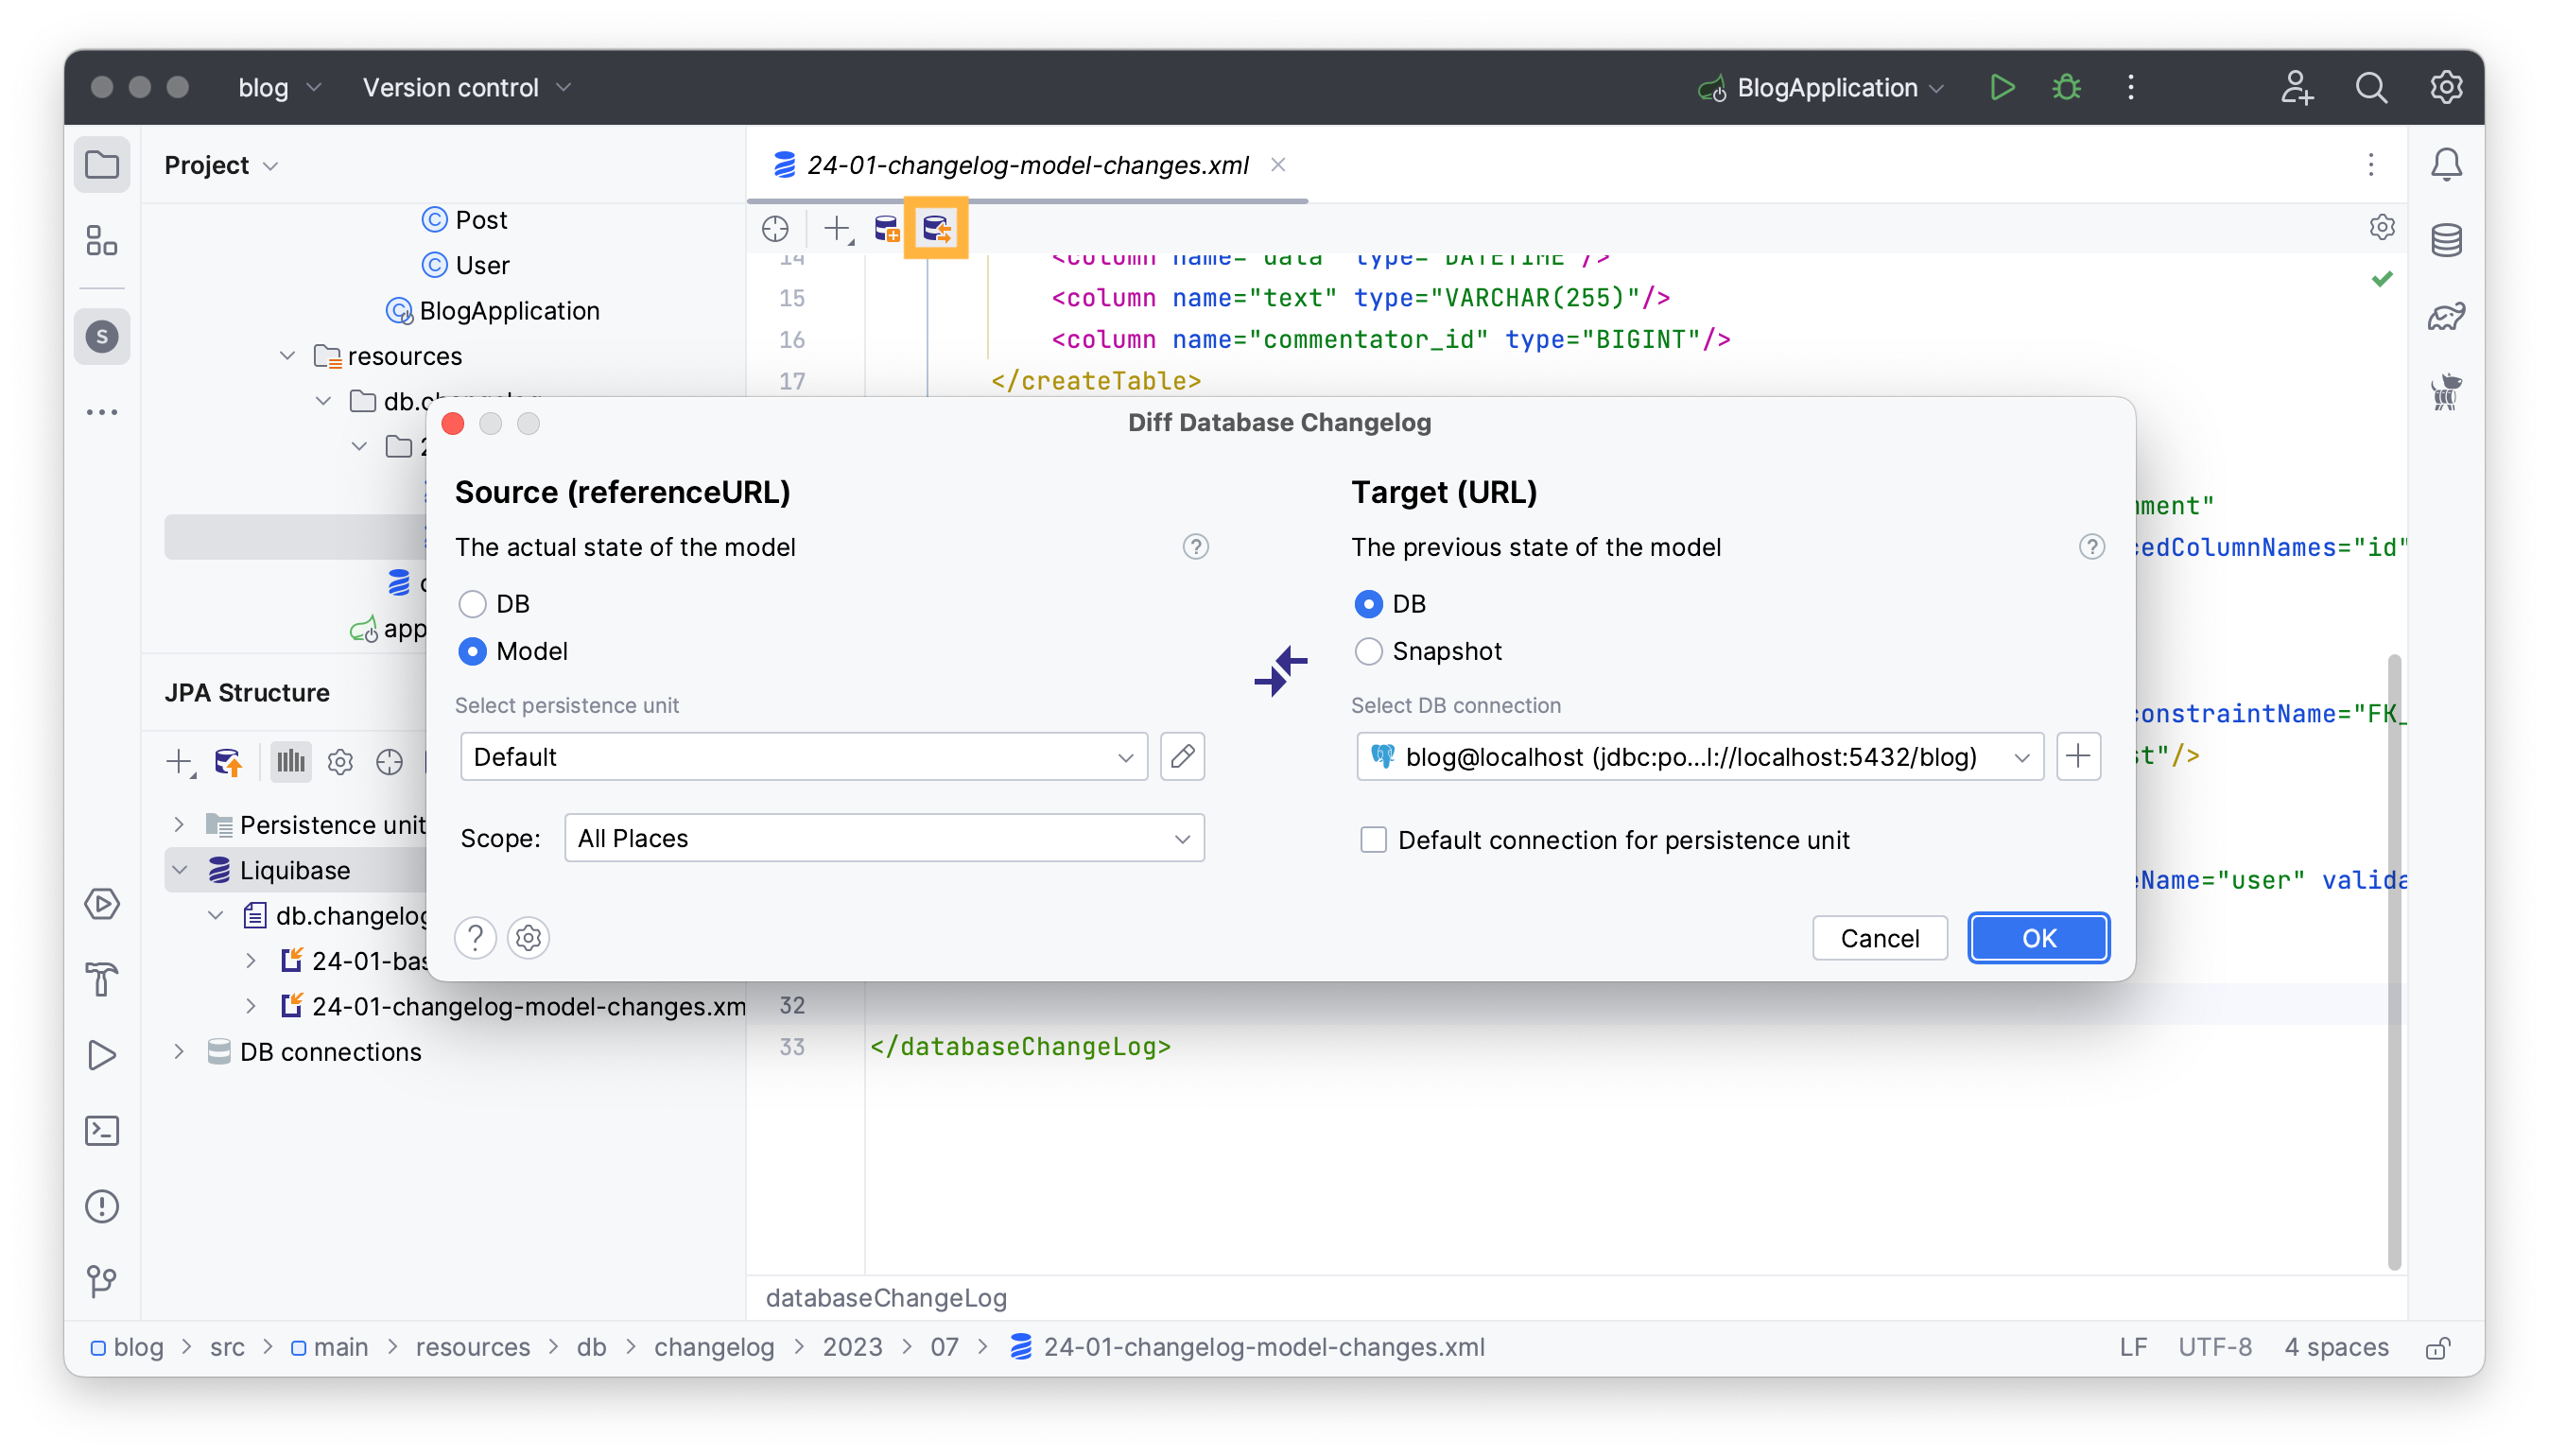
To generate a diff changelog, click on the + button in the JPA Structure → select Liquibase Diff Changelog.
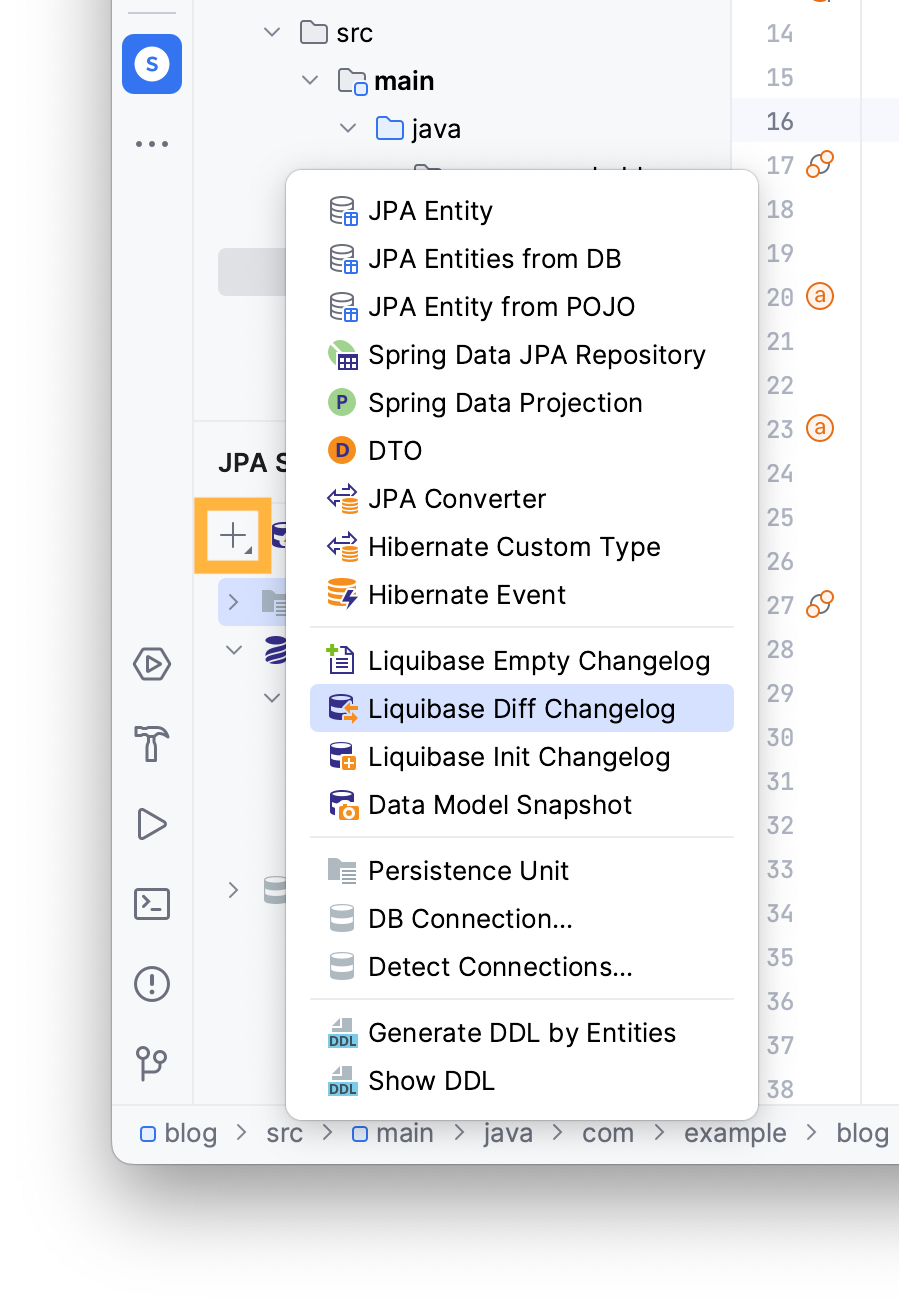
JPA Buddy sets the source to Model to propagate all modifications from the model to the database.
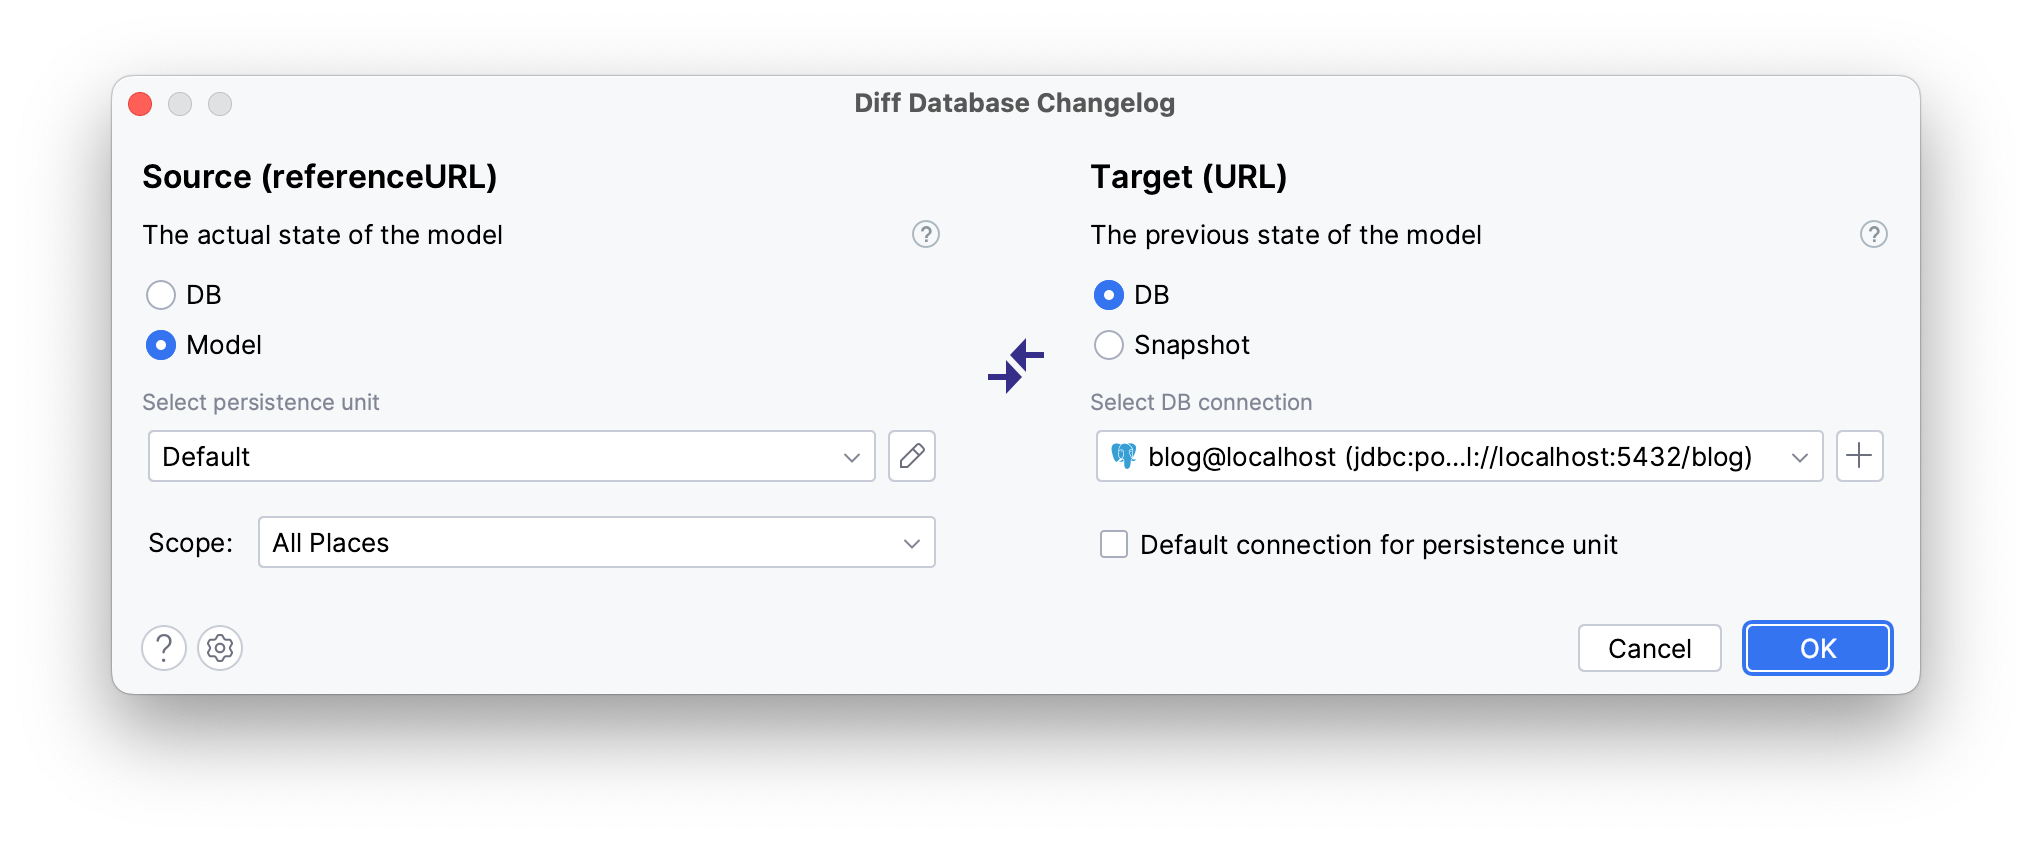
Click OK.
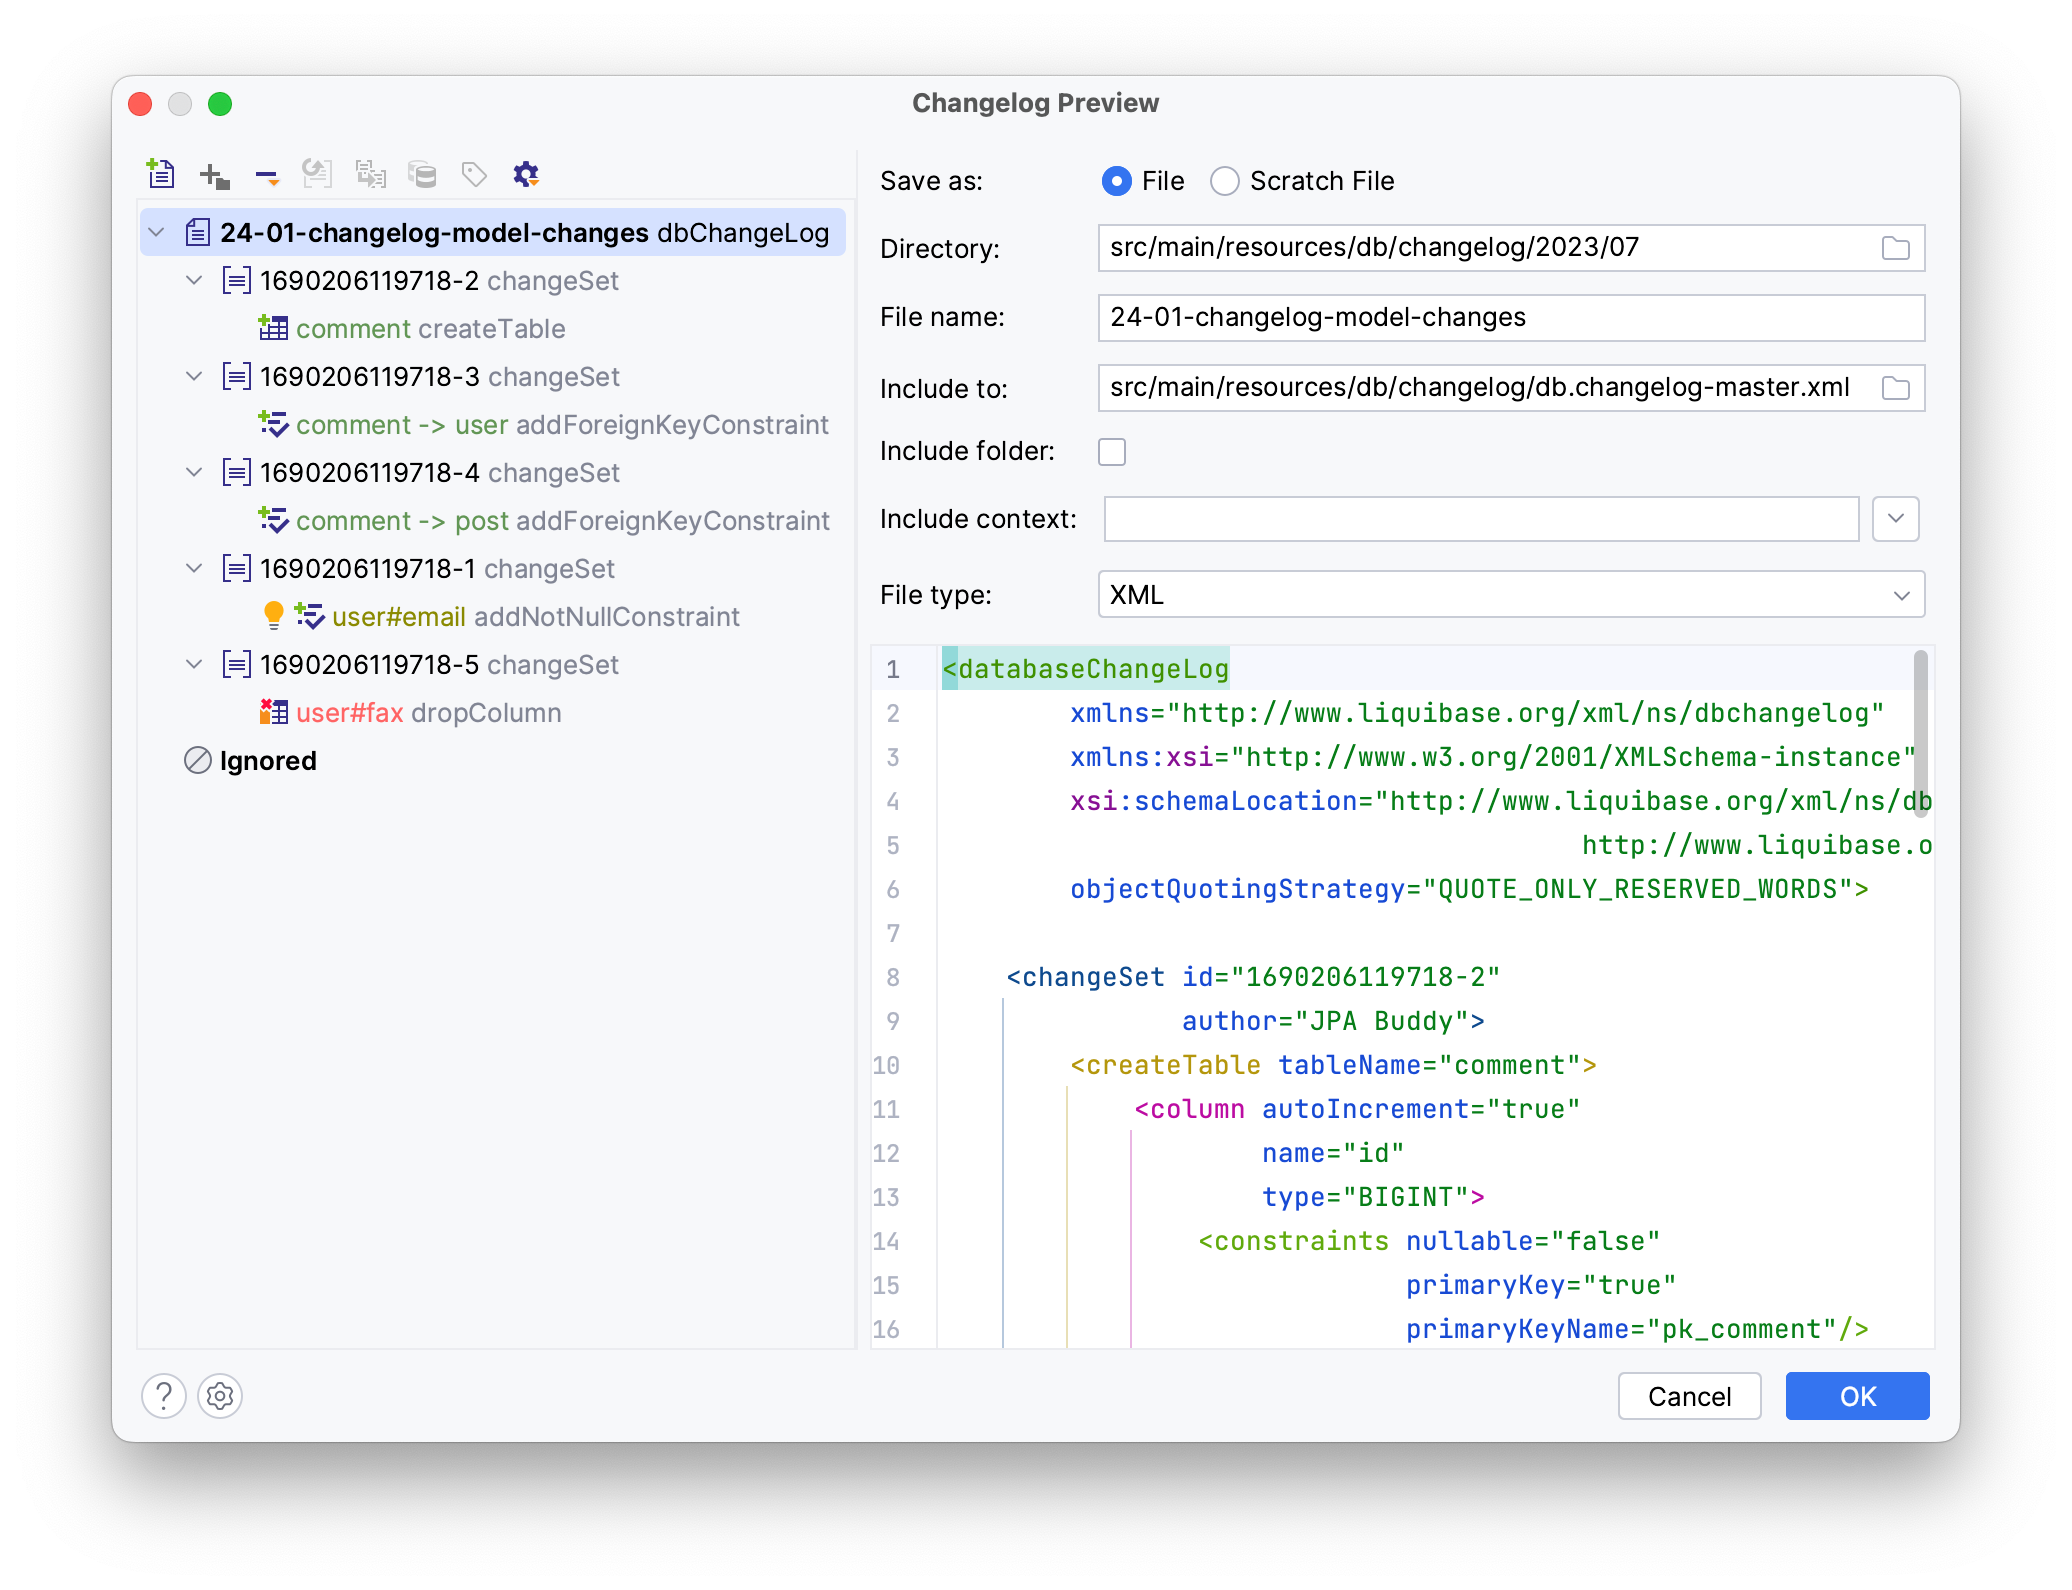
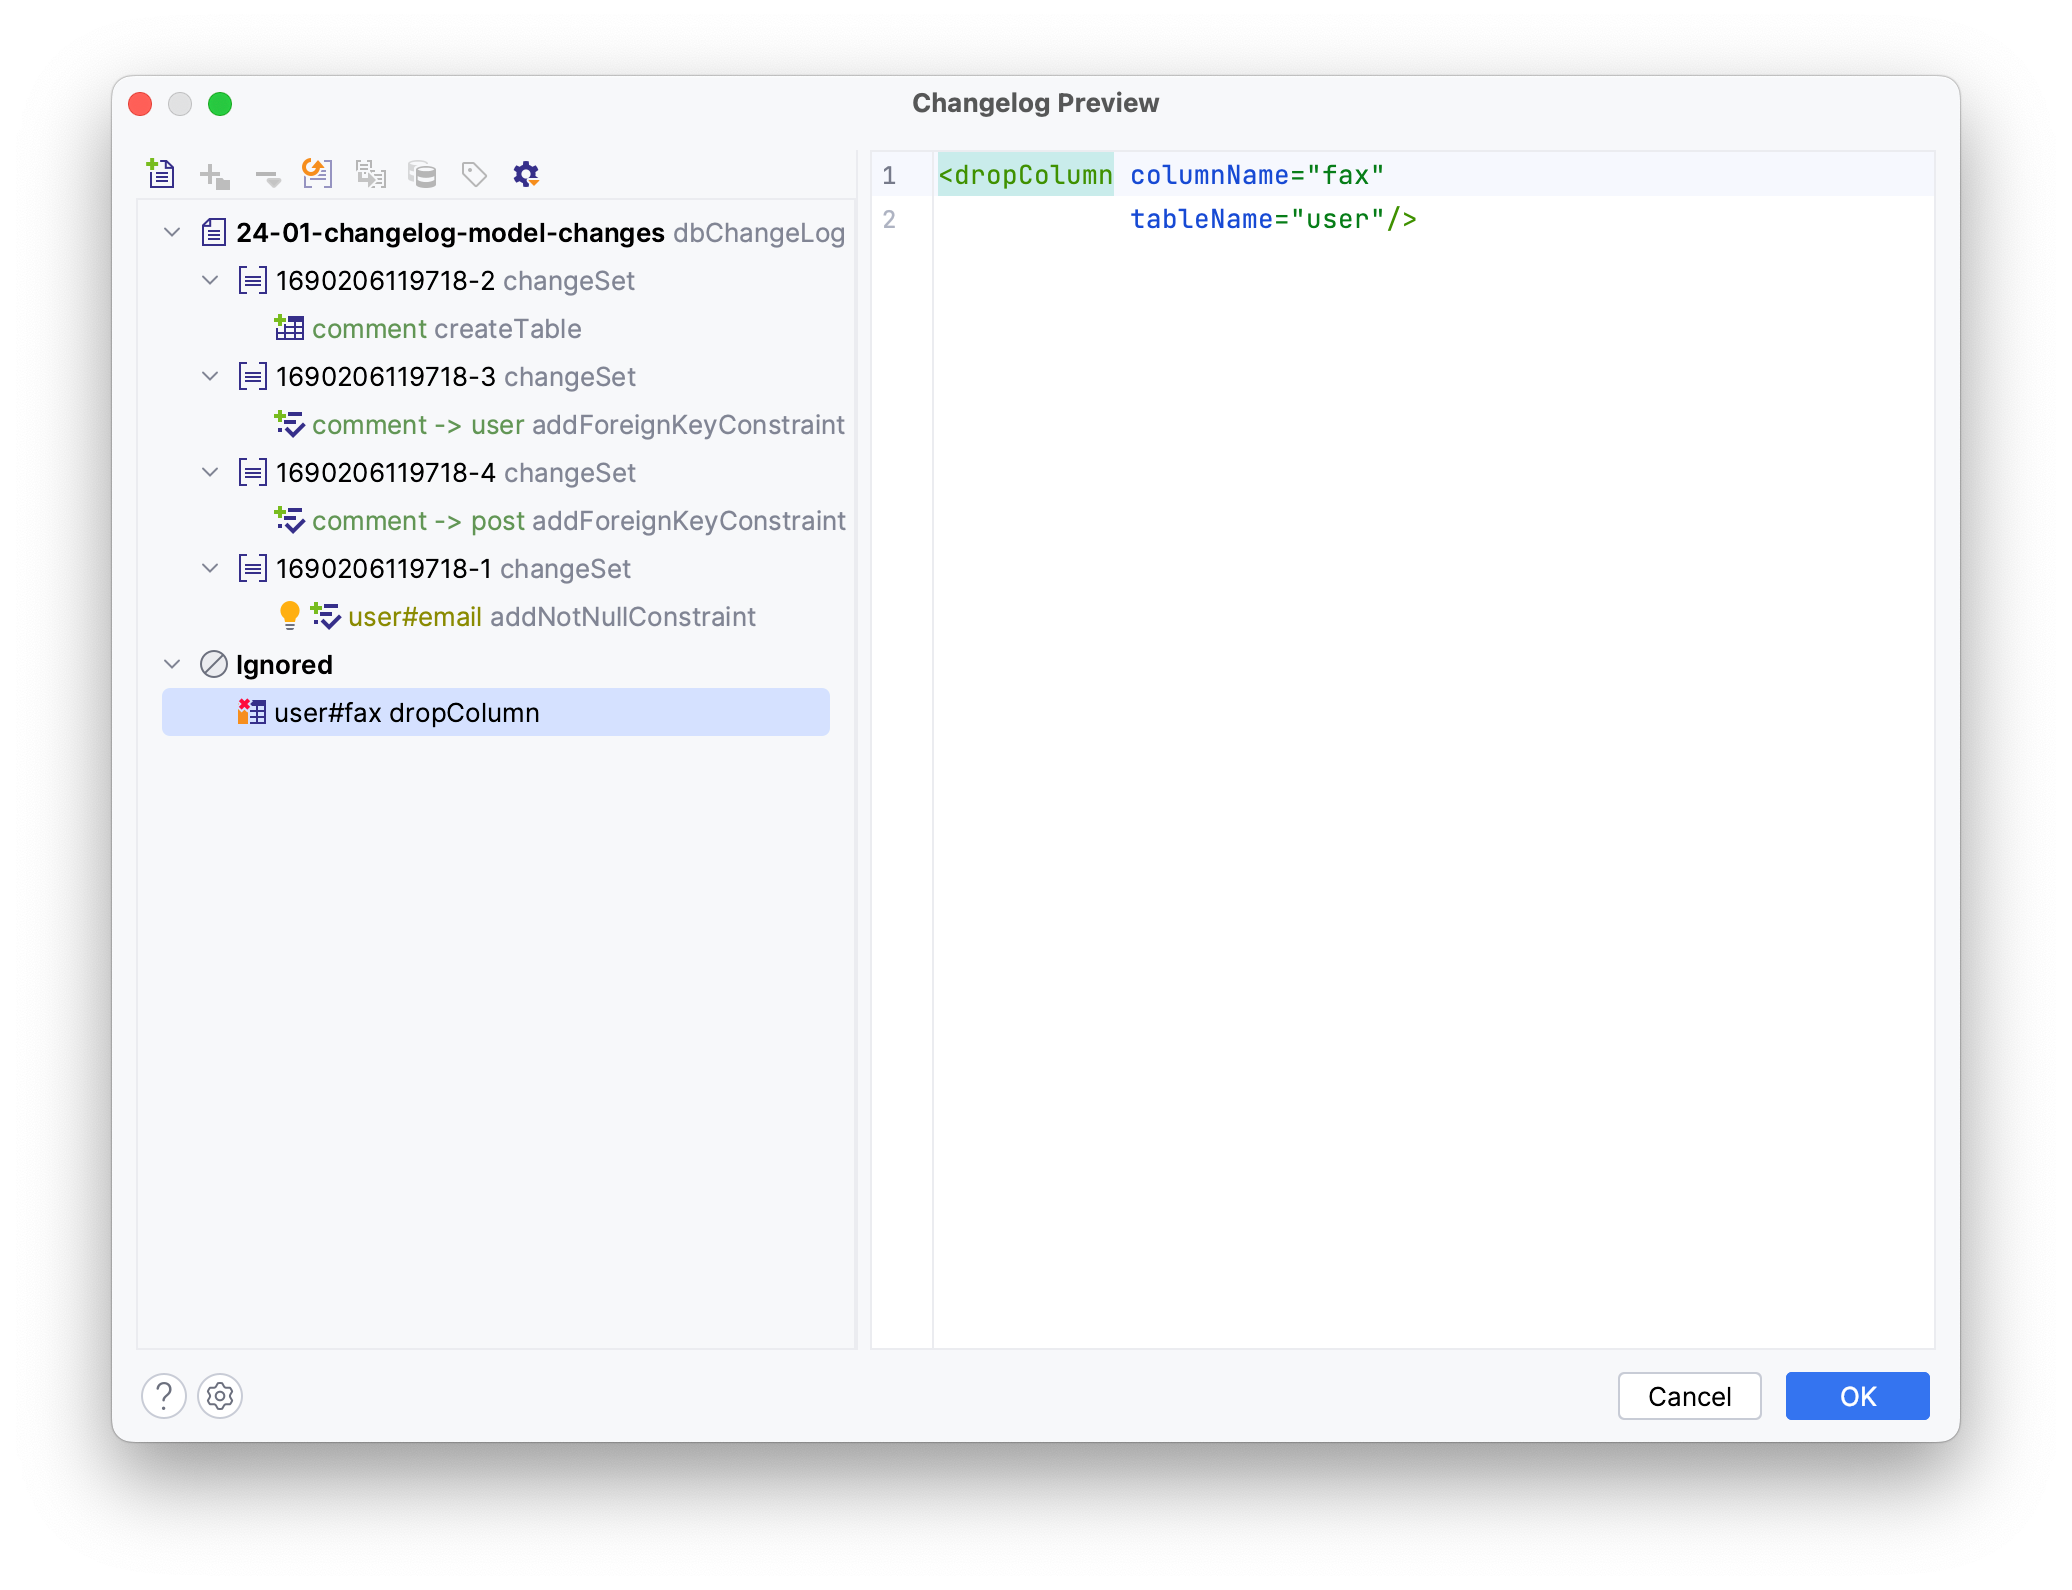
In the Changelog Preview window, name your changelog. Notice that statements are color-coded: green for safe changes, yellow for potential failures requiring attention, and red for changes risking irreversible data loss.
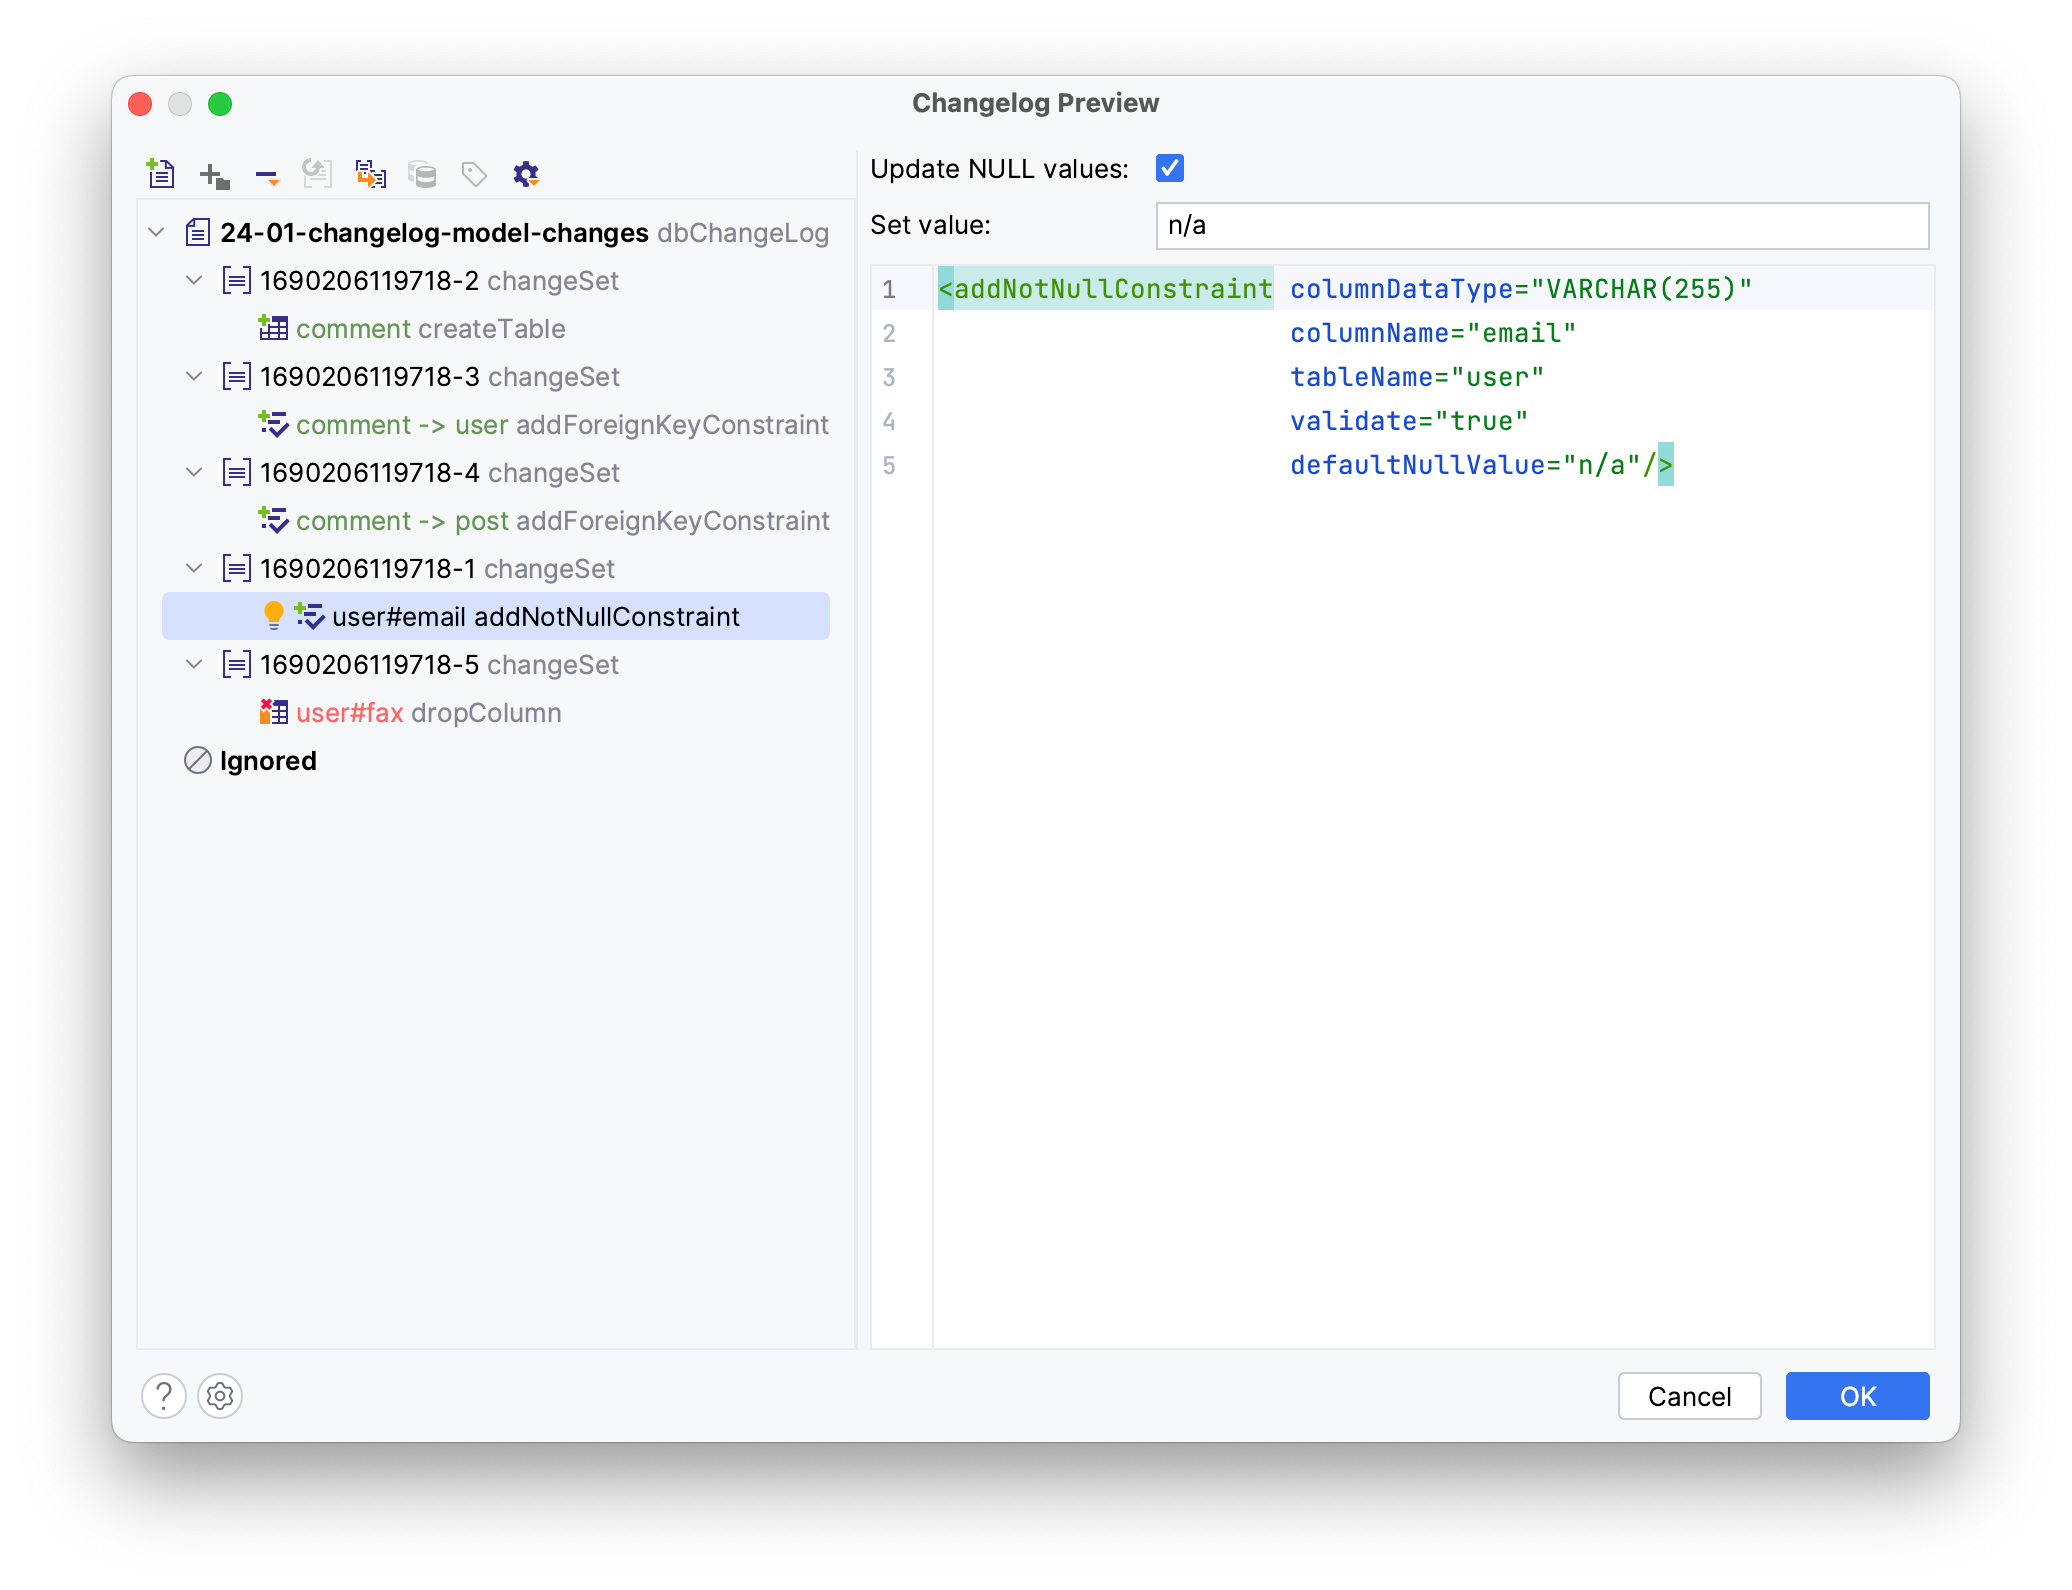
JPA Buddy lets you assign a default value, like n/a for all blank emails before setting a not-null restriction:
- Click on the
user#email addNotNullConstraintstatement - Tick the Update NULL values checkbox
- Type
n/ain the Set value field

To prevent accidental deletion of unmapped columns, add them to the ignore list. Drag user#fax dropColumn’s changeset to the ignore list.
Click OK.
This will result in a new changelog file under your db.changelog folder.
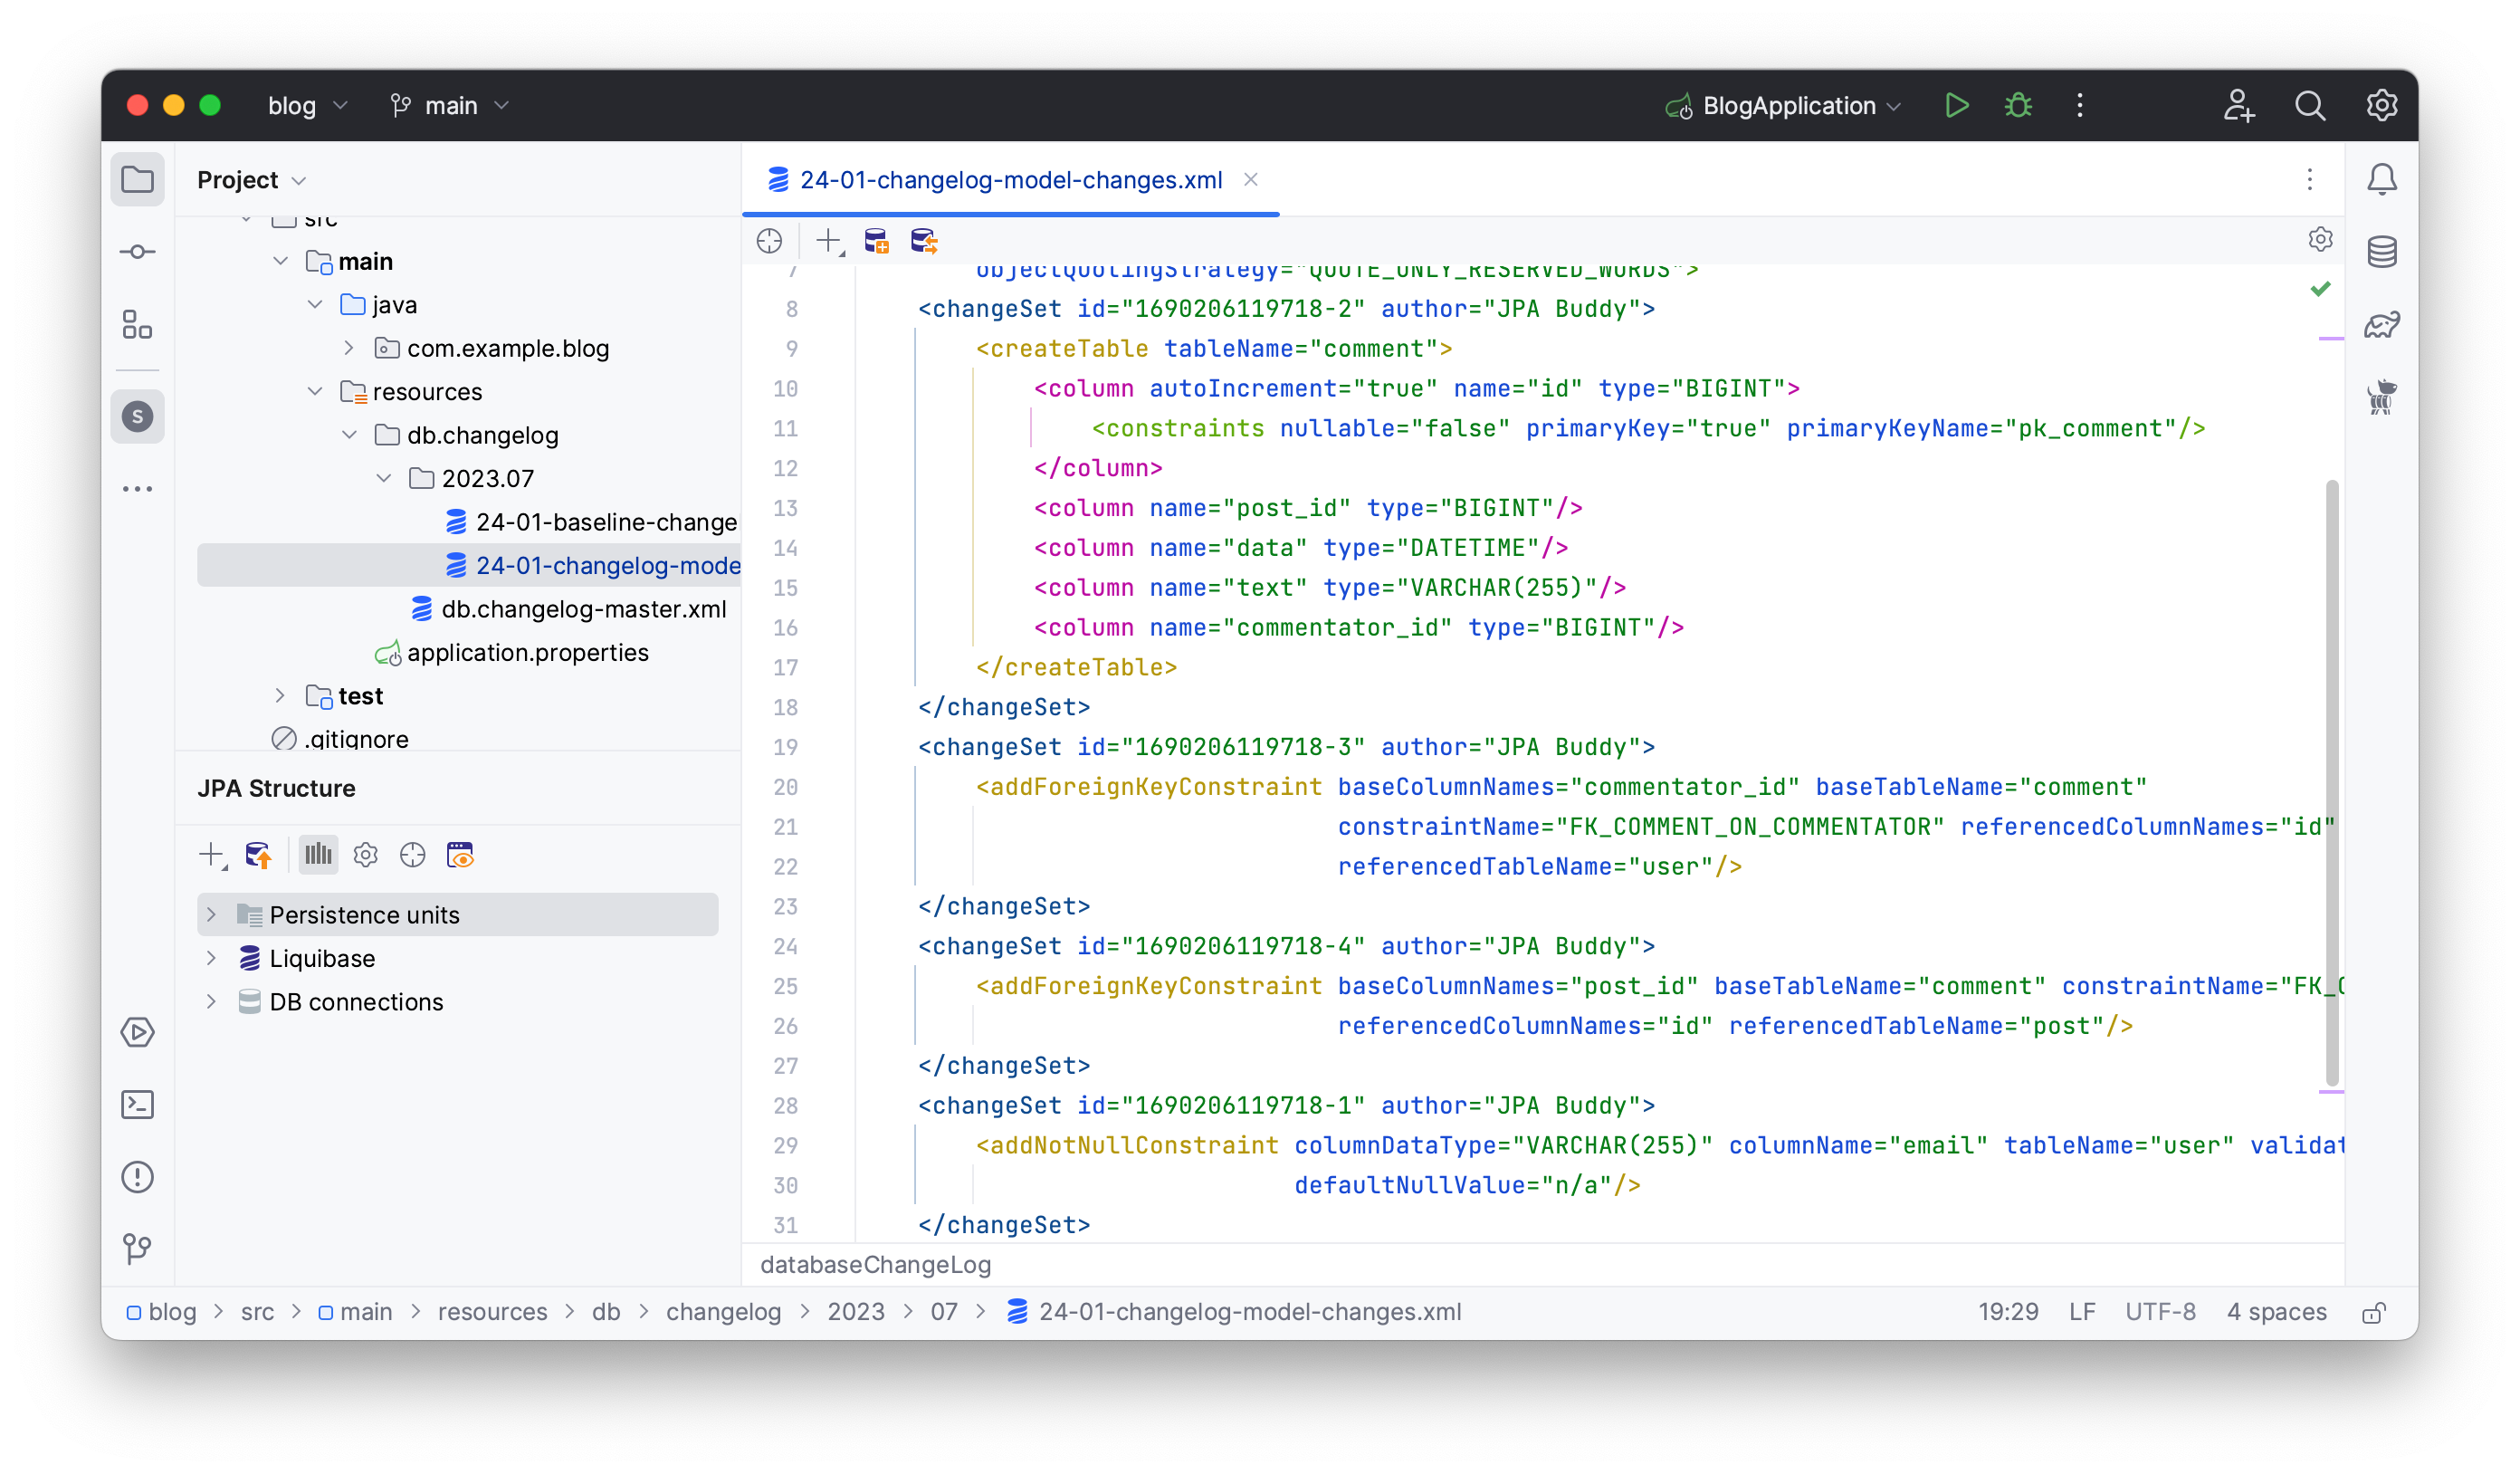
Execute these changes to implement them in the database as in the Generating an Init Script section.
Let’s see how to add a changeset to an existing changelog to avoid cluttering the project with many small changelogs. Add a unique property to the user’s email attribute to reflect this change in a changeset in your latest changelog:
- Open
Usersource code - Click on the
emailattribute - Tick the Unique option in JPA Designer

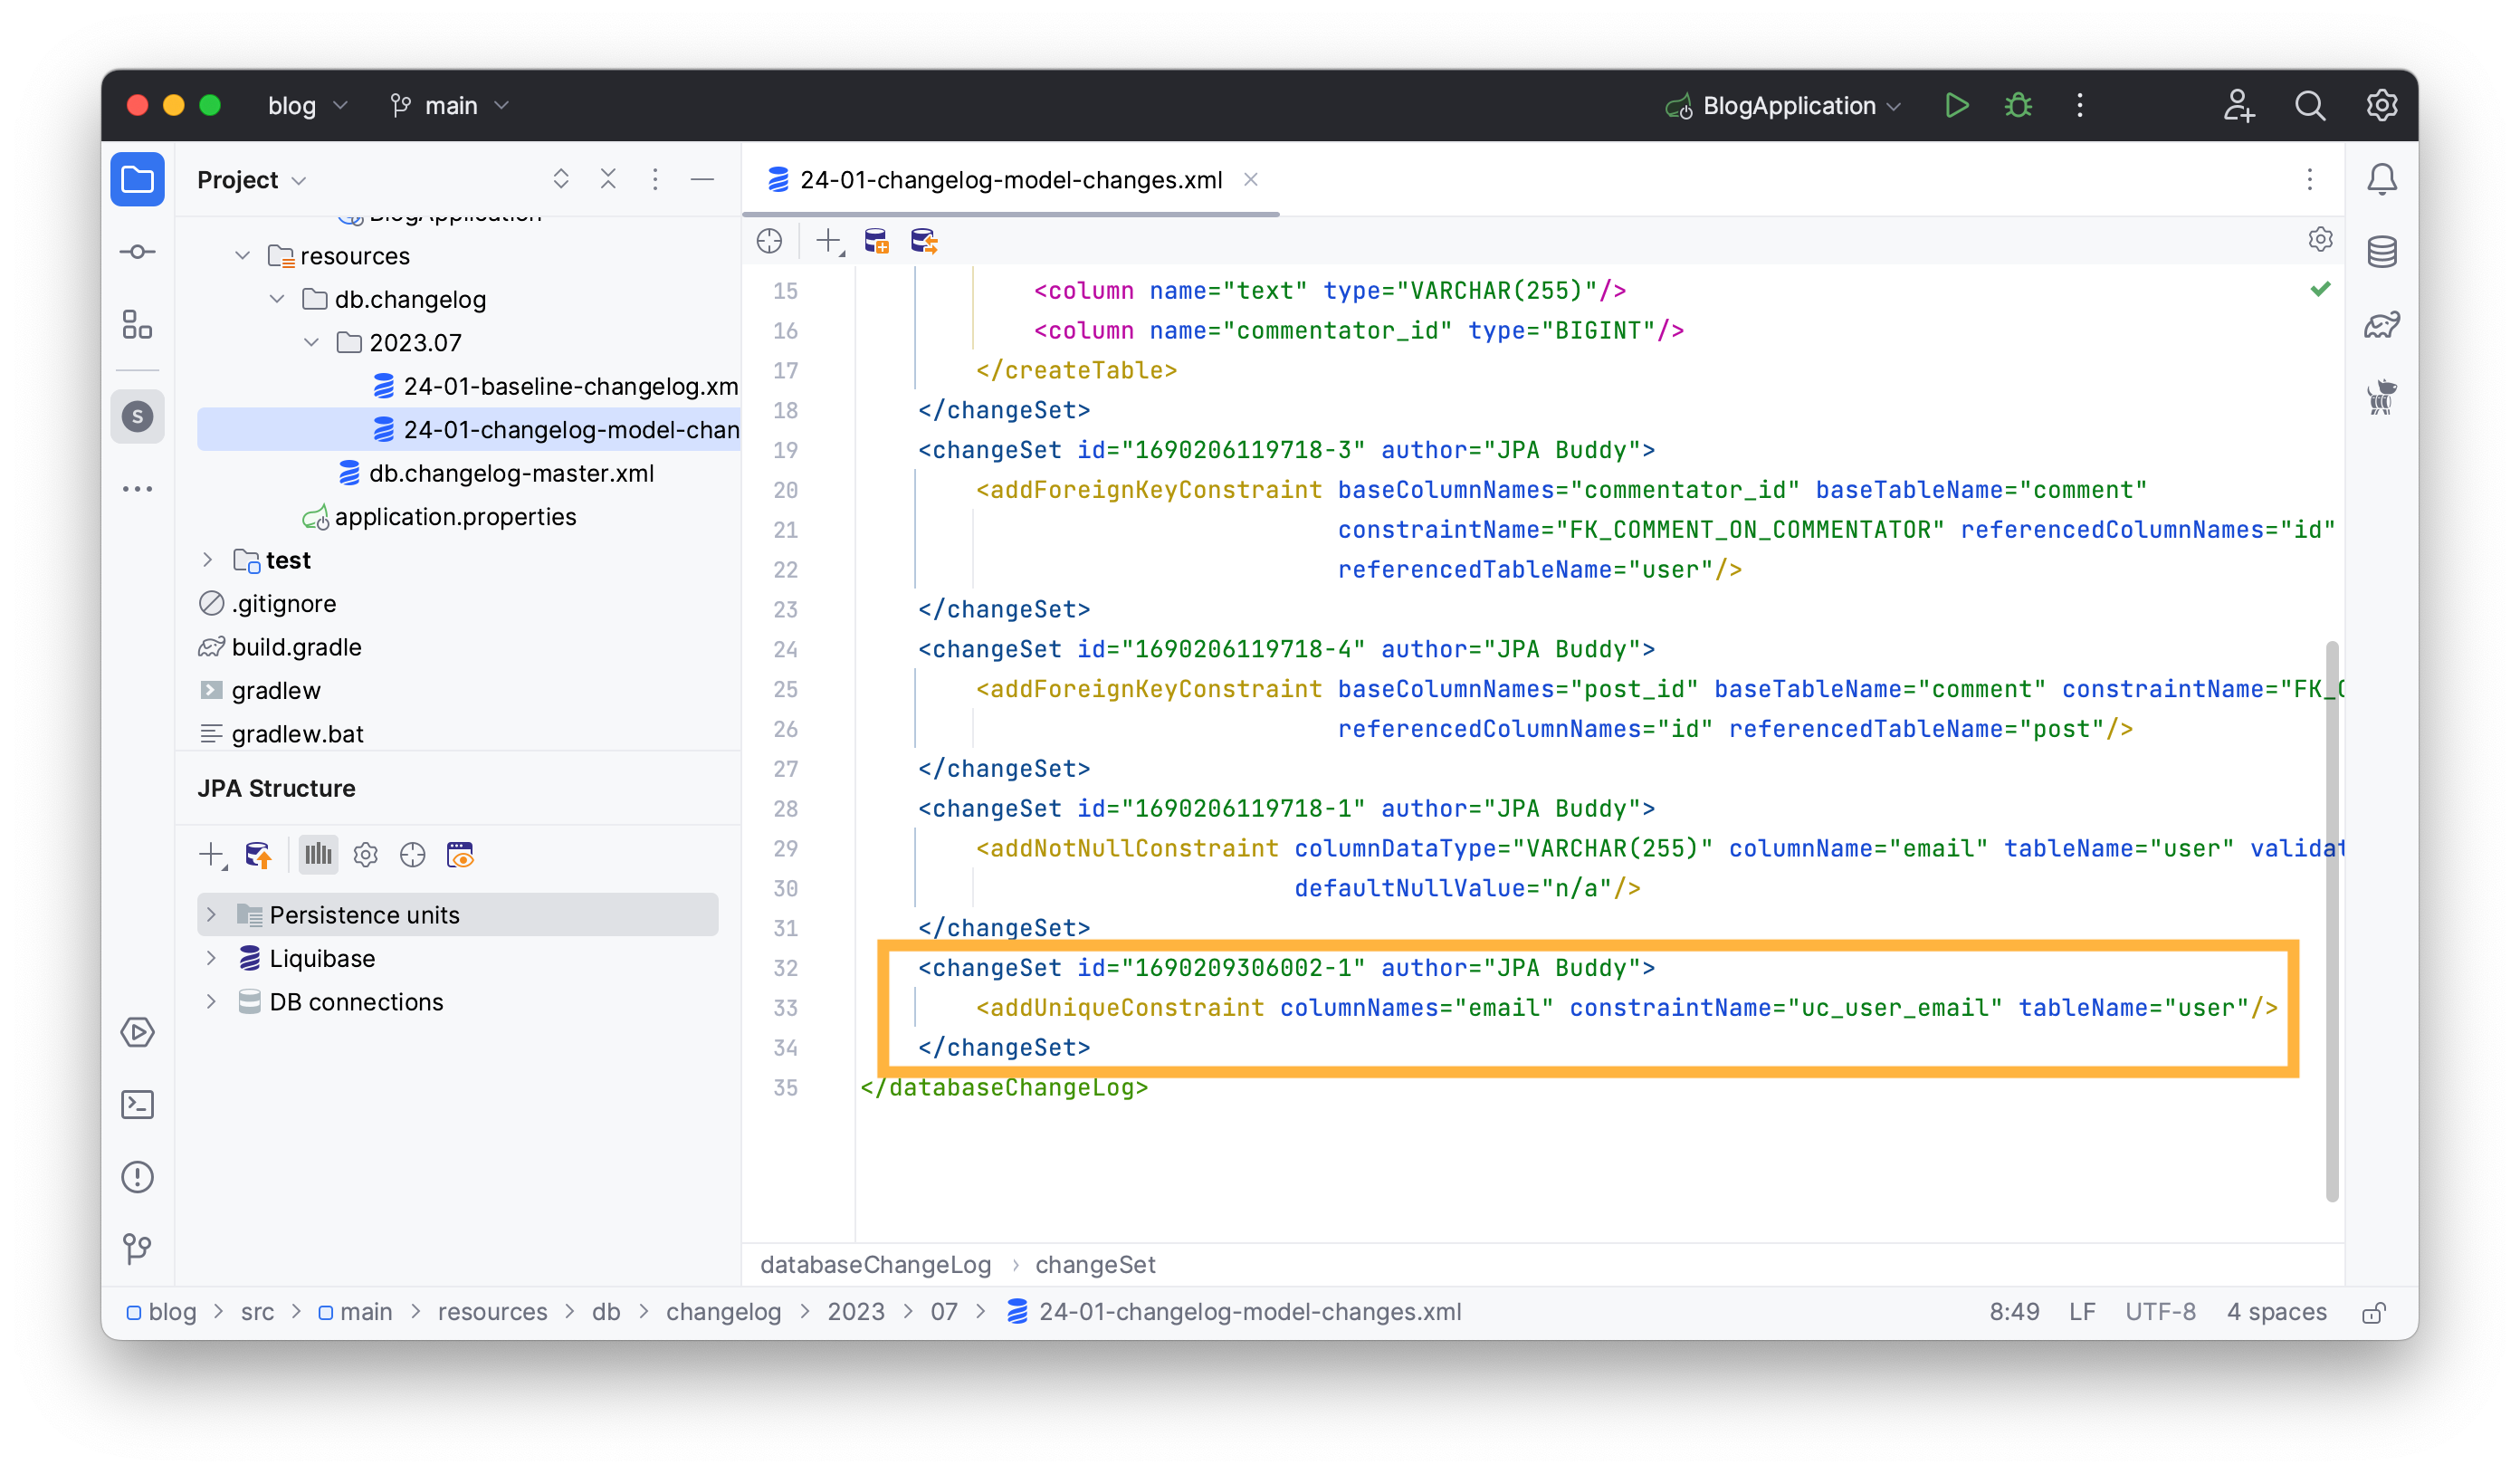
To include this modification within the current changelog:
- Open the latest changelog
- Click on Generate Liquibase Diff Changes in the toolbar
- Click OK in the invoked window
You can review your changes in the Changelog Preview window and click OK.
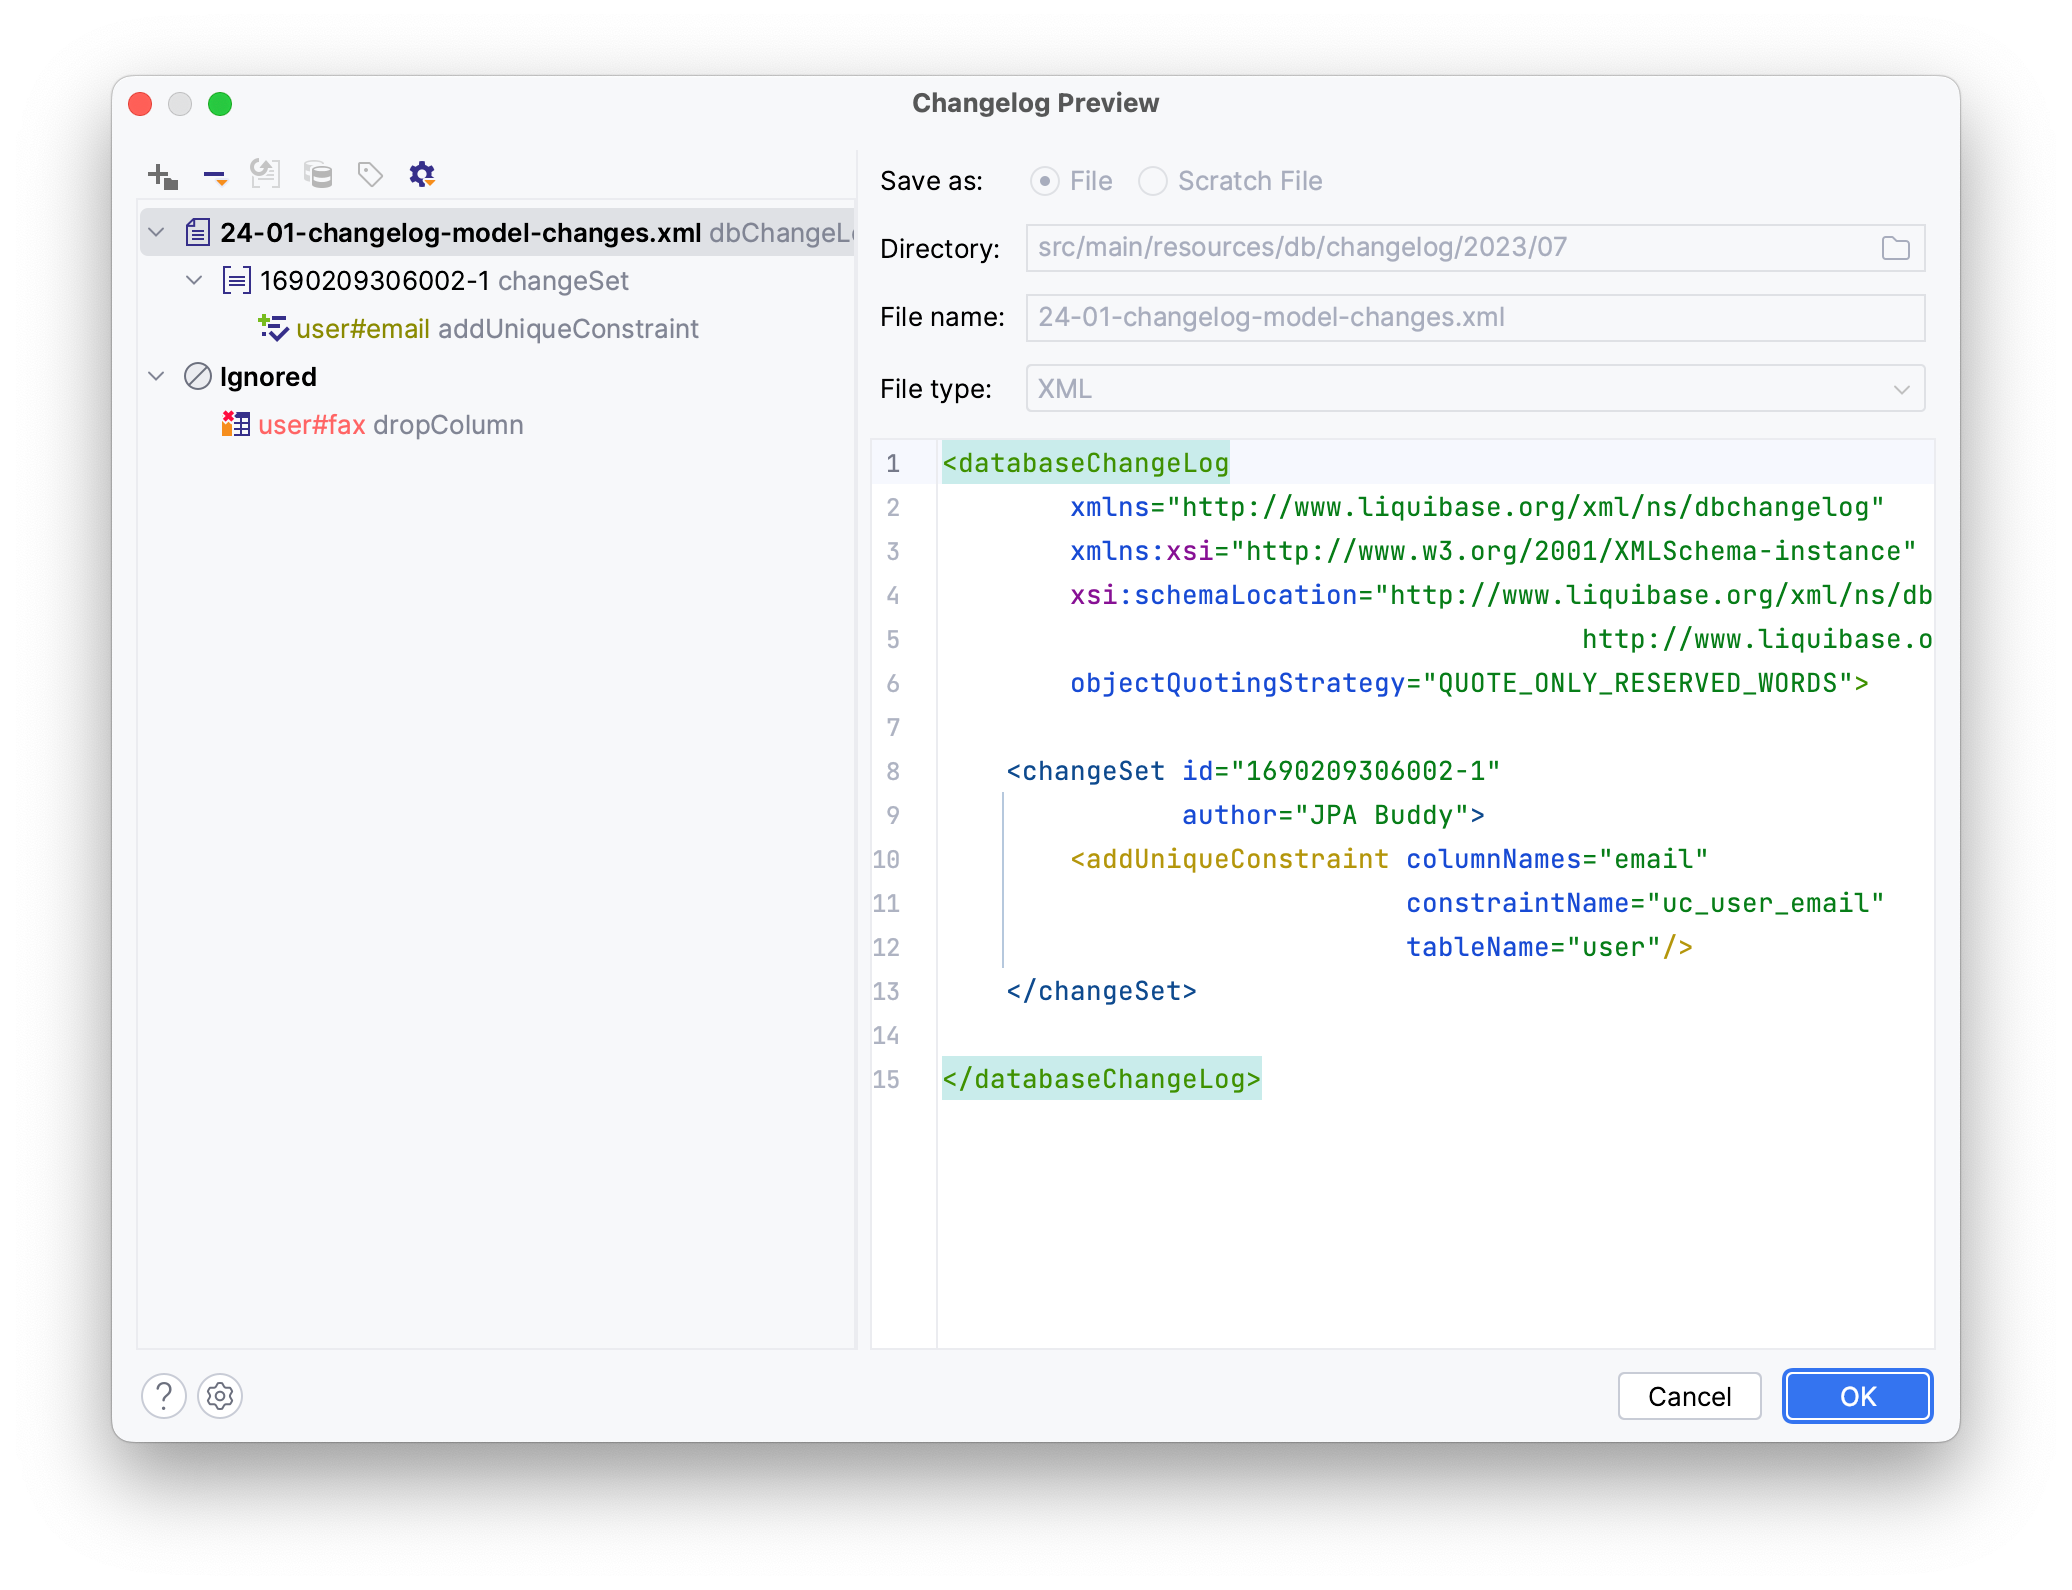
The mentioned steps will add a new changeset with the unique constraint.
Execute the script to implement the unique constraint in your database.
Conclusion
Thus far, you've learned how to use JPA Buddy to manage your database schema changes using Liquibase. This includes creating entities, establishing relationships, adding attributes, and generating changelogs. With these skills, you're able to handle database versioning effectively.